
Press-on nails are an easy way to change your manicure at home without committing to a salon appointment. Whether you’re exploring press on nails for the first time or looking for a better-fitting, longer-lasting set, the right product, nail prep, and removal method make a noticeable difference. As of October 2026, options range from traditional glue-on tips and reusable stick-ons to gel-style sets and semi-cured gel strips.
Often searched as presson, these artificial nails come in different lengths, shapes, colors, and finishes. Some are designed for a few hours of wear, while others can last up to two weeks with careful preparation and suitable nail glue. The best choice depends on your natural nail shape, the occasion, your preferred wear time, and how easily you want to remove them.
This guide explains what press-on nails are, how the main types compare, how to find your size, and how to apply, maintain, and remove them safely.
1. What are press-on nails?
Press-on nails are pre-shaped artificial nail covers, commonly made from ABS plastic or similar lightweight materials, that attach to natural nails using nail glue or adhesive tabs. They provide the appearance of a finished manicure without requiring a full salon service.
The terms presson, stick ons, and press-on nails are often used interchangeably. However, products sold under these names can differ in material, shape, adhesive, and intended wear time.
Traditional press-ons usually arrive ready to wear. A set may include artificial nails in multiple sizes, nail glue or adhesive tabs, and basic preparation tools. You select the pieces that fit your natural nails, prepare your nail plates, and attach the artificial nails at home.
How are press-ons different from salon extensions?
Press-ons are designed for home application and are generally quicker to apply than salon extensions. They also make it easier to change your manicure without maintaining a long-term set.
Salon extensions typically involve a technician shaping and building or attaching an enhancement directly to the natural nail. Press-ons arrive pre-shaped, so the main tasks are selecting the correct size, preparing the natural nail, and securing each tip.
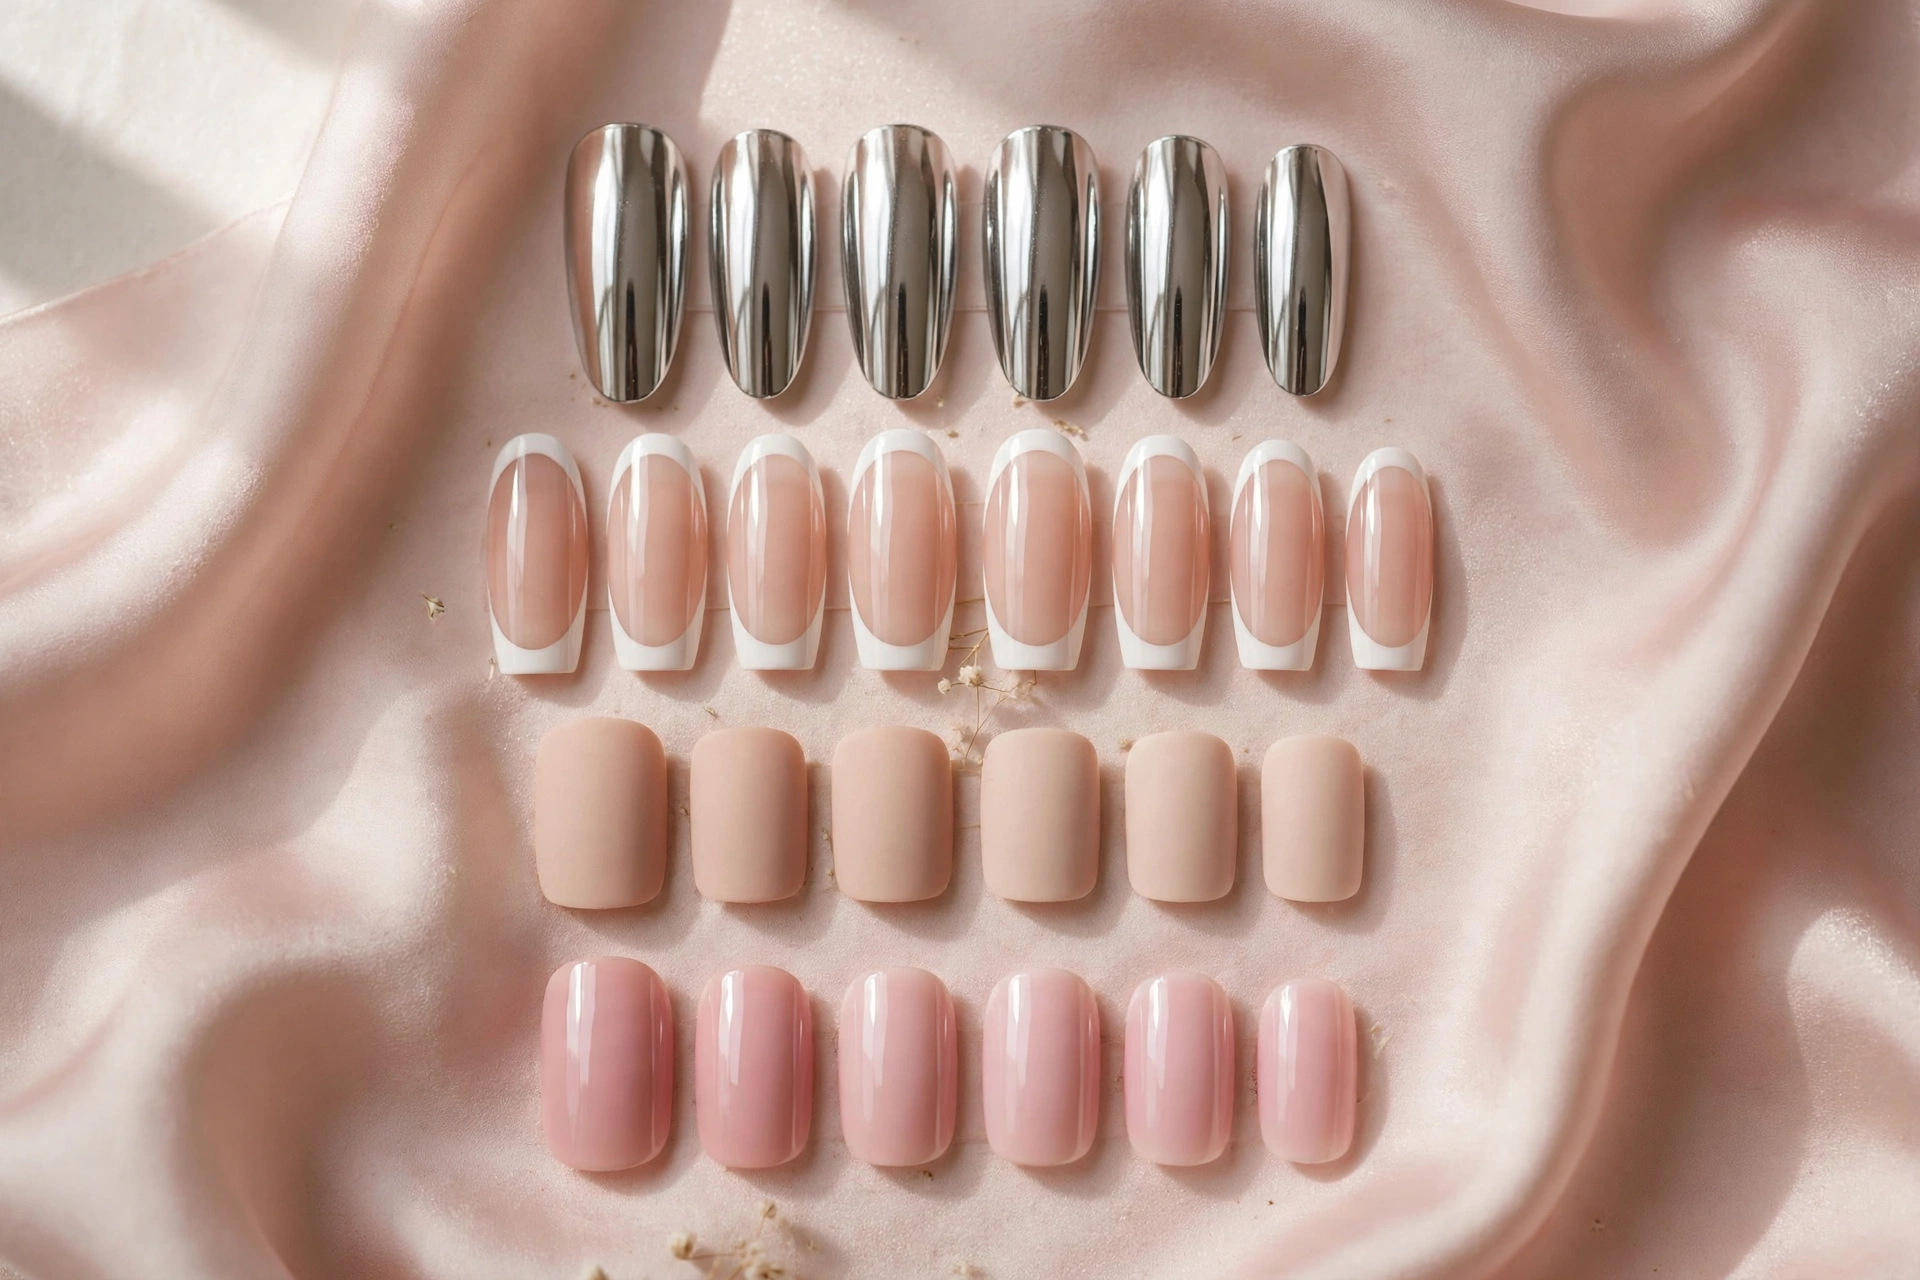
Press-ons are available in short, medium, and long lengths, with finishes ranging from natural-looking nude to chrome and intricate nail art. They can suit everyday wear, special occasions, or temporary changes in style.
One important distinction: press-ons are not automatically harmless just because they are removable. Incorrect sizing, irritating adhesives, aggressive preparation, or forceful removal can damage the natural nail or irritate the surrounding skin.
2. Types of press-on nails (glue-on, gel, semi-cured, magnetic)
Not every press-on manicure uses the same attachment method. Understanding the differences helps you choose a set that suits your routine and desired finish.
Traditional glue-on press-ons
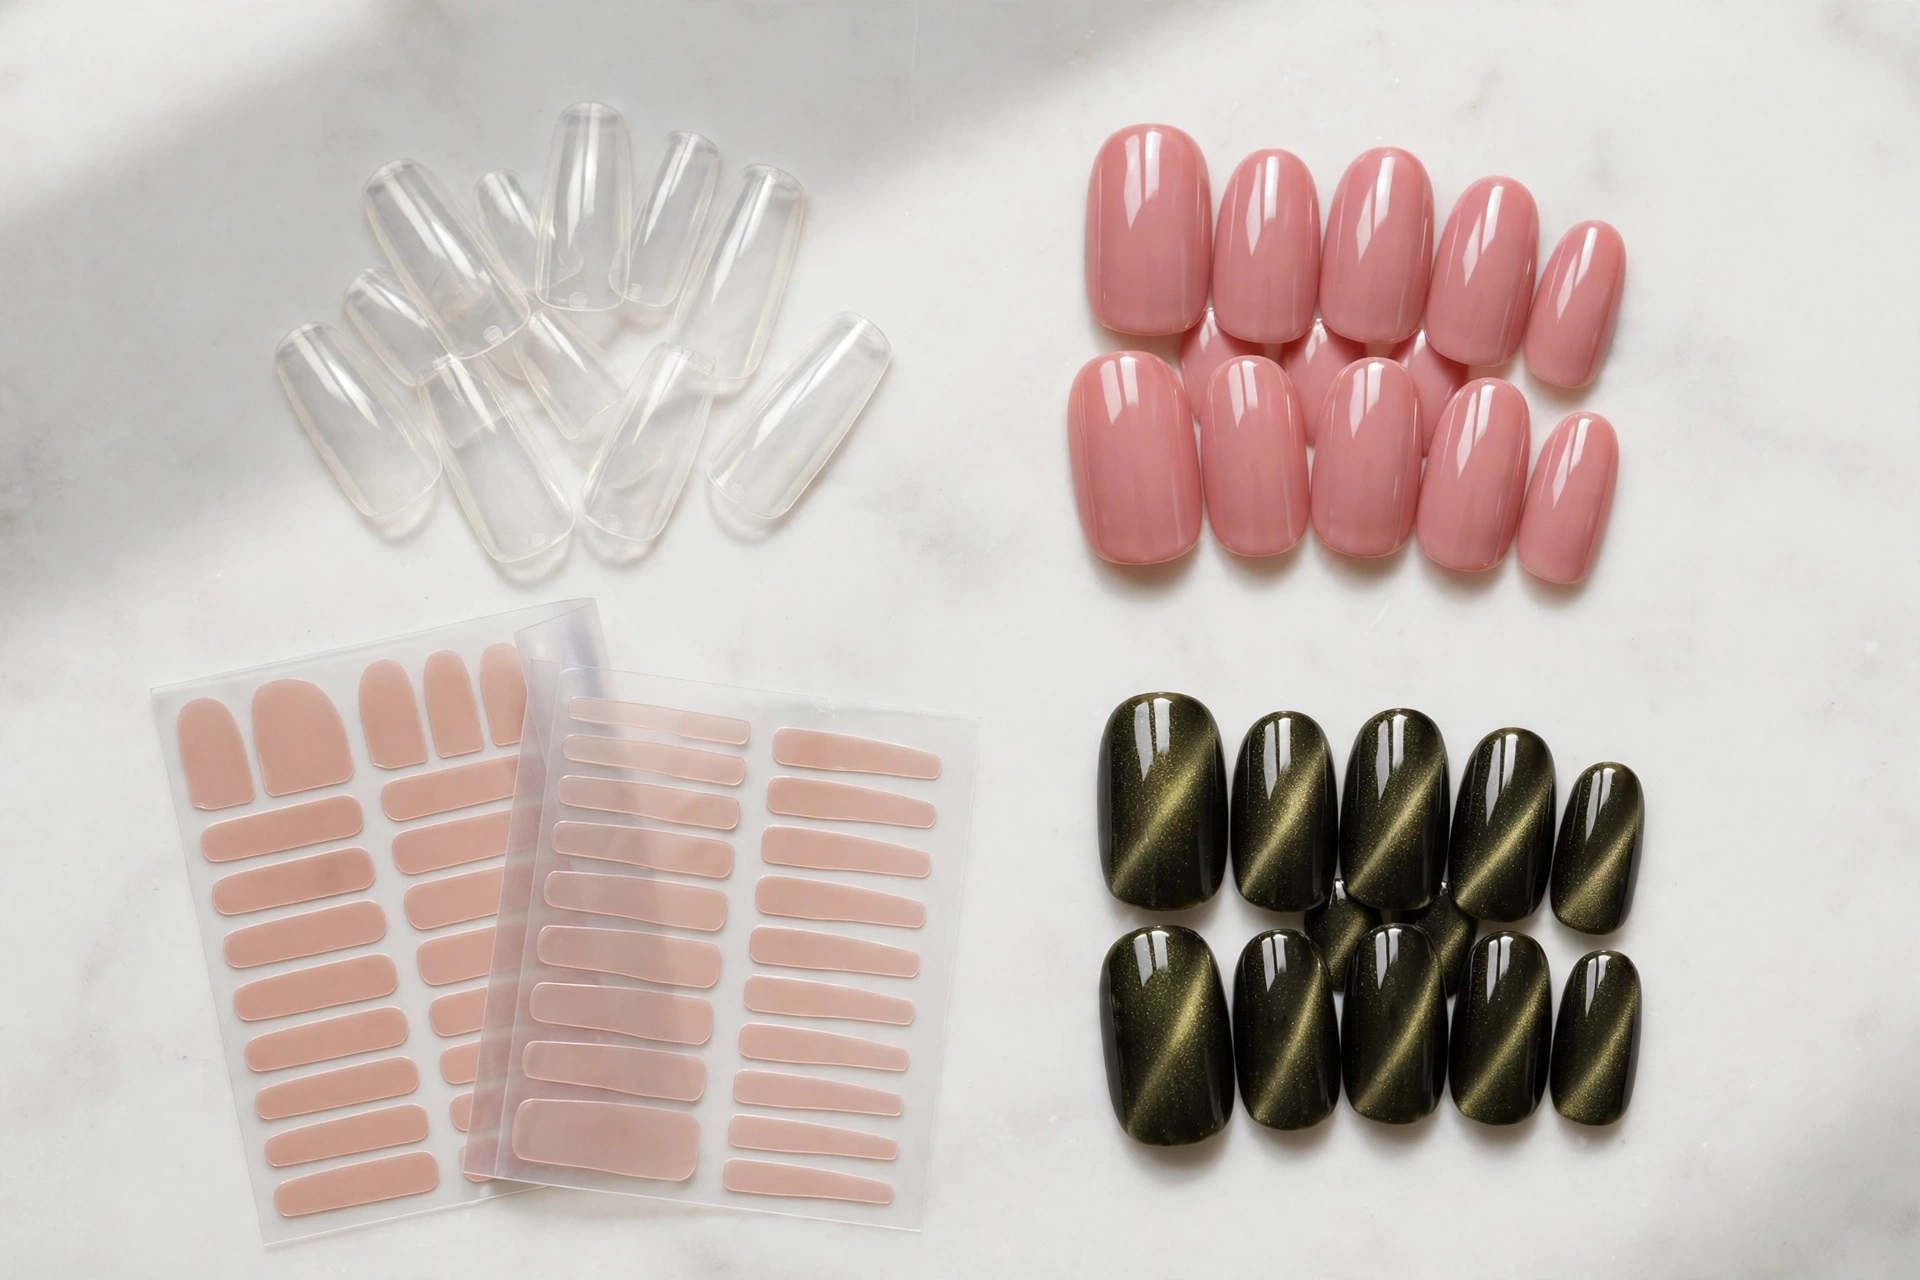
Traditional glue-on nails are pre-shaped artificial tips attached with nail glue formulated for artificial nails. They are widely available in drugstores, beauty stores, and online shops.
With good nail prep and careful application, glue-on sets may last approximately 7–14 days, although individual results vary. They are a practical option for people who want a manicure that stays in place through ordinary daily activities.
Choose a set with several sizes and a shape that follows your natural nail without pressing into the sidewalls.
Gel press-on nails and press on gel nails
The phrases gel press on nails and press on gel nails can describe different products, so check the packaging rather than relying on the name alone.
Some sets have a glossy, gel-like finish but attach with ordinary nail glue or adhesive tabs. Others use gel-based materials or systems that require a specific curing process.
A shiny finish does not necessarily mean a nail needs a UV lamp. The manufacturer’s instructions determine whether a product requires curing.
Semi-cured gel strips
Semi-cured gel strips are flexible strips made from partially cured gel material. You place a strip on the natural nail, trim or file away the excess, and cure it under a compatible UV/LED lamp according to the product instructions.
Brands such as Ohora and Dashing Diva offer examples of this type of manicure product. These strips are different from conventional rigid, pre-shaped plastic press-ons, even though both can create a finished manicure at home.
Follow the manufacturer’s curing time and lamp requirements. Do not assume that a longer curing time or a different lamp will make an incompatible product safe to use.
Magnetic nails press on
Magnetic press-ons feature magnetic or magnet-inspired decorative effects, often designed to resemble the cat-eye finishes created with magnetic nail polish.
Some products use actual magnetic components, while others simply imitate a magnetic effect in their finish. Attachment methods vary by product.
Magnetic press-ons can work for a short event or a temporary style change, but some sets have less reliable hold than conventional glue-on nails. Treat short-term wear as the practical option unless the manufacturer specifies otherwise.
What about Gel-X press-on nails?
Gel-X is a salon-applied soft-gel extension system associated with Aprés, not simply another name for ordinary at-home press-ons. Products described as gel x press on nails may be inspired by that look, so check whether the specific set is a consumer press-on kit or a salon extension product.
3. Glue vs adhesive tabs: which should you use?
The adhesive you choose affects how long your manicure stays in place, how easy removal is, and how well the nails suit your plans.
Nail glue
Nail glue made specifically for artificial nails generally provides a stronger attachment than adhesive tabs.
- Typical wear: Around 7–14 days, depending on the product, preparation, and daily activities.
- Best suited for: People who want a more secure manicure for several days.
- Main consideration: Removal requires patience, and forceful lifting can damage the natural nail.
Apply only the amount recommended by the manufacturer. Keep glue away from skin and avoid using it on irritated, broken, or damaged nails.
Adhesive tabs
Adhesive tabs are double-sided stickers that attach the artificial nail to the natural nail without liquid glue.
- Typical wear: Around 3–7 days, although some sets may loosen sooner.
- Best suited for: Short-term wear, events, or people who want a simpler removal process.
- Main consideration: Water exposure, oils, and everyday friction can weaken the bond.
Tabs can also be useful when you want to reuse a press-on set, provided the artificial nails remain intact and can be cleaned according to the manufacturer’s instructions.
Should you use a base coat for press-on nails?
A base coat for press-on nails is not normally necessary when using traditional nail glue or adhesive tabs. These adhesives are designed to attach directly to a properly prepared natural nail.
A layer of ordinary base coat can interfere with adhesion unless the product instructions specifically allow it. Avoid adding extra layers simply because they are part of your regular polish routine.
What about a top coat for press-on nails?
A top coat for press-on nails can be useful when you want to change the finish of a compatible artificial nail, add shine, or create a matte look.
However, check whether the material accepts ordinary polish or gel products. Gel top coats may require a UV/LED lamp, and some artificial nail materials can react poorly to certain solvents or coatings. Do not cure a coating on your skin or use an incompatible lamp-and-product combination.
Practical choice: Use nail glue when you want a longer-lasting attachment, and adhesive tabs when short-term wear and easier removal matter more.
Always patch-test new adhesives and other products according to their instructions. A patch test can help identify some reactions, but it cannot guarantee that irritation or allergy will not occur.
4. Press-on nails vs acrylic, gel and salon manicures
Press-ons, acrylic enhancements, gel manicures, and salon services all have different application methods and maintenance requirements. Your choice should depend on your budget, preferred wear time, and willingness to maintain the manicure.
Press-on nails: These are pre-shaped artificial nails applied at home with nail glue or adhesive tabs. They are convenient for temporary changes and do not necessarily require salon equipment.
Acrylic nails: Acrylic enhancements are built using an acrylic liquid-and-powder system, usually by a trained nail professional. They involve a different application and maintenance process from conventional press-ons.
Gel nails: Gel manicures use gel products that are cured with a compatible lamp. Not every product labeled “gel” uses the same formula or curing requirements.
Salon manicures: A salon manicure may involve natural-nail polishing, artificial extensions, or another nail service. The cost and time commitment depend on the service selected.
Press-on nails with acrylic: Some DIY enthusiasts use acrylic products to customize or reinforce artificial tips, but this is different from applying ordinary press-ons with their intended adhesive. Acrylic systems require appropriate products and technique; they are not necessary for a standard press-on manicure.
In the United States, drugstore press-on sets commonly cost around $8–$15, while some premium or semi-cured gel sets fall around $15–$25. Salon Gel-X services may cost approximately $60–$100 or more, depending on location, nail length, and design.
These are broad price ranges rather than fixed market prices. Check what each kit includes and whether additional tools or removal products are needed.
5. How to apply press-on nails: step by step
Applying press-on nails correctly starts with preparation, not glue. Rushing through nail prep or choosing tips that are too large can cause lifting, discomfort, and a less natural-looking result.
This DIY press-on nails routine works for most conventional glue-on sets. If your kit uses adhesive tabs or a different attachment system, follow its specific instructions.
Step 1: Gather your supplies
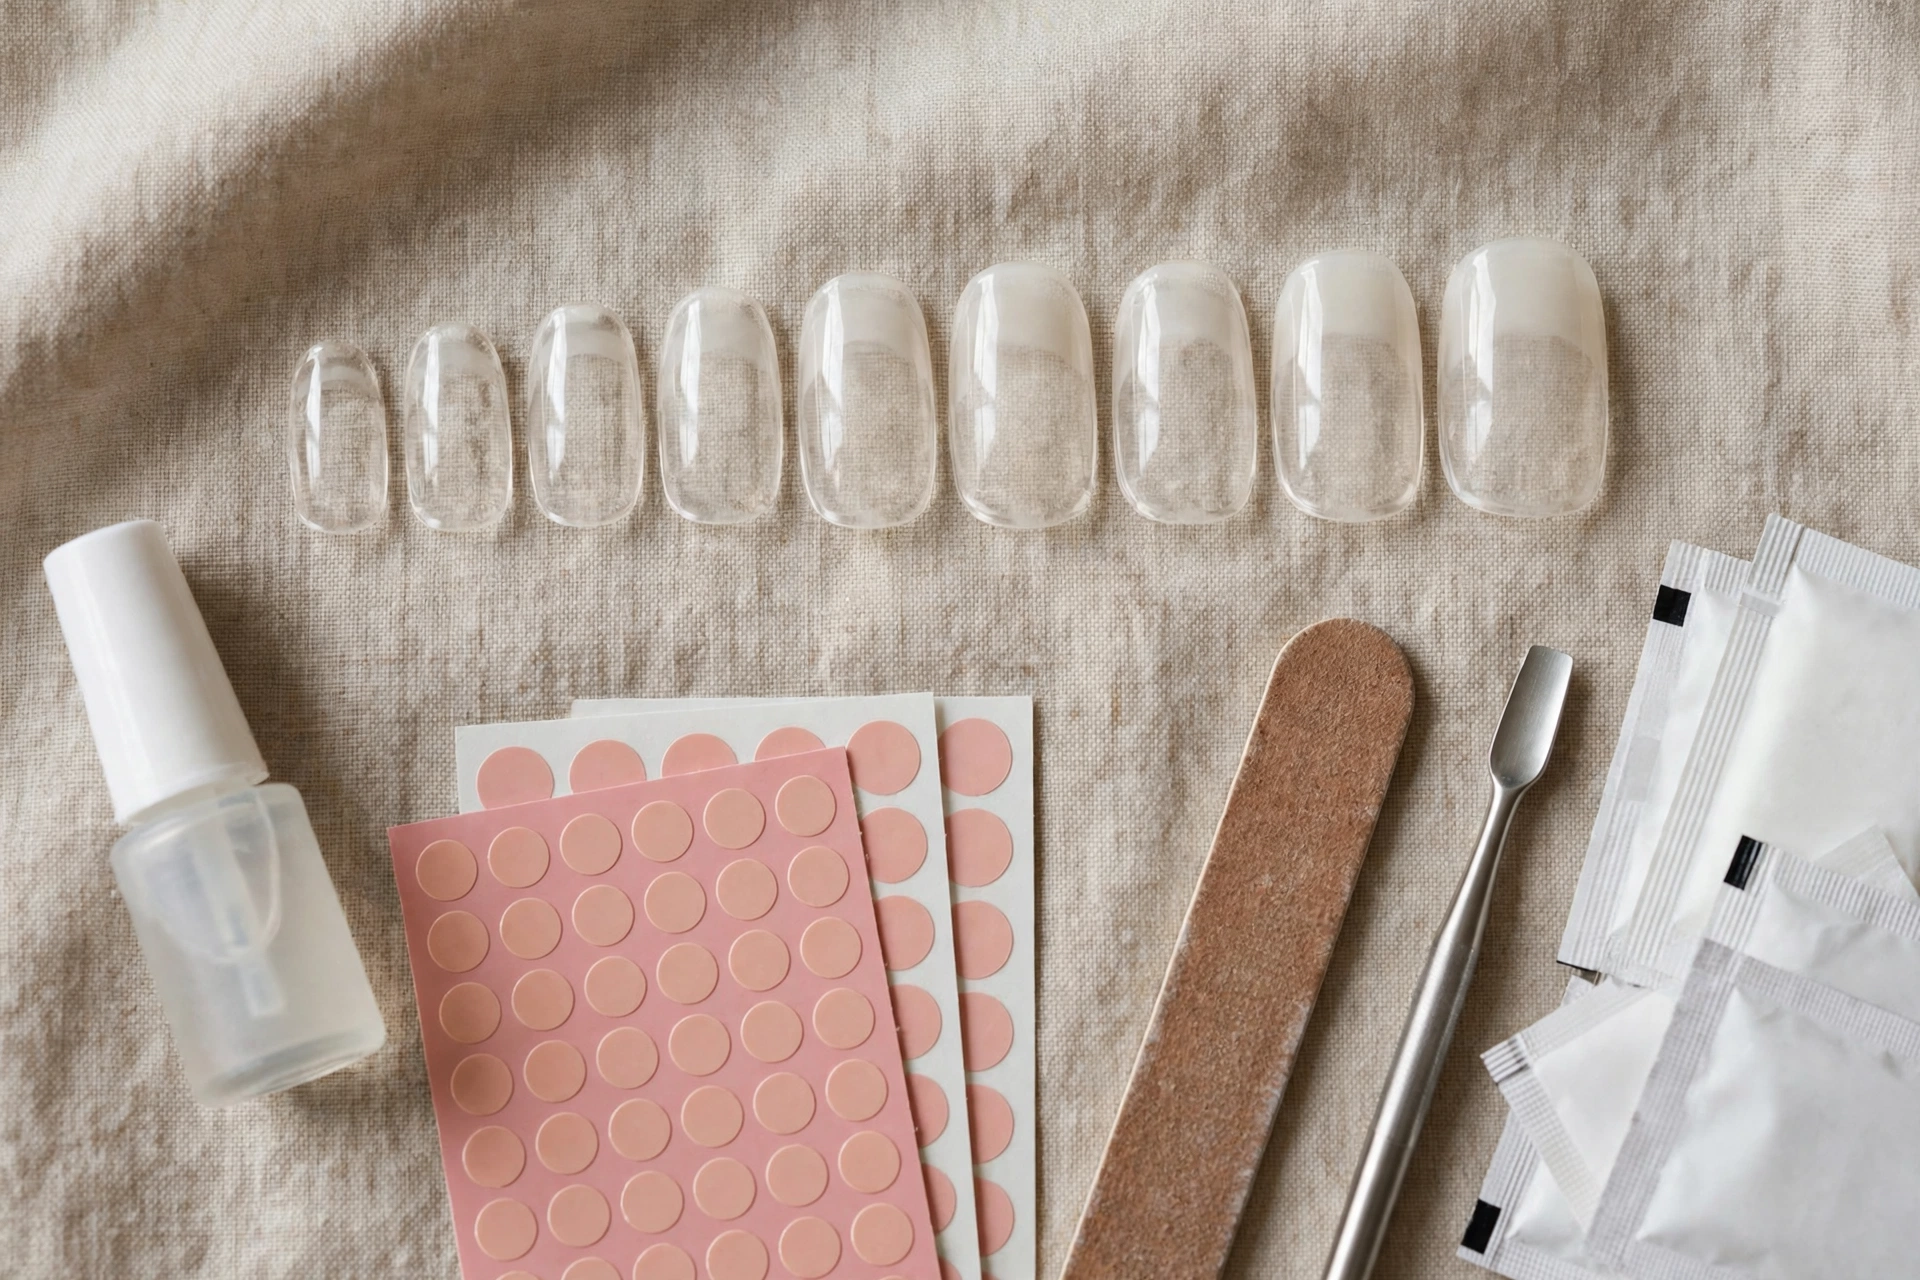
Before starting, prepare:
- A press-on nail set with multiple sizes
- Nail glue or adhesive tabs designed for press-ons
- A nail file and gentle buffer
- A cuticle pusher
- An alcohol wipe or suitable nail-prep product
- A wooden orange stick for gentle cleanup
- Cuticle oil for use after removal
Work on a clean, dry surface with good ventilation. Keep adhesives away from your eyes and skin, and read the package instructions before use.
Step 2: Prepare your natural nails
Remove any existing polish and wash your hands. Dry them thoroughly before applying the adhesive.
Gently push back the cuticles with a cuticle pusher. Do not cut living cuticle tissue or force the tool under the skin.
Lightly buff the shiny surface of each natural nail only if the product instructions call for it. Excessive buffing thins the nail plate and can leave nails more vulnerable to damage.
Wipe away dust and surface residue with an appropriate alcohol wipe or nail-prep product. Let your nails dry completely.
Avoid applying cuticle oil, hand cream, or other oily products before attaching the nails, as residue can interfere with adhesion.
Step 3: Select and arrange the correct sizes
Match each artificial nail to its natural nail before opening or applying the adhesive.
The artificial nail should cover the natural nail from sidewall to sidewall without pressing into the surrounding skin. Arrange the selected sizes in order so you do not need to search for them while the adhesive is exposed.
If a tip is slightly too wide, gently file its side edge if the material allows it. Do not force a tip that is too narrow onto the nail.
Step 4: Apply nail glue or adhesive tabs
Choose one attachment method rather than layering incompatible adhesives.
For nail glue, apply the amount specified by the manufacturer to the appropriate surface. Avoid flooding the cuticle area or allowing glue to contact your skin.
For adhesive tabs, choose a tab that covers the natural nail without extending onto the surrounding skin. Smooth it into place and remove any protective backing as directed.
Never substitute hardware or craft super glue for nail glue. Household adhesives are not formulated for this cosmetic use and can create additional risks during application and removal.
Step 5: Attach each press-on nail
Align the artificial nail with the natural nail near the cuticle area, leaving the small clearance recommended by the manufacturer. Lower it into place rather than dropping it down at an angle.
Press firmly and evenly for approximately 30 seconds, or for the time specified in your kit instructions.
Repeat for each finger. Avoid shifting the nail repeatedly after attachment, because this can weaken the bond or create gaps.
Step 6: Check the finished manicure
Inspect every nail from the top and sides. Each tip should feel comfortable, sit securely, and avoid pressing into the surrounding skin.
Do not add more glue around the edges to cover gaps. If a nail is poorly aligned, uncomfortable, or lifting immediately, remove it using the appropriate removal method and correct the fit before trying again.
Give the adhesive the recommended setting time before washing your hands or exposing the nails to water.
Step 7: Care for the manicure
Avoid soaking your hands immediately after application. Wear gloves for tasks involving prolonged water exposure or cleaning products, and use your fingertips carefully rather than treating the artificial nails as tools.
Do not pick at lifting edges or attempt to push a loose nail back into place. Remove it safely and reapply only if both the natural nail and artificial tip remain suitable for reuse.
6. Sizing guide: how to find your perfect fit
A comfortable fit is essential for a natural-looking manicure. Press-on nails that are too wide may overlap the skin, while tips that are too narrow can leave parts of the natural nail uncovered.
A press on nail size chart can help you identify the correct size, but there is no universal numbering system across all brands. One brand’s size 4 may differ from another’s.
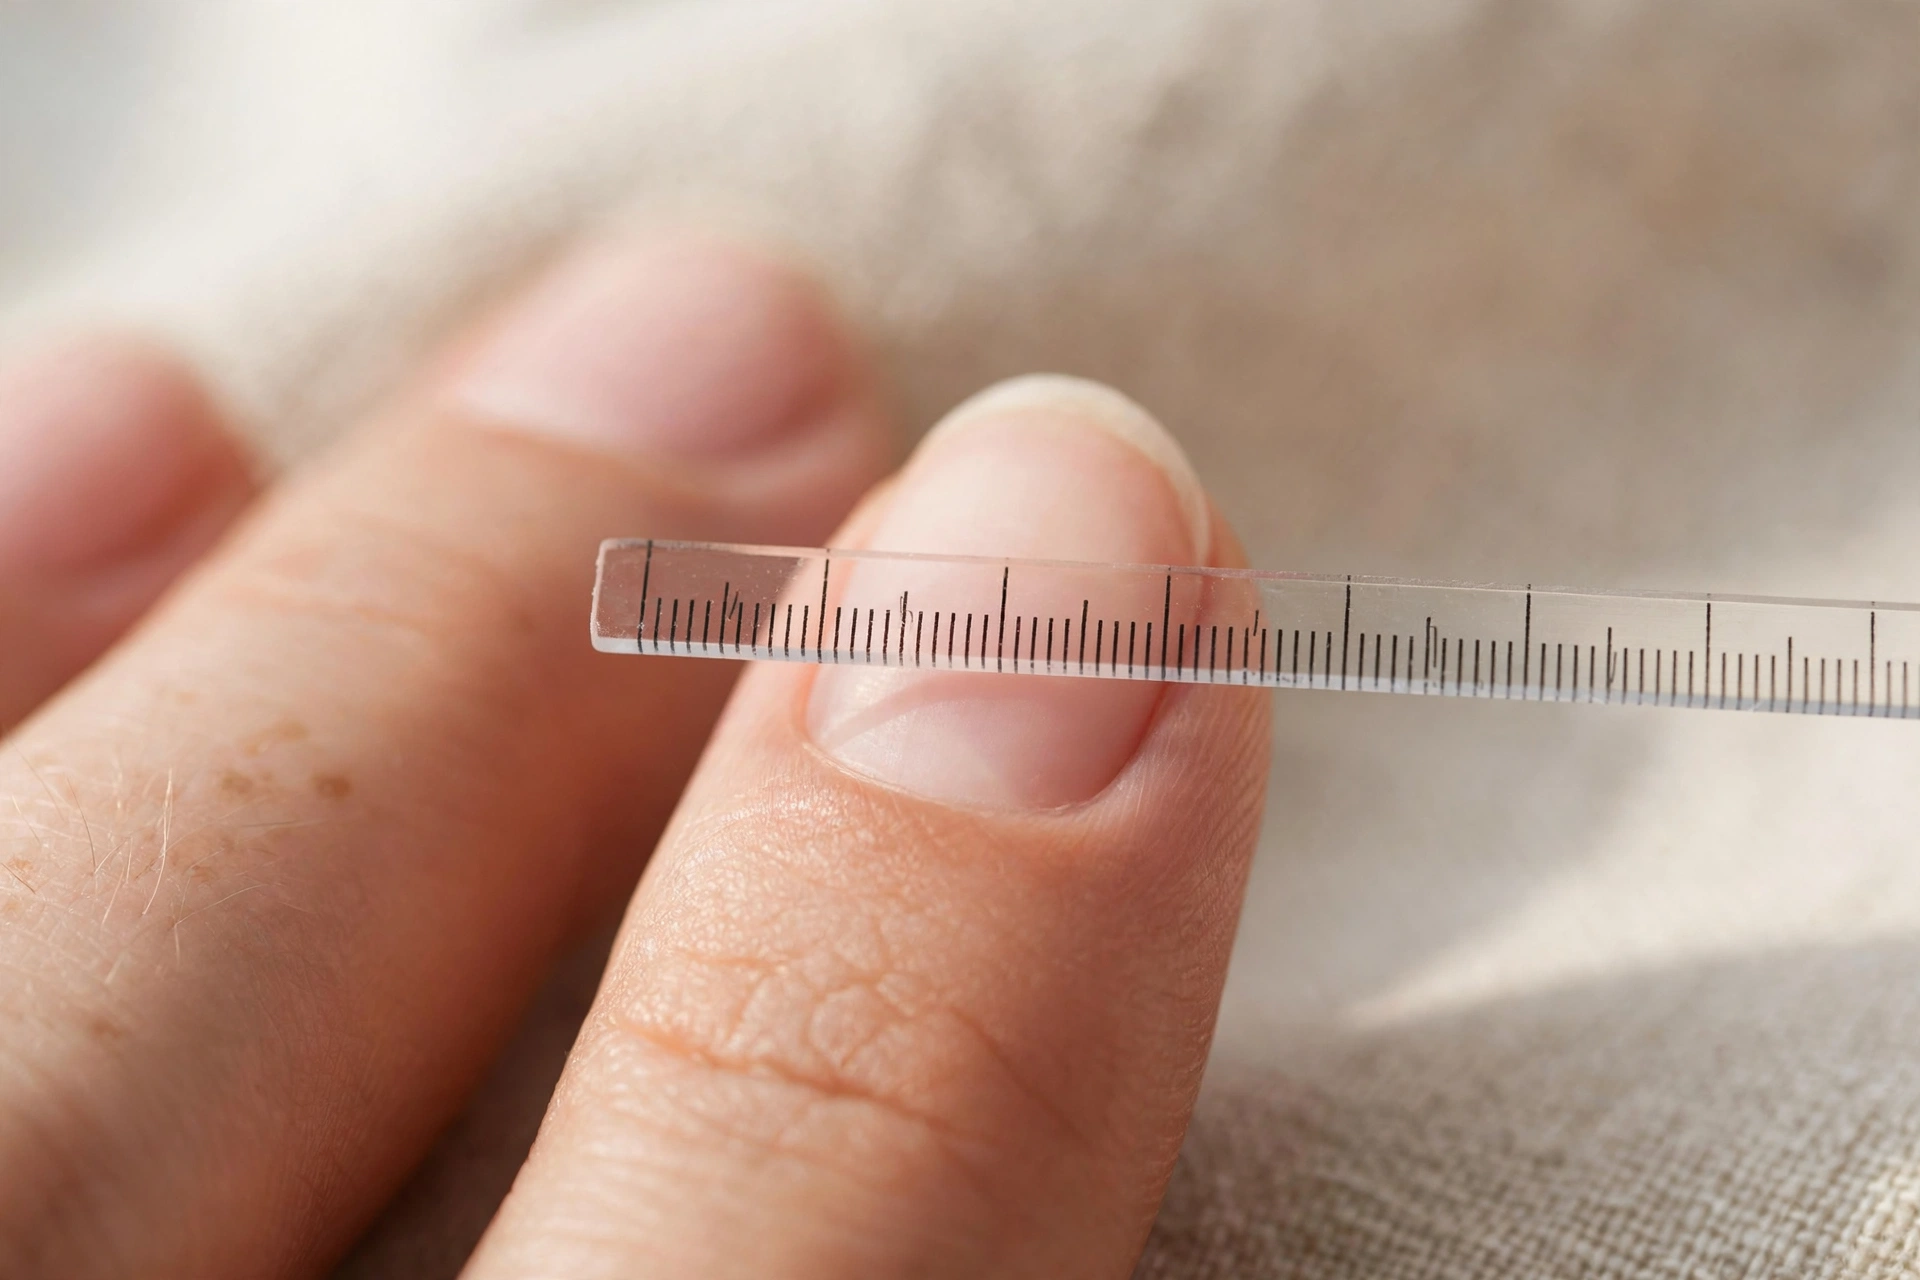
How to measure your nails
The most reliable approach is to measure the widest part of each natural nail in millimeters.
- Place a flexible measuring tape across the widest point of your nail.
- Record the width in millimeters for each finger.
- Compare your measurements with the manufacturer’s sizing chart.
- Check the physical fit of the tips before applying any adhesive.
Measure each finger separately. Your two thumbs, for example, may not be exactly the same width.
Some kits include numbered sizes, commonly ranging from 0 to 9, with 0 usually representing the largest tip. However, numbering and size availability vary by manufacturer.
What should you do between sizes?
When a tip falls between two available sizes, choose the slightly smaller size only if it still covers the entire natural nail comfortably.
If the smaller tip leaves part of your natural nail exposed, select the larger tip and carefully file its side edges where the material permits. Never choose a size that pinches the nail or overlaps the surrounding skin.
This approach helps you achieve a better fit without forcing the artificial nail into place.
Wide-fit, flat and large nail beds
Not every nail set is designed for every natural nail shape. Look for specific fit options if standard sets consistently leave gaps or feel uncomfortable.
- Wide fit press-on nails: These sets offer wider tips for people whose natural nails need more side-to-side coverage.
- Press-on nails for flat nail beds: Flatter tips may fit more comfortably on nails with less curvature. Highly curved tips can leave gaps or create pressure when they do not match the natural nail.
- Press-on nails for large nail beds: Sets with a broader size range can provide better coverage for wider or larger natural nails.
Compare both width and curvature. A tip can be wide enough yet still fit poorly if its curve differs significantly from your natural nail.
Do not force a rigid tip to fit a flat or unusually curved nail. Persistent pressure or discomfort is a reason to remove it rather than trying to secure it more tightly.
A sizing note for men’s press-on nails
Men’s press-on nails are often marketed in wider sizes, longer lengths, or shapes designed for different preferences. However, nail width and shape vary from person to person, so the label alone does not guarantee a good fit.
Measure the natural nails and use the same fit criteria as any other set. Shorter, natural-looking finishes are available alongside longer lengths and more decorative designs.
7. Do you need a UV lamp for press-on nails?
Most conventional press-on nails do not require a UV lamp. Traditional plastic tips attach with nail glue or adhesive tabs, neither of which requires UV curing.
A UV/LED lamp is relevant when the specific product uses a gel system that requires light curing, such as compatible semi-cured gel strips or certain gel products.
When a lamp is needed
Semi-cured gel strips typically require a compatible UV/LED lamp after application. Follow the product’s stated curing time, often around 60 seconds for some products, rather than assuming every strip uses the same duration.
For products requiring a lamp, check the manufacturer’s compatibility requirements and safety instructions. Keep uncured gel products off your skin, as exposure can cause skin sensitization.
Can you use press-on nails with UV light?
The phrase press on nails with uv light can refer to several different products, so identify the attachment method before using a lamp.
A lamp does not make ordinary nail glue cure like gel, and shining light on a conventional glue-on set does not automatically improve its hold.
Some systems use clear artificial tips with a compatible gel adhesive that must be cured through the tip. These require specific products and instructions; not every opaque, painted, or decorative press-on allows the necessary light to reach the material underneath.
Do not improvise a curing process or use a lamp simply because a nail product looks glossy. Follow the exact instructions for the system you purchased.
8. How long do press-on nails last (and how to make them last)
Press-on nails can last from a few hours to around two weeks, depending on the attachment method, product quality, nail preparation, and everyday activities.
Adhesive tabs commonly provide approximately 3–7 days of wear, while nail glue may provide around 7–14 days under suitable conditions. These are estimates, not guarantees.
How to help your press-ons last longer
- Start with dry nails: Water and oily residue can interfere with adhesion.
- Prepare gently: Remove dust and follow the manufacturer’s nail-prep instructions without excessive buffing.
- Choose the correct size: Poorly fitting tips can lift at the edges.
- Use the intended adhesive: Do not combine glue and tabs unless the manufacturer explicitly recommends that system.
- Allow the adhesive to set: Follow the instructions before washing or soaking your hands.
- Protect your hands: Use gloves for cleaning and prolonged wet work.
- Avoid picking: Do not pull at loose corners or use the nails to open packaging.
Common mistakes to avoid
For beginners, the most common problems are using the wrong sizes, applying adhesive over oily nails, choosing too much glue, and rushing the setting time.
Another mistake is leaving a lifted nail in place because it still appears attached. Gaps and trapped moisture can create an unsuitable environment around the natural nail. Remove a lifting tip safely rather than sealing the gap with extra glue.
Press-ons should never cause persistent pain, burning, swelling, or significant redness. Remove them carefully if possible and stop using the product if irritation develops. Seek medical advice when symptoms are concerning.
Can you reuse press-on nails?
Some sets can be reused, particularly when attached with adhesive tabs and removed without bending or damaging the tips.
Before reusing a set, inspect each artificial nail for cracks, residue, discoloration, and damaged edges. Clean it according to the manufacturer’s instructions and use fresh adhesive for the next application.
Do not reuse damaged tips or share used artificial nails with other people. Reuse also depends on the product: certain sets are intended for one application only.
9. How to remove press-on nails safely (and making your own)
Removing press-ons carefully matters just as much as applying them correctly. Pulling, biting, or prying off an artificial nail can tear layers from the natural nail plate, leaving it rough or weakened.
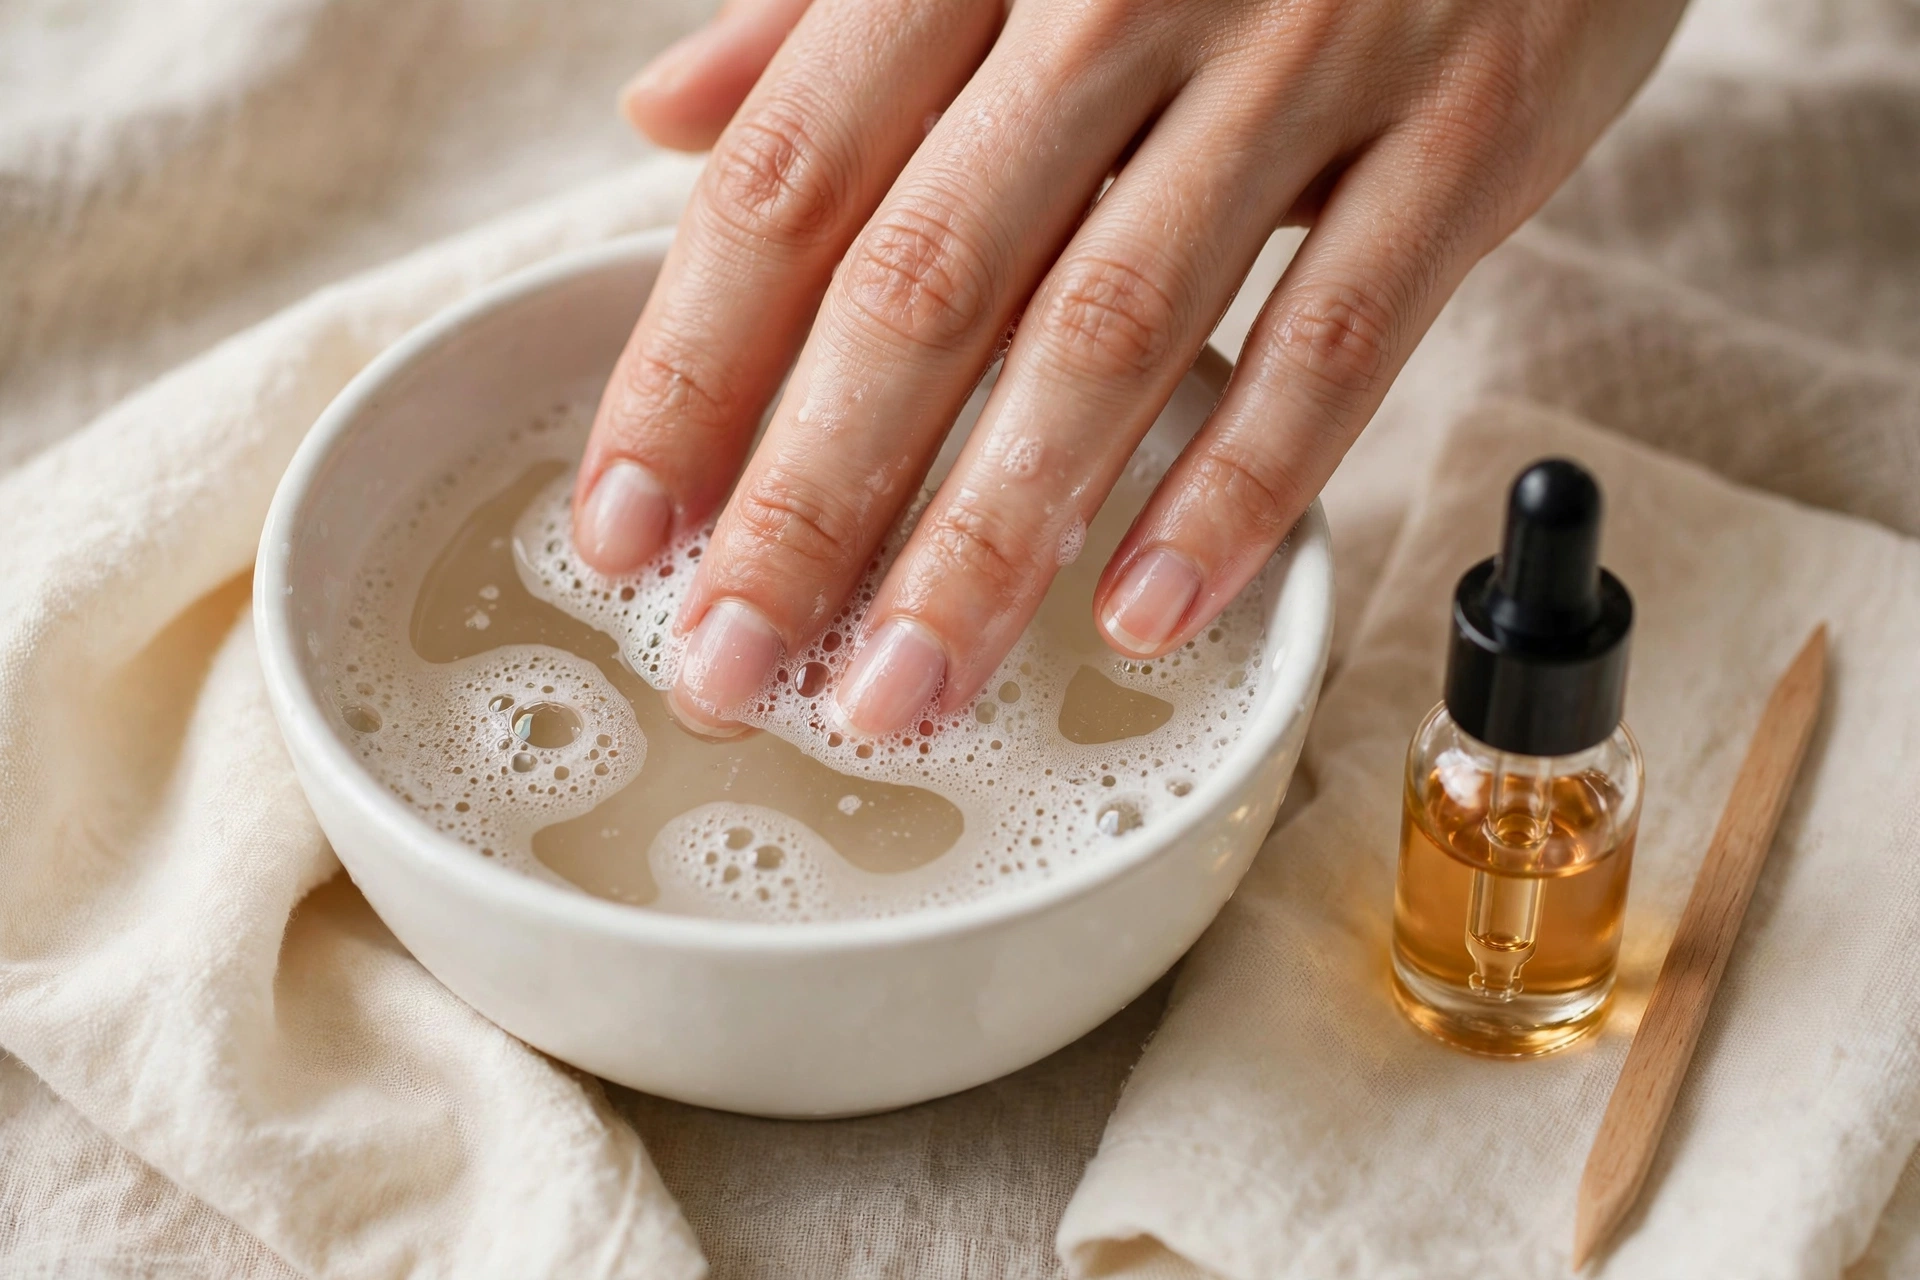
How to remove press-on nails
For conventional glue-on nails, start with a gentle soak. The following method is a starting point, but the manufacturer’s removal instructions take priority, particularly for gel-based systems.
- Prepare a warm soak. Fill a small bowl with comfortably warm water and a little mild soap.
- Soak your fingertips. Leave them in the water for approximately 10–15 minutes. You can add a small amount of cuticle oil if appropriate for the product.
- Check for loosening. Gently test whether an artificial nail has started to release at the edges. Do not pull if it remains firmly attached.
- Work carefully around the edges. If the product has loosened, use a wooden orange stick to guide it away gently from the sides. Stop if you feel resistance or pain.
- Repeat if necessary. Continue soaking rather than applying force. Some nail glues need a different removal method or a suitable glue remover.
- Clean and moisturize. Once the tips are off, remove residue using a product appropriate for your nails, then apply cuticle oil and hand moisturizer.
Adhesive-tab sets may release more easily than glue-on sets. Some products require a dedicated remover, and certain gel systems cannot be removed safely with warm soapy water alone. Follow the product-specific instructions rather than forcing the same method on every type.
Never rip, pry, bite, or forcibly peel off press-on nails. Do not insert a sharp tool under the tip or use household solvents that are not intended for nail products.
If a nail will not release, or if the natural nail appears damaged, stop and seek advice from a qualified nail professional or healthcare professional as appropriate.
Nail care after removal
After removal, wash your hands and inspect the natural nails without scraping or buffing them aggressively. Give your nails a break if they feel tender or look damaged, and use cuticle oil or moisturizer to help maintain the surrounding skin.
If you notice persistent discoloration, unusual thickening, separation, swelling, or signs of possible infection, consult a dermatologist rather than attempting to diagnose or treat the problem yourself.
Can you make homemade press-on nails?
Homemade press-on nails let you customize the color and decoration before attaching the tips.
To make a simple set:
- Choose artificial nail tips that fit your natural nails.
- Arrange the tips in finger order on a nail stand or another suitable holder.
- Apply nail polish or compatible nail art products according to their instructions.
- Let ordinary polish dry completely before handling or storing the tips.
- Add a compatible top coat if desired, then allow the finish to dry or cure as required.
- Attach the finished tips using nail glue or adhesive tabs designed for artificial nails.
Keep uncured gel products away from skin and use a compatible lamp when curing is required. Do not use hardware or craft super glue to attach homemade nails.
If you plan to reuse the set, store the tips clean and dry and inspect them before each application. Homemade designs offer creative flexibility, but the fit and attachment method still determine comfort and wear.
10. Press-on nail brands worth knowing
Press-on nail brands differ in availability, sizing, designs, adhesive options, and price. The names below are examples to help you recognize products while shopping, not a ranking of quality.
KISS and imPRESS
KISS and its imPRESS line are widely available in the United States through drugstores, beauty retailers, and online sellers. Their ranges include different lengths, shapes, finishes, and attachment styles. Check the specific package for the included adhesive, sizing options, and removal directions.
Hello Love
People searching for Hello Love press on nails may be looking for a particular brand or product range under that name. Verify the seller, product listing, and packaging before purchasing, especially if the name appears on multiple retail platforms. Compare the sizing chart, adhesive type, and return policy rather than relying on the brand name alone.
LEE press-on nails
LEE press-ons are another brand-related search term worth checking against the exact product listing. Confirm the manufacturer’s details, available sizes, and application instructions before buying. Product availability and naming can vary by retailer, so do not assume that similarly named listings contain identical products.
Buying bulk press-on nails
Bulk press-on nails are useful for people who need multiple sets of plain tips, practice nails, or supplies for custom designs. Bulk packs may offer a lower cost per tip, but the size range, shape consistency, material, and quantity of usable tips matter more than the headline price.
Check whether the pack includes finished press-ons or blank artificial tips intended for customization. Those are different purchases with different preparation requirements.
Men’s press-on nails
Men’s press-on nails are available in understated finishes, neutral colors, short lengths, and more expressive designs. Product labels can help narrow the search, but measuring your natural nails remains the most reliable way to choose a comfortable set.
Starting a press-on nail business
A press-on nail business may involve designing, decorating, and selling handmade or pre-designed artificial nail sets. Product consistency, accurate sizing information, clear application and removal instructions, and appropriate hygiene practices are important considerations. Anyone selling these products should also check the applicable labeling, consumer-safety, and business requirements for their market.
11. Colors, finishes and styles
Press-on nails are available in a wide range of colors and surface finishes, making it easy to change your manicure without committing to a salon appointment.
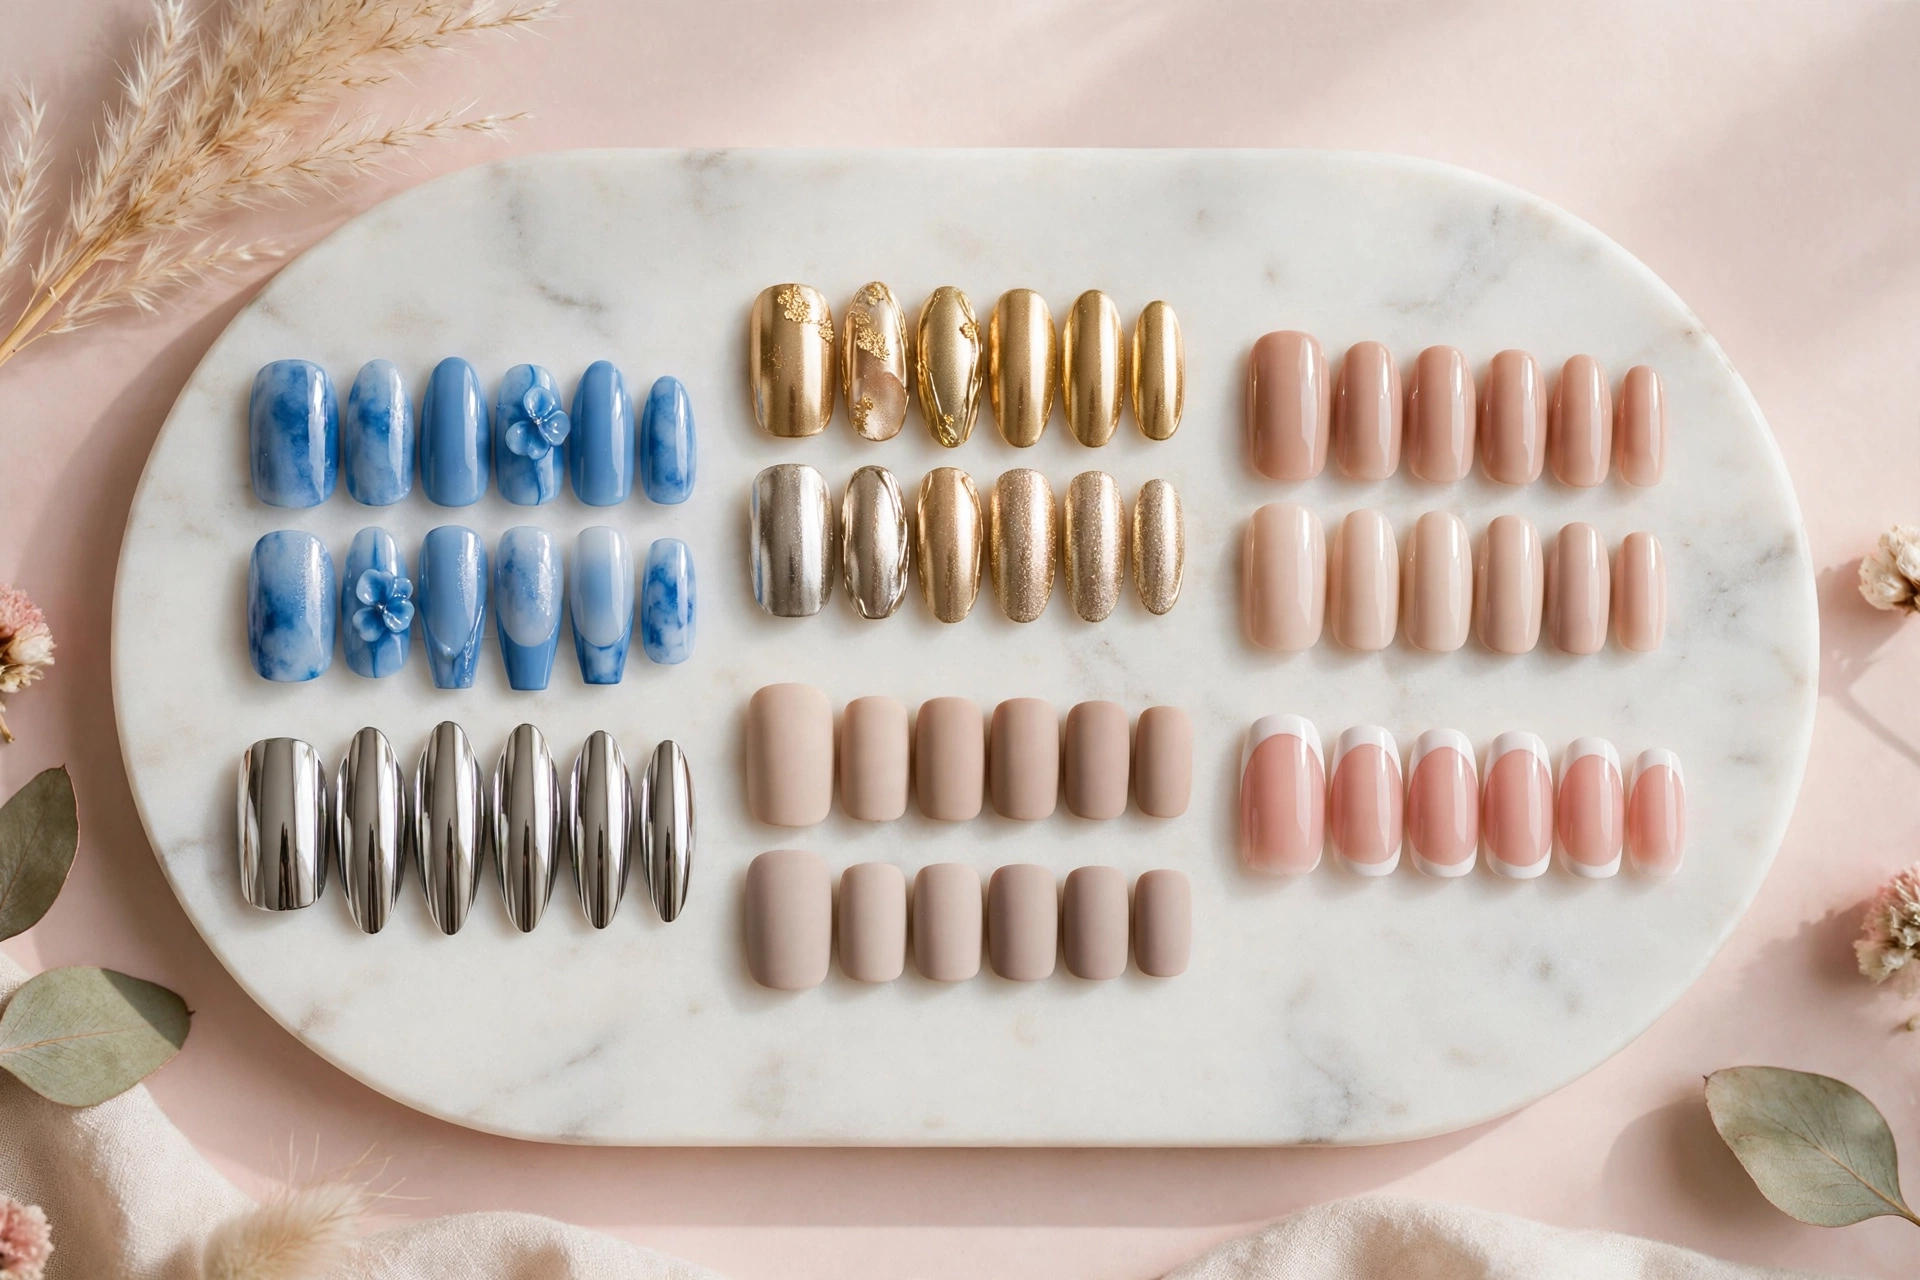
Press-on nails blue
Press on nails blue covers everything from pale blue and muted denim shades to cobalt, navy, and metallic finishes. Lighter shades can create a softer look, while deeper blues offer more contrast.
When comparing sets, look at the actual product photographs and color descriptions. Lighting and screen settings can make the same shade appear different across listings.
Gold press-on nails
Gold press on nails are available in metallic, glitter, foil, chrome-inspired, and gold-accented finishes. Some sets use gold as the main color, while others combine it with nude, black, or French-tip designs.
If you want a subtler finish, consider a set with small gold accents rather than a fully metallic surface.
Other finishes to consider
Popular finish options:
- Glossy and natural: Neutral pink, nude, and sheer-looking finishes work well for a simple everyday manicure.
- Chrome and metallic: Reflective finishes add shine and can feature silver, gold, or other metallic tones.
- Matte: A matte top coat can give a compatible artificial nail a softer, less reflective appearance.
- French tip: A neutral base with contrasting tips offers a familiar manicure style in both short and long sets.
Choosing a nail shape
Shape affects the overall appearance and practical feel of a manicure. These are brief descriptions rather than a full nail-shape guide.
- Almond nails: Tapered sides with a softly pointed tip.
- Coffin nails: Straight sides that narrow toward a flat tip.
- Stiletto nails: Long, sharply pointed tips.
- Oval nails: Rounded edges and a gently curved tip.
- Square nails: Straight sides with a flat edge.
Shorter lengths may be easier to manage for everyday tasks, while very long tips can require more care when typing, opening packages, or handling small objects.
Halloween is another seasonal occasion when themed press-ons can provide a temporary manicure without requiring a full salon design.
12. Frequently asked questions
What is press on nails, and how do they work?
Press-on nails are pre-shaped artificial nail covers attached to natural nails with nail glue or adhesive tabs. After selecting the correct sizes and preparing your nails, you position each tip and press it into place according to the product instructions. Most traditional sets do not require a UV lamp.
Are press-on nails suitable for beginners?
Yes. Press-on nails for beginners are often easiest to use when the kit includes multiple sizes, clear instructions, and adhesive tabs or nail glue. Start with a shorter length, prepare your nails carefully, and check the fit before attaching each tip. Allow enough time for application and never force a nail that feels too tight.
What is the difference between press-on nail sizes and a press-on nail size chart?
Press-on nail sizes refer to the individual tips available in a set, while a press-on nail size chart helps you match those tips to your natural nail widths. Measure each nail in millimeters when possible, because sizing numbers can vary between brands.
Can you use press-on nails with a UV light?
Ordinary glue-on press-ons do not need a UV lamp. Certain semi-cured gel strips and compatible gel systems do require curing. Always follow the exact product instructions and use a compatible lamp when required; a lamp cannot substitute for the correct adhesive.
How do you remove press-on nails without damaging natural nails?
Soak conventional press-ons in warm soapy water for approximately 10–15 minutes, then check whether they release gently. Use an appropriate remover if the manufacturer’s instructions require it. Never rip, bite, or pry off firmly attached nails. Stop if you feel pain or resistance, and seek professional advice when necessary.
Are press-on nails reusable?
Some artificial nail sets can be reused if they are removed carefully, remain undamaged, and can be cleaned according to the manufacturer’s instructions. Adhesive tabs may make reuse easier than glue, but reuse is not suitable for every product. Replace cracked or damaged tips and use fresh adhesive for each application.
Last reviewed: October 2026 — Editorial Team, Polish Haven