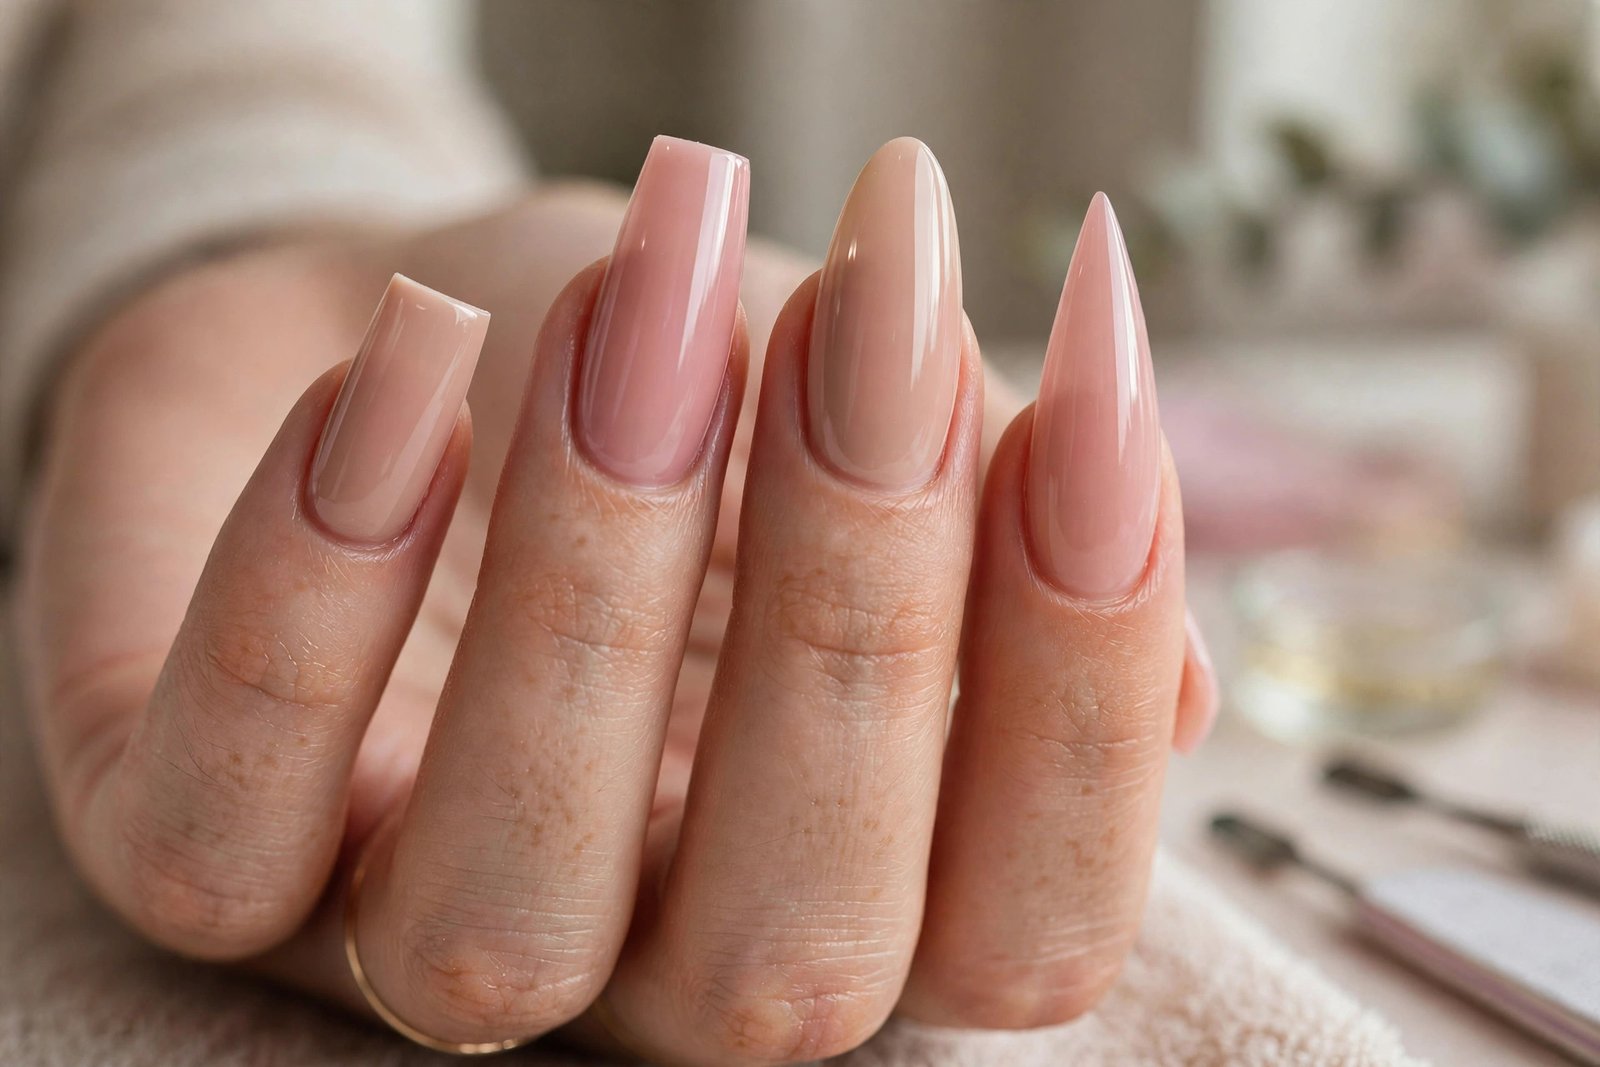

Acrylic nails are a popular choice for anyone who wants added length, a defined nail shape, and a manicure that can last for weeks with proper maintenance. From natural-looking overlays to square acrylic nails, dramatic stilettos, and bold black acrylic nails, acrylics offer plenty of ways to personalize your manicure.
But choosing acrylics involves more than picking a shape or color. You need to understand how acrylic products work, what happens during application, how often to get fills, and how to remove enhancements without damaging your natural nails.
This guide covers acrylic nail shapes, salon and at-home application, maintenance, removal, design ideas, costs, and the safety details worth knowing before your next acrylic manicure.
What are acrylic nails?
Acrylic nails are nail enhancements made by combining a liquid monomer with a powdered polymer to create a workable bead. The nail technician shapes this material over the natural nail, a nail tip, or a nail form to add length, structure, or both.
Unlike gel systems that require a compatible UV or LED lamp to cure, traditional acrylics harden through a chemical reaction at room temperature. They air-dry, so a curing lamp isn’t needed for the acrylic itself.
Once hardened, acrylic creates a firm enhancement that can be filed into different lengths and shapes. It can also be finished with regular nail polish, acrylic-compatible nail art products, or other suitable coatings.
What is acrylic powder?
Acrylic powder contains polymer materials that combine with the liquid monomer during application. When the two components are mixed in the correct ratio, they form a bead that can be placed and sculpted before it hardens.
The consistency matters. A bead that’s too wet or too dry can be difficult to control and may affect the finished enhancement. Professional nail technicians learn to manage the ratio, placement, and setting time.
What is monomer, and why does EMA matter?
Monomer is the liquid component used in traditional acrylic systems. Professional products commonly use ethyl methacrylate (EMA).
Avoid products containing methyl methacrylate (MMA) for artificial nail application. MMA-based acrylic products are restricted or banned in many places, including several US jurisdictions, because of safety and removal concerns. MMA can produce particularly hard enhancements that are difficult to remove and may contribute to nail damage.
Ask your salon which monomer it uses, and choose a technician who can explain the products and removal process. Don’t assume that every liquid labeled simply as “acrylic liquid” has the same formulation.
Acrylic overlays, tips, and forms
Acrylic enhancements can be created in several ways:
- Acrylic overlay: Acrylic is applied over the natural nail to add structure without necessarily adding length.
- Nail tip: A pre-shaped extension is attached to the natural nail, then covered and refined with acrylic.
- Nail form: A temporary guide is positioned under the nail edge so the technician can sculpt an extension directly.
- Sculpted acrylic: Acrylic is shaped to create the desired length and structure, often using a nail form.
The best method depends on your natural nail, the length you want, and the technician’s assessment. Acrylic can create a natural-looking finish, but the final result depends on correct preparation, suitable products, and careful shaping.
Acrylic nail shapes: find your fit
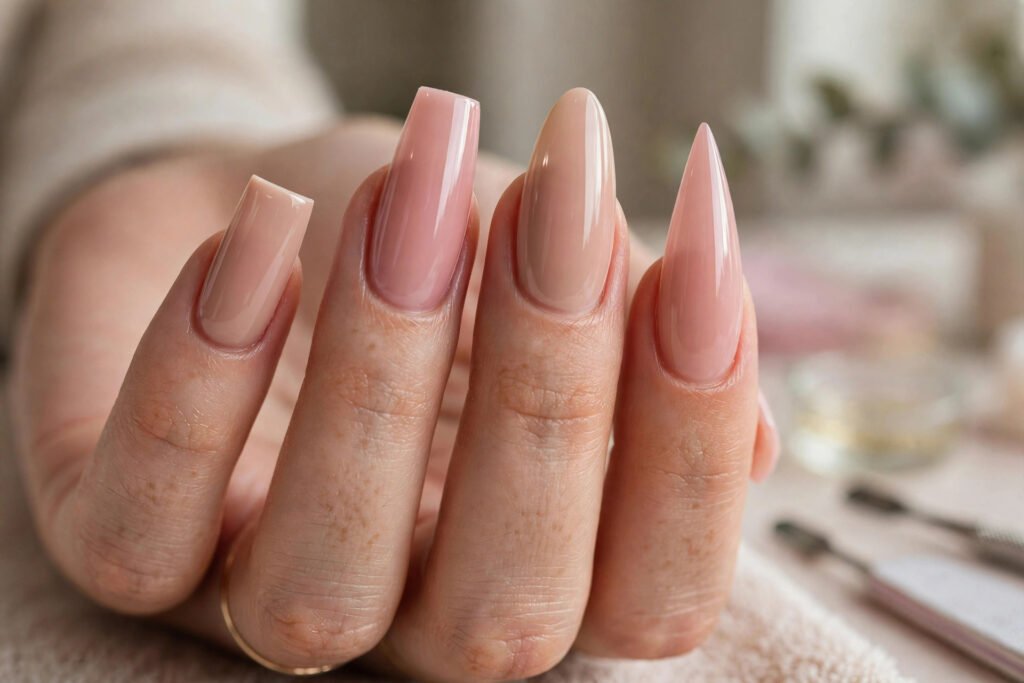
The right shape can change the overall look of your hands and affect how practical your manicure feels during everyday activities. Nail length, natural nail width, lifestyle, and personal preference all matter.
Here are the most common shapes to consider.
1. Square acrylic nails
Square nails have straight sides and a flat, squared-off tip. They create a clean, structured appearance and work well with solid colors, French tips, and minimalist designs.
Square acrylic nails can look especially striking at medium or longer lengths. However, the corners may catch on clothing or feel less practical if you work with your hands frequently.
Best for: Classic French manicures, bold colors, and a crisp, geometric look.
2. Coffin or ballerina nails
Coffin nails taper along the sides and finish with a flat tip. Ballerina nails have a similar silhouette, often compared to the shape of a ballet slipper.
The tapered sides create room for detailed designs, gradients, rhinestones, and decorative finishes.
Best for: Longer acrylics, statement manicures, and detailed nail art.
3. Almond acrylic nails
Almond nails taper toward a softly rounded point, creating an elongated appearance.
They offer a balance between a defined shape and a softer finish. Almond acrylics work well with nude shades, delicate French tips, floral details, and simple glossy colors.
Best for: Everyday elegance and a gently tapered silhouette.
4. Stiletto acrylic nails
Stiletto acrylic nails have sharply tapered sides and a pointed tip. The shape is dramatic and works particularly well for statement colors, metallic details, and high-contrast nail art.
Because the tip is narrow, long stilettos may be less practical for typing, opening packages, or tasks that put pressure on the nails.
Best for: Dramatic looks, bold colors, and statement designs.
5. Oval acrylic nails
Oval nails have softly rounded tips and gently curved sides. They suit a wide range of nail lengths and offer a classic, understated appearance.
This shape is a good option if you prefer a softer outline rather than sharp corners or pointed tips.
Best for: Everyday wear, neutral shades, and timeless manicures.
6. Round acrylic nails
Round nails follow the natural curve of the fingertip. They usually work well at shorter lengths and can be practical for people who use their hands frequently.
A simple polish color can look polished without requiring a long extension.
Best for: Short nails, low-maintenance styles, and subtle manicures.
7. Squoval acrylic nails
Squoval combines a square shape with gently rounded corners. The result keeps some of the straight-edged appearance of a square manicure while softening the corners.
It’s a versatile option if you want a neat shape that doesn’t feel too sharp.
Best for: Everyday manicures and people who like a balanced, understated finish.
Which acrylic nail shape should you choose?
Use this quick guide as a starting point:
| Your preference | Shape to consider |
|---|---|
| Classic and structured | Square |
| Long with a tapered, flat tip | Coffin |
| Soft and elongated | Almond |
| Bold and pointed | Stiletto |
| Rounded and timeless | Oval |
| Short and practical | Round |
| Square with softer corners | Squoval |
No shape is automatically best for everyone. Choose a length you can manage comfortably, especially if you type, cook, exercise, or perform hands-on work throughout the day.
Acrylic nail kits and application — salon vs at-home
An acrylic nail kit typically contains some of the tools and products needed to create acrylic enhancements. Depending on the kit, these may include acrylic powder, monomer, nail tips, a brush, a nail file, and preparation products.
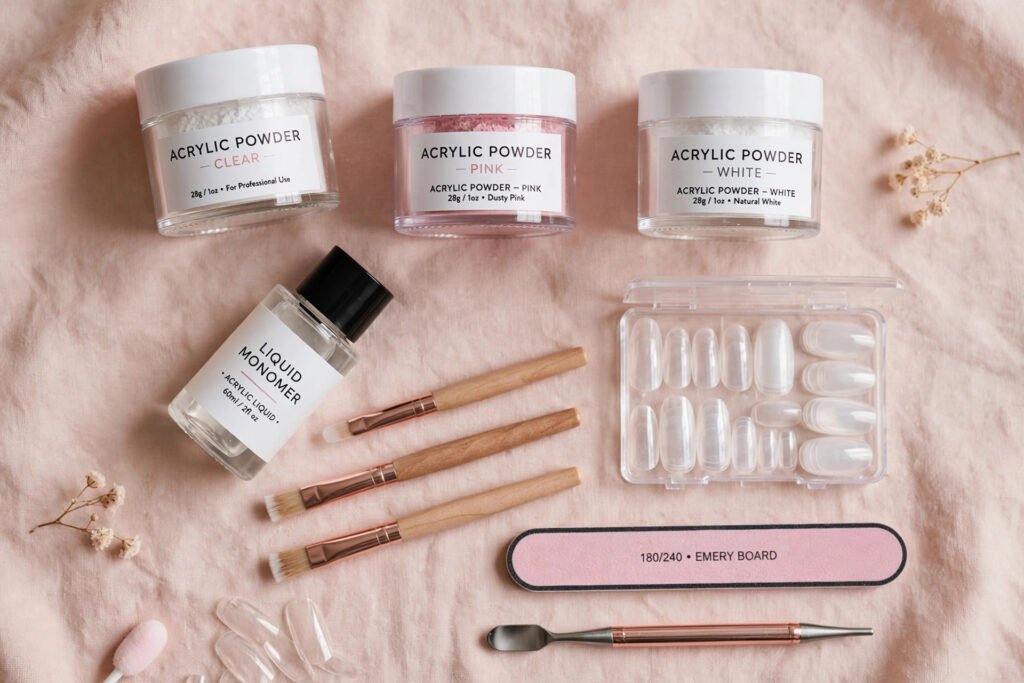
Not every kit includes everything required, and buying a kit doesn’t automatically make acrylic application safe or straightforward. Acrylic products require careful handling, appropriate ventilation, and practice to achieve a well-shaped enhancement.
What’s included in an acrylic nail kit?
Before buying a kit, check whether it contains the following items:
- Acrylic powder and monomer: The two components mixed to create the acrylic bead. Choose a clearly labeled system intended for nail use.
- Nail tips or nail forms: Used to add length or support sculpting.
- Acrylic brush: Used to pick up, place, and shape the product.
- Nail file: Used to refine the enhancement after it hardens. Different grits have different purposes; coarser files remove more material, while finer files are used for refining and finishing.
- Cuticle pusher: Helps gently move back the cuticle without cutting living skin.
- Nail dehydrator and primer: Preparation products that may be recommended by the acrylic system to support adhesion.
- Top coat: Adds the final finish and can help protect the chosen color or design.
You may also need lint-free wipes, a suitable cleanser, a dust-collection setup, and supplies for safe removal. Read the kit instructions before mixing products, and don’t substitute unidentified liquids or powders.
Salon application: what happens during an appointment?
A professional full set typically takes around one to two hours, although detailed designs, long extensions, and the condition of your natural nails can extend the appointment.
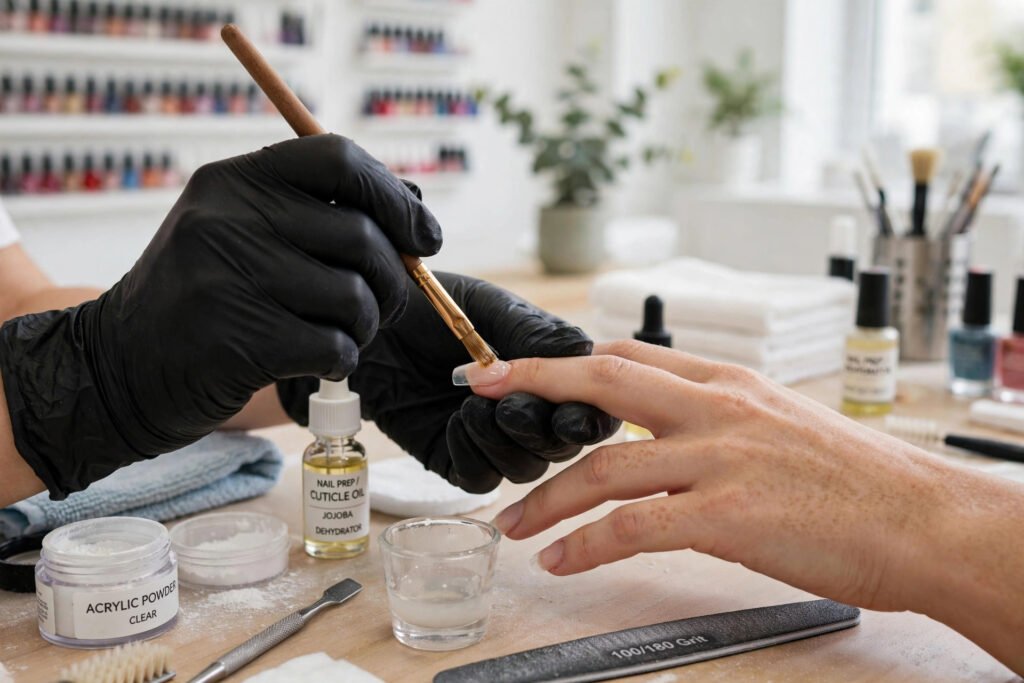
Step 1: Nail assessment and preparation
The technician examines your natural nails and surrounding skin, discusses your preferred shape and length, and checks for signs that might make an enhancement unsuitable.
They then prepare the nails, gently manage the cuticles, and remove surface residue according to the product instructions. Excessive filing of the natural nail isn’t necessary and should be avoided.
Step 2: Applying tips or nail forms
If you want added length, the technician may attach suitable nail tips or position forms for sculpting. An overlay may be used when extra length isn’t needed.
The chosen method helps determine the shape and structure of the finished nail.
Step 3: Mixing and placing acrylic
The technician combines acrylic powder with the appropriate monomer, then places the bead onto the prepared nail or extension.
The acrylic is shaped before it hardens. Correct placement and product control help create a balanced enhancement without flooding the cuticles or leaving excessive bulk.
Step 4: Filing and shaping
After the acrylic has hardened, the technician refines the surface and shapes the free edge.
An e-file may be used by a trained professional, but it must be handled carefully. Excessive pressure, incorrect technique, or filing into the natural nail can cause damage.
Step 5: Finishing the manicure
The technician applies the selected finish, such as a suitable top coat, regular nail polish, or compatible nail art products. The final steps depend on the chosen system and design.
A reputable salon should be able to explain its products, maintain clean tools, provide suitable ventilation, and discuss safe removal before you commit to a full set.
At-home application: what beginners should know
Doing acrylic nails at home is possible, but learning the technique takes practice. Working with monomer and acrylic powder also introduces risks that aren’t present with ordinary nail polish.
If you’re new to acrylics, understand the entire application and removal process before opening a kit.
- Read the instructions. Check the ingredients, preparation requirements, mixing ratio, and safety information for every product.
- Prepare a ventilated workspace. Monomer vapors can be irritating. Work with effective ventilation, follow the product’s safety directions, and keep liquids away from flames, heat, and ignition sources.
- Check your nails and skin. Don’t apply acrylic over irritated, broken, or visibly abnormal nails. If you have a history of product allergies, seek professional advice before use.
- Prepare gently. Use a cuticle pusher carefully and follow the system’s instructions for a nail dehydrator and primer, if required. Don’t aggressively thin the natural nail.
- Practice product control. Follow the kit’s mixing ratio and learn to place the acrylic without touching the skin. Avoid overly thick or uneven applications.
- Allow the acrylic to harden. Traditional acrylic air-dries. Don’t place it under a gel lamp expecting that to replace the normal setting process.
- Finish and inspect. Shape the hardened product carefully and apply a compatible finish. Stop if you experience irritation, unexpected heat, or discomfort.
Important: Perform a patch test for new products when the manufacturer’s directions permit it, and follow any specific allergy-testing instructions provided. A negative patch test does not guarantee that a product won’t cause an allergic reaction. Never deliberately apply uncured acrylic product to damaged skin or use a home test that contradicts the label.
For beginners, a professional application is often the more practical starting point, especially if you want long extensions or have never worked with monomer before.
Acrylic nails vs gel: which should you choose?
Acrylic and gel enhancements can both create durable, attractive manicures, but their application and removal methods differ. Traditional acrylic combines liquid monomer with powder and air-dries, while gel products harden through curing under a compatible lamp.
| Feature | Acrylic nails | Gel enhancements |
|---|---|---|
| Durability | Firm structure; maintenance depends on length, application, and lifestyle | Varies by gel type and whether it’s polish or a structural enhancement |
| Cost | A US salon full set commonly costs about $35–$80 or more | Varies by product, salon, and service |
| Removal | Usually requires filing and an acetone soak for soak-off acrylic systems | Depends on the gel formula; some soak off, while others require filing |
| Look | Can be sculpted into many shapes and lengths | Can provide glossy color, overlays, or extensions, depending on the system |
Choose acrylic if you want a sculpted enhancement and prefer a system that air-dries. Gel may suit you if you prefer a gel-based finish or a particular gel application method.
Neither option is automatically safer or more damaging. Product ingredients, application quality, curing where required, maintenance, and removal all influence the experience. For a more detailed gel-specific guide, see our dedicated gel manicure pillar page.
Acrylic manicure aftercare: how long they last and when to get fills
A fresh acrylic manicure typically looks its best for two to three weeks. After that, your natural nails keep growing, leaving a visible gap near the cuticle — that’s when a fill (also called a backfill or rebalance) is due. Most people book fills every 2–3 weeks; waiting much longer invites lifting, where the enhancement separates from the natural nail and moisture gets trapped underneath.
Daily care that extends the life of your set:
- Moisturize the cuticles daily with cuticle oil — dry cuticles lift faster.
- Wear gloves for dishwashing and harsh cleaning chemicals; prolonged water exposure weakens adhesion.
- Don’t use your nails as tools (opening cans, scraping labels). Acrylics are strong, but the leverage can crack the enhancement or injure the natural nail.
- If an edge starts lifting, don’t pick at it — trapped moisture under a lifted enhancement is how “greenies” (bacterial discoloration) start. Get it repaired promptly.
Signs you need a fill or repair now: visible growth gap, lifting at the cuticle or sidewalls, cracks, persistent soreness, or any discoloration under the enhancement. Covering lifting or discoloration with fresh polish hides problems that need professional attention.
With consistent fills and gentle daily habits, many wearers keep the same set maintained for months — the fills, not the original application, are what make acrylics a long-term manicure.
How to remove acrylic nails safely at home
Safe removal protects the natural nail underneath. The golden rule: never pry, rip, or bite acrylics off — that tears off layers of your natural nail with them.
What you’ll need: nail clippers, a coarse nail file, 100% acetone, cotton balls or pads, aluminum foil strips, a cuticle pusher, and cuticle oil.
- Shorten the extensions. Clip the acrylics down as short as you comfortably can without touching the natural nail.
- File off the top coat. Use a coarse file to break through the shiny top layer on each nail — acetone can’t penetrate an intact top coat, so don’t skip this.
- Soak in acetone. Soak a cotton ball in 100% acetone, place it on the nail, and wrap tightly with foil. Leave for 20–30 minutes. (A bowl soak works too, but foil wraps use less product and keep the acetone in contact.)
- Gently push off softened acrylic. After soaking, the acrylic should be soft and crumbly. Use a cuticle pusher to gently slide it off. If any area resists, re-wrap and soak for another 10 minutes — never force it.
- Buff lightly and moisturize. Gently buff away residue with a fine file, wash your hands, and apply cuticle oil generously. Your nails will be dehydrated — give them a few days of oil and rest before the next set.
When to go to a salon instead: if the acrylics were applied very thick, if you suspect MMA product (unusually hard, won’t soften in acetone), or if removal causes pain. A professional has stronger removal options and can assess the nail underneath.
Acrylic nail design ideas — colors and styles you’ll love
Once you’ve chosen your shape and length, color is where you can personalize an acrylic manicure. You can keep the look understated with sheer pinks and neutrals or choose saturated shades and detailed nail art.
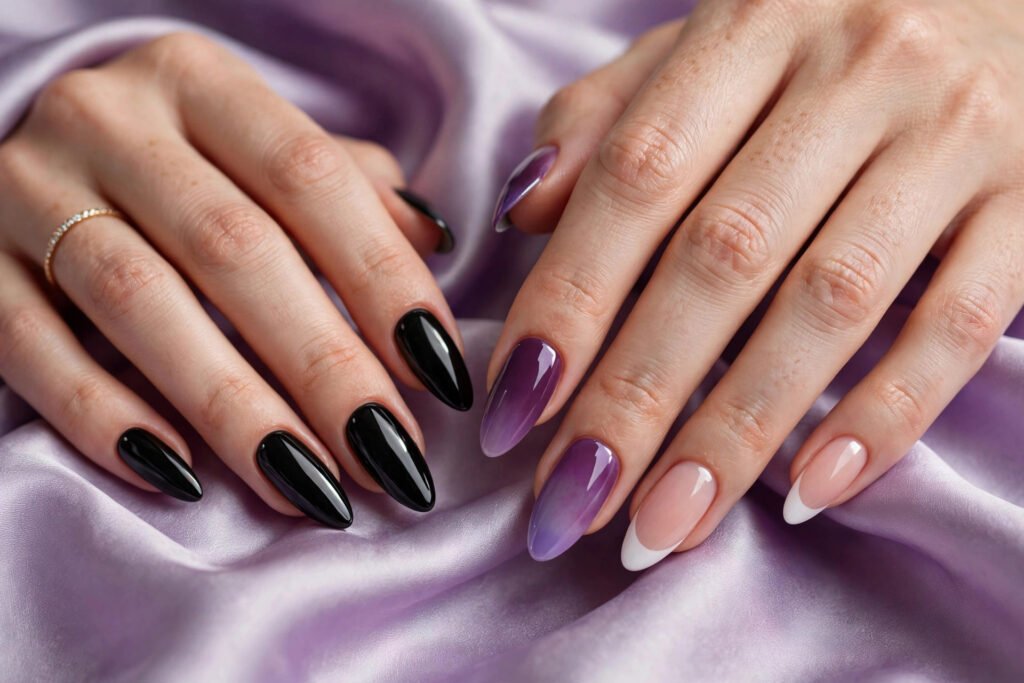
Natural acrylic nails
Natural acrylic nails focus on a finish that complements the appearance of your natural nail. Think soft pink, sheer beige, milky white, or a subtle nude shade.
Acrylic overlays can provide a neat, structured look without requiring dramatic length. Ask your technician to choose a shape and shade that suit your preferences rather than assuming that one nude color works for everyone.
Black acrylic nails
Black acrylic nails can look sleek, minimalist, or dramatic depending on the finish and design.
Try a glossy black manicure for a classic statement, a matte finish for a softer texture, or black French tips over a neutral base. Fine metallic lines and small accents can add detail without making every nail busy.
Black also pairs well with square, coffin, almond, and stiletto shapes. Consider your preferred length and daily routine when deciding how dramatic you want the final set to be.
Purple acrylic nails
Purple acrylic nails range from pale lavender and lilac to rich plum and deep violet.
- Lavender: Soft and understated, especially with a glossy finish.
- Lilac: A light pastel option for a fresh, playful look.
- Violet: A saturated shade that makes a stronger statement.
- Plum: A deeper color that works well for evening looks.
- Purple French tips: A simple way to add color without covering the entire nail.
You can also combine two purple shades for a gradient or use small floral details for a more decorative manicure.
Nail polish with acrylic
You can wear regular nail polish over many acrylic enhancements. This is useful if you like changing your color without replacing the entire set.
Before applying polish, make sure the acrylic surface is intact, clean, and suitable for the product. Apply the color in thin coats and finish with a compatible top coat if desired.
Regular nail polish can usually be removed with an appropriate remover, but acetone may affect some acrylic finishes or other coatings. Check the product instructions and avoid aggressive filing when changing colors.
If the acrylic is lifting, cracked, painful, or discolored, don’t cover the issue with fresh polish. Have the enhancement assessed first.
French tips and minimalist designs
French tips remain a versatile choice because they can be adapted to different nail shapes and lengths. Traditional white tips create a clean finish, while colored tips add a modern twist.
Other easy-to-customize ideas include:
- Micro-French tips with a thin line at the edge
- Neutral nails with one accent nail
- Minimalist dots or fine lines
- Soft pink with white detailing
- Alternating complementary shades
- Metallic accents on a solid-color base
The best design is one you enjoy wearing and can maintain comfortably. You don’t need elaborate artwork on every nail to create a polished result.
Frequently asked questions
1. How long do acrylic nails last?
Acrylic nails commonly need a fill after about two to three weeks as your natural nails grow. The enhancement may last longer with maintenance, but lifting, cracks, discomfort, or damage should be addressed promptly rather than covered up. See the aftercare section above for the full maintenance routine.
2. How to remove acrylic nails at home?
For many traditional soak-off acrylic systems, the process involves shortening the extensions, filing the top coat, and soaking the acrylic in acetone until it softens. This may take around 20–30 minutes, depending on the product. Gently remove only the softened material, follow the manufacturer’s instructions, and never pry or rip the acrylic off. Full step-by-step instructions are in the removal section above.
3. Are acrylic nails better than gel?
Neither is universally better. Acrylic combines liquid monomer and powder and hardens at room temperature. Gel products require the appropriate curing process and may be used for polish, overlays, or extensions. Choose according to your desired look, maintenance preferences, and the product system you’re comfortable using.
4. Do acrylic nails damage your nails?
Acrylic nails don’t automatically damage natural nails. Problems are more likely when the nail is over-filed, enhancements are applied or removed incorrectly, or the product is pulled off. Gentle preparation, proper maintenance, and safe removal help reduce avoidable damage.
5. How much are acrylic nails?
In the United States, a full set often costs around $35–$80 or more, while fills commonly range from $20–$40. Prices vary by location, salon, technician, nail length, and design. Ask for the complete price before booking, including any extra charges for removal or nail art.
For additional guidance on artificial nails and nail health, consult the American Academy of Dermatology. If you suspect nail fungus or an infection, see a dermatologist rather than trying to diagnose or cover the problem yourself.
Last reviewed: October 2026 — Editorial Team, Polish Haven
[…] Acrylic or gel can also be used as a base for Halloween nail art, but neither is necessary for a short seasonal manicure. For a one-night event, simple polish or appropriately sized press-ons may be easier to manage. […]
[…] Acrylic nails: Acrylic enhancements are built using an acrylic liquid-and-powder system, usually by a trained nail professional. They involve a different application and maintenance process from conventional press-ons. […]
[…] nails when sufficient length is available. For a longer or more pronounced taper, gel extensions or acrylic enhancements can help create the desired outline, although the result still depends on correct application and […]
[…] natural nail rather than repeatedly replacing broken length with an enhancement. Polish Haven’s acrylic, gel, and press-on guides cover those alternatives […]
[…] acrylic nails give you the polished look of an acrylic enhancement without the extra length that can get in the way of typing, cooking, or everyday tasks. The free […]