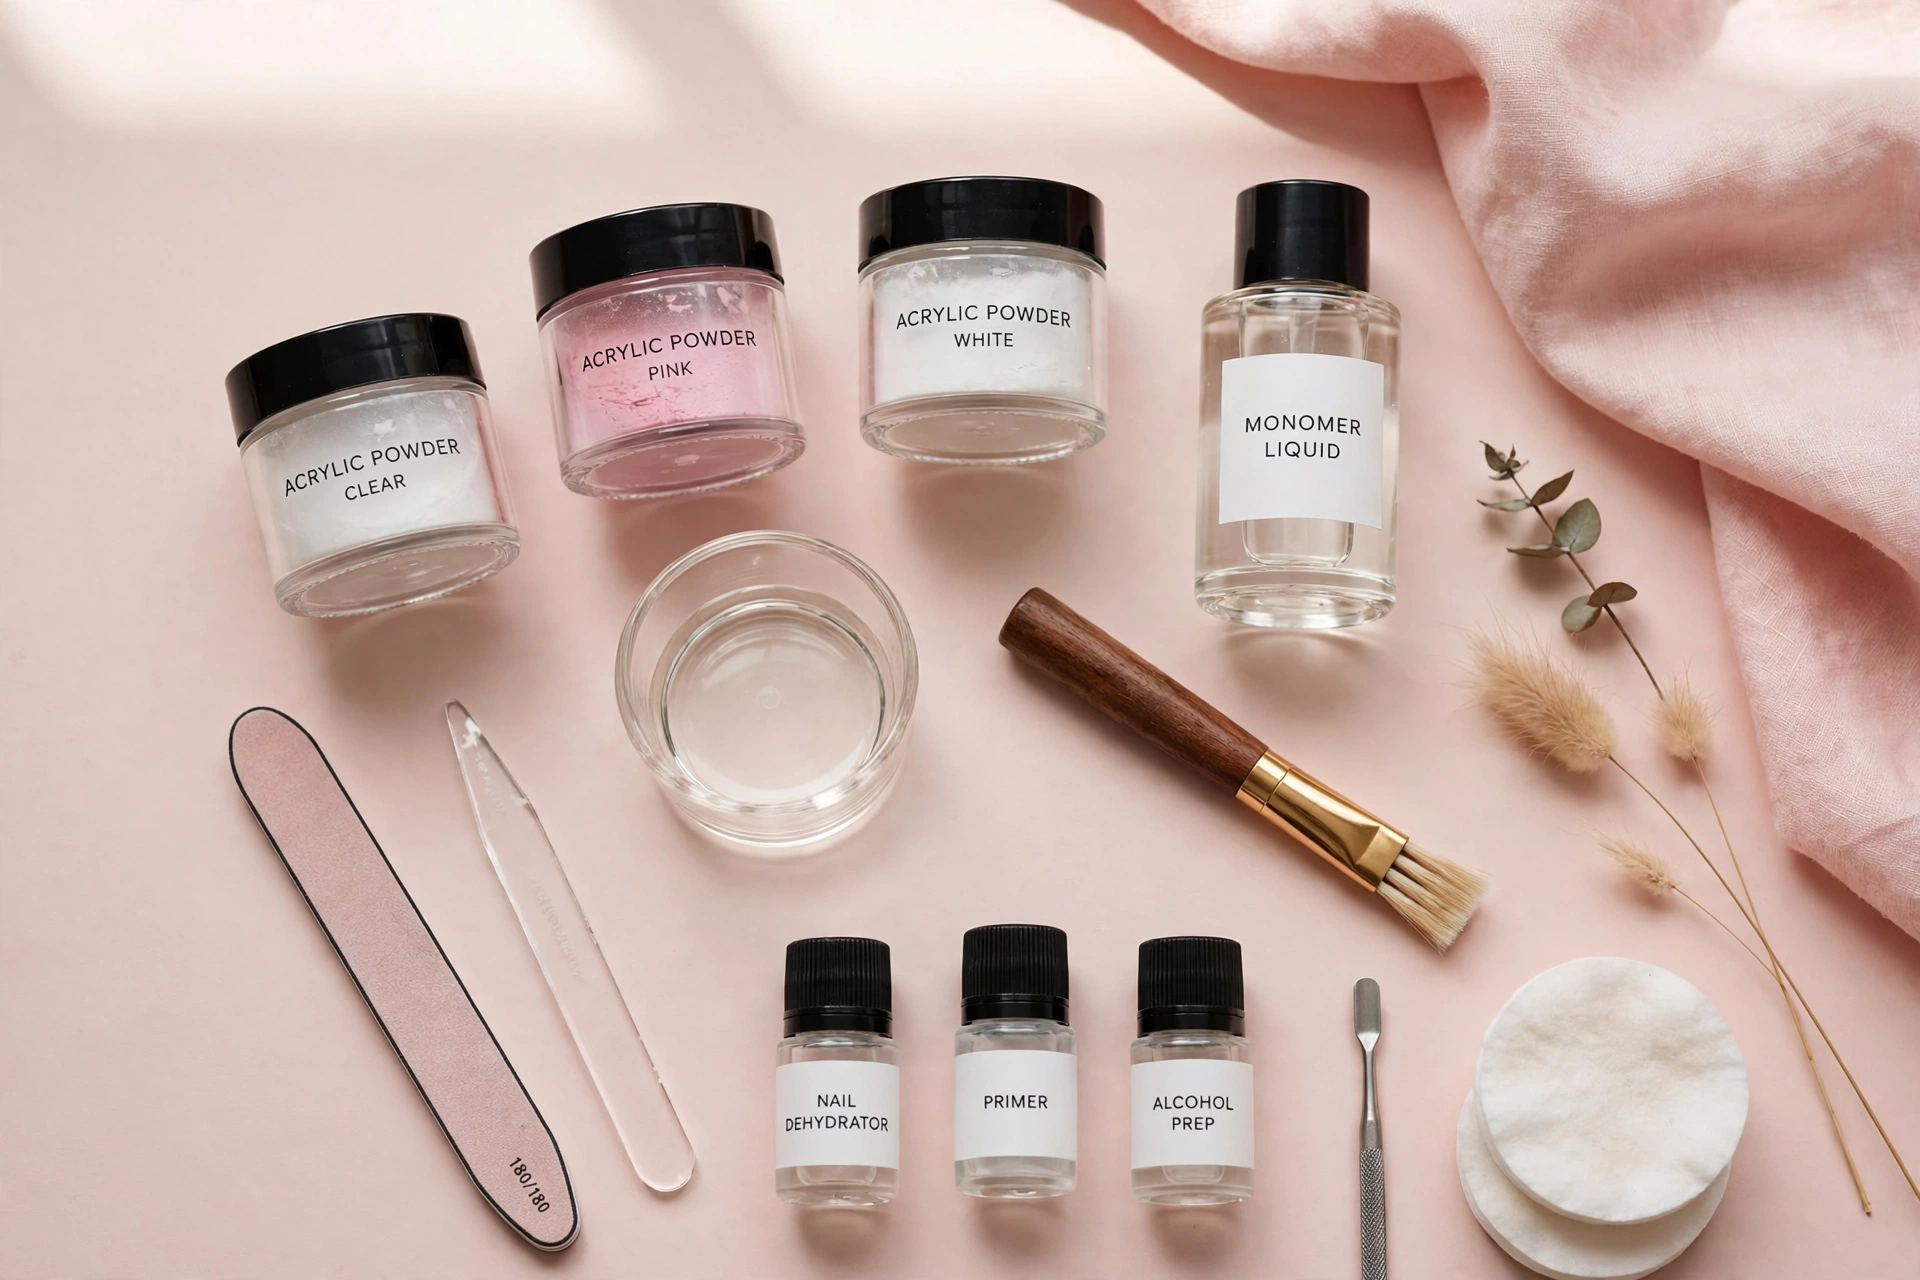

An acrylic nail kit combines polymer powder, monomer liquid, and the tools needed to create acrylic nail enhancements. The acrylic mixture hardens in the air at room temperature, so it does not need a UV or LED lamp. This guide explains what a complete kit should contain, how to choose acrylic nail powder and liquid, and what beginners should know before working at home.
Updated October 2026, this guide focuses on choosing the right supplies rather than promoting a particular brand. A well-labeled system, suitable brush, and reliable preparation products matter more than the number of items in the box.
What is an acrylic nail kit?
An acrylic nail kit is a set of products used to build nail enhancements by combining polymer powder with monomer liquid. The two components are mixed fresh for each bead, then applied and shaped before the product hardens.
An acrylic nails kit may contain everything needed for a basic application, or it may include only the powder, liquid, and brush. Check the contents carefully before buying an acrylic kit, because a large box does not necessarily mean it has all the essentials.
Acrylic systems may suit people who want structured nail extensions or overlays and are willing to practice application and maintenance. They are not the easiest option for everyone: the liquid has a strong odor, the product must be kept off the skin, and bead control takes practice.
Unlike gel products that require curing under a compatible lamp, a traditional powder-and-liquid acrylic system air-cures. A lamp is not required for the acrylic itself.
What should be in a complete acrylic nail kit?
Use this acrylic nail supplies list to check whether a kit contains the basics for preparation, application, and finishing. A complete acrylic manicure kit should include compatible powder and liquid, a suitable brush, and the tools needed to prepare and shape the nails.
| Item | What it does | Must-have or optional |
|---|---|---|
| Acrylic polymer powder | Combines with monomer to form the acrylic bead | Must-have |
| EMA-based monomer liquid | Activates the powder so the mixture can be shaped and harden | Must-have |
| Acrylic brush | Picks up and places each bead | Must-have |
| Dappen dish | Holds a small amount of monomer during use | Must-have |
| Nail dehydrator | Removes surface moisture and oil before application | Must-have for many systems |
| Nail primer | Helps the acrylic adhere when the system calls for it | Must-have when specified |
| Nail tips or nail forms | Provide a base for extensions when needed | Optional, depending on the intended application |
| Files and buffer | Refine the surface and shape | Must-have |
| Cuticle pusher | Gently moves back the non-living cuticle tissue on the nail plate | Must-have |
| Top coat | Adds a finished surface and shine | Optional, depending on the finish |
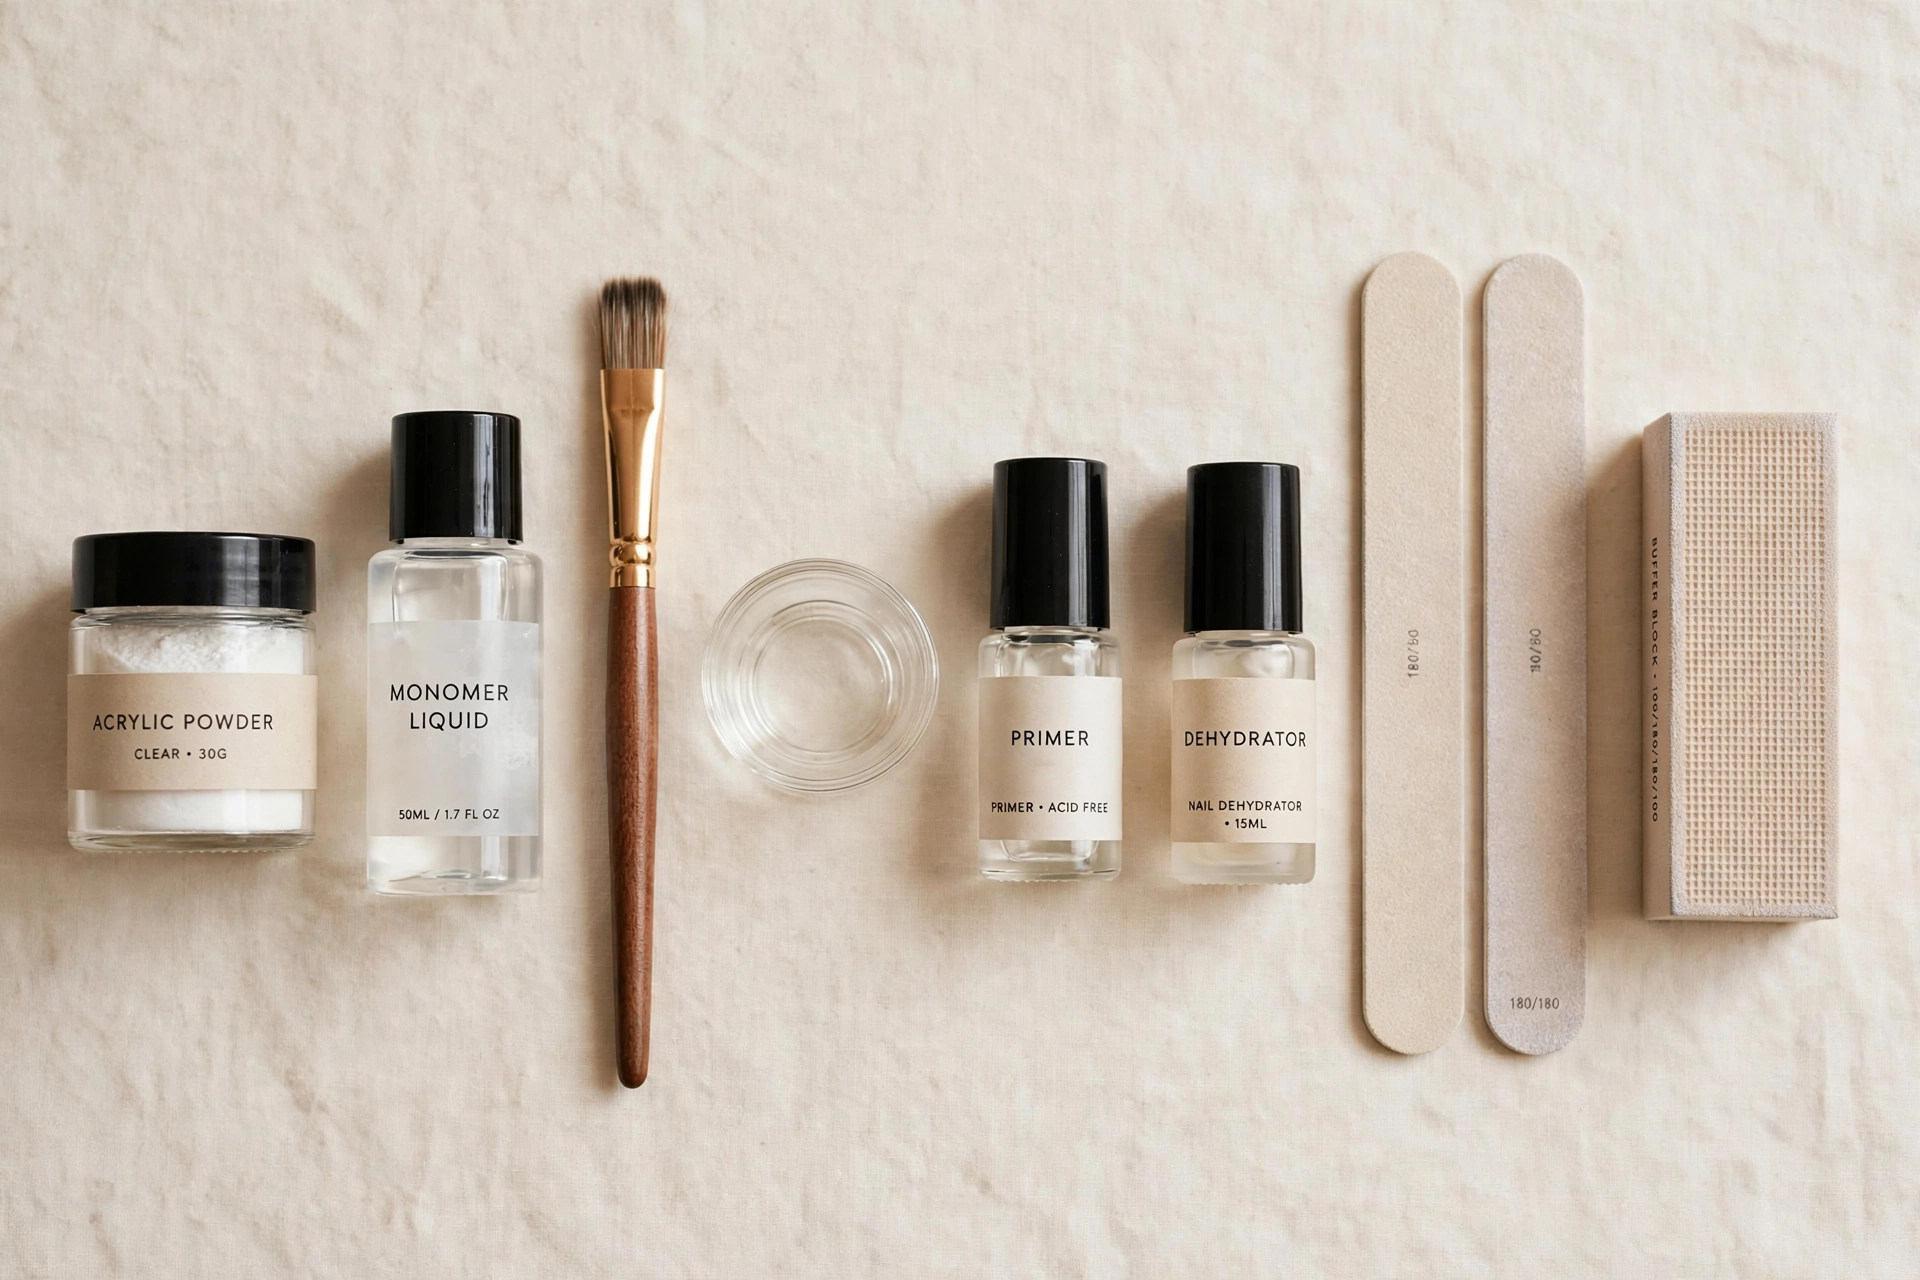
Look for a kit with at least two or three powders, clearly labeled EMA-based monomer, and instructions that identify which products work together. Some inexpensive kits leave out primer or dehydrator, so check whether these need to be purchased separately. Follow the system’s directions rather than adding products at random.
A pure kolinsky (sable) acrylic brush in roughly size 8–10 can offer useful bead control for beginners, although brush size is a personal preference. A poorly made brush may make it harder to pick up a consistent bead. Keep the brush clean according to the product instructions; when cleaning an acrylic brush, use fresh compatible monomer rather than acetone, which can damage the brush.
Acrylic powder explained: types, colors & setting speeds
Acrylic nail powder is a manufactured polymer powder designed to combine with a compatible monomer liquid. Once mixed, the product forms a workable bead that gradually hardens. The powder you choose affects opacity, color, and the amount of time you have to shape the bead.
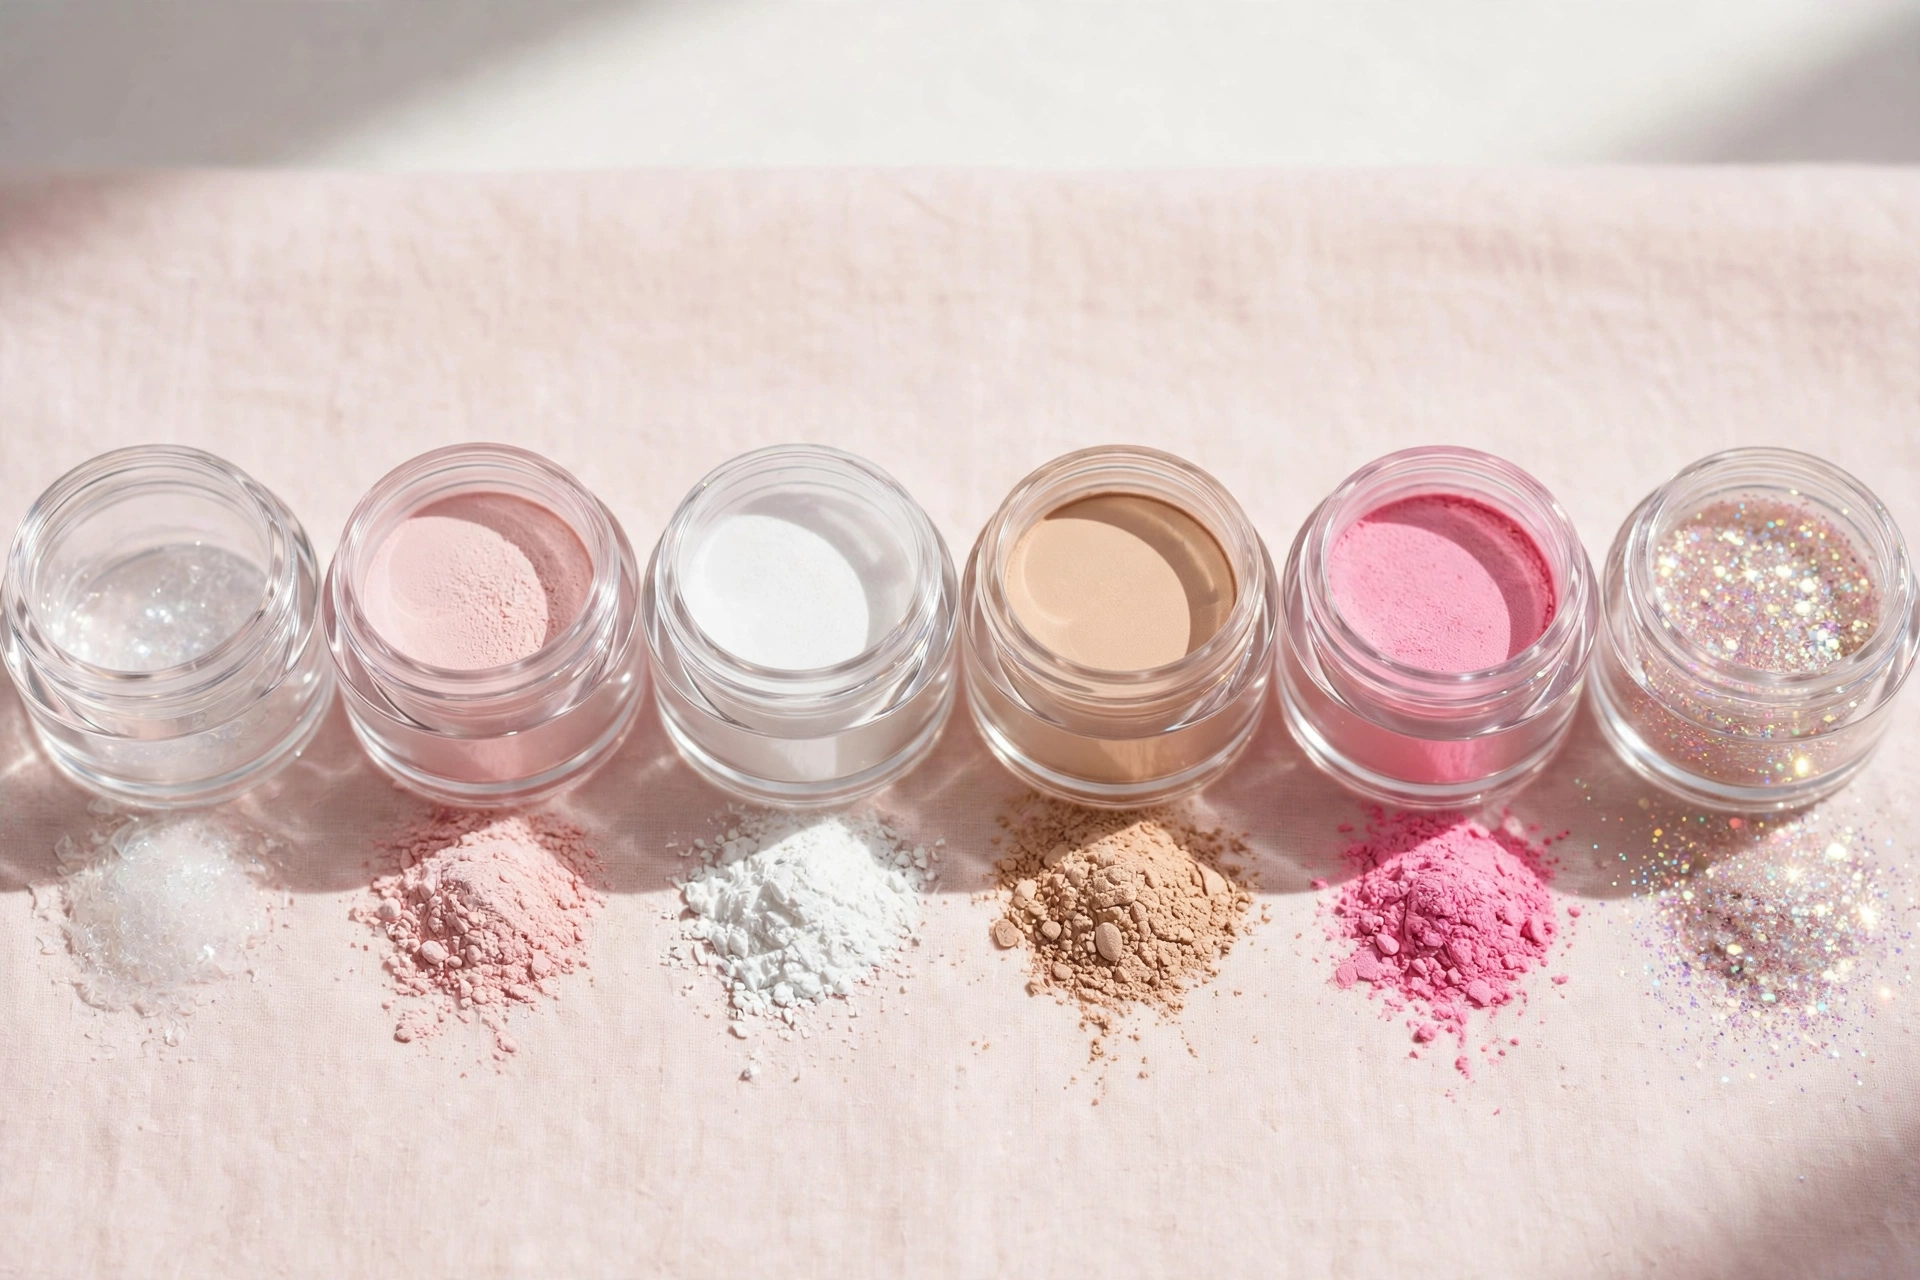
Common types of acrylic powder for nails include:
- Core powders: Clear, pink, and white powders used to build the structure of the enhancement. Clear powder is also useful when you want the underlying design to show through.
- Cover powders: Opaque pink, beige, and skin-tone shades that can make the nail bed look more uniform or conceal the natural nail line.
- Colored acrylic powders: Pigmented powders used to create colored sections without relying only on polish.
- Glitter powders: Powders containing decorative particles for sparkle or texture. Check how the particles affect the product’s consistency and application.
These are the main types of acrylic nails powder you may see in a kit. The right option depends on whether you need a clear base, a cover shade, a French-style white, or color for a specific design. “Fingernail acrylic powder” is not a separate chemical category; the important details are the intended nail use, the ingredients, and the compatibility with the liquid.
Setting speed is another consideration. Slow-set powder gives you more working time and can be easier to learn with. Medium-setting systems offer a balance, while fast-setting products are generally better suited to experienced users who can place and shape beads quickly. Powder and liquid work as a system, so check the manufacturer’s guidance rather than assuming any powder will perform the same with any liquid.
Acrylic liquid (monomer): the other half of the system
Monomer liquid is mixed with acrylic powder to form the bead used to build the nail. The liquid is not a substitute for the powder: both components are necessary for a traditional acrylic system.
Choose a clearly labeled EMA (ethyl methacrylate) monomer made for nail use. Avoid MMA (methyl methacrylate) monomer and any unlabelled liquid whose ingredients cannot be verified. MMA has been associated with serious nail injuries, and its use in nail products is restricted or prohibited in some jurisdictions. The US Food and Drug Administration has documented injuries associated with artificial nail products containing MMA monomer.
EMA does not mean risk-free. Methacrylate ingredients can cause allergic reactions, especially when uncured product repeatedly touches the skin. Work in a well-ventilated area, keep liquid and uncured acrylic off the skin, and follow all label precautions. Do not continue using a product if you develop a concerning reaction.
The powder-to-liquid ratio affects how the acrylic bead behaves. A properly balanced bead should look smooth and manageable rather than watery or crumbly. Too much liquid can make the mixture overly wet and difficult to control; excess product may spread toward the skin and increase exposure. A bead that is too dry may look grainy and be difficult to place evenly. Follow the kit instructions and practice before working on your natural nails.
Beginner vs professional acrylic nail kits
An acrylic nail kit for beginners should prioritize clear labeling, manageable setting time, compatible components, and useful instructions. A beginner acrylic nail kit does not need dozens of colors or decorative extras. A small, well-chosen set of supplies is easier to understand and troubleshoot.
A professional acrylic nail kit may include larger powder and monomer containers, a higher-quality brush, more color choices, and extra tools. A professional nail kit for acrylic nails may also assume that the user already knows how to prepare the nail plate, control beads, and maintain hygiene.
Typical US price ranges in 2026 are approximately:
- Beginner kits: $15–$40
- Professional kits: $50–$120 or more
These are broad estimates, not guaranteed prices. Compare the ingredients, quantities, brush quality, preparation products, and instructions rather than judging by price alone. A more expensive kit is not automatically safer or easier to use, and a low-cost kit is not good value if it omits essential supplies or uses unclear labeling.
For an acrylic set for beginners, prioritize a clearly labeled EMA-based liquid, slow- or medium-setting powder, a suitable brush, preparation products, files, and reliable instructions. Skip large decorative bundles until you know which materials you actually use.
How to choose a good acrylic powder
There is no single best acrylic powder for every user. A good acrylic powder should be intended for nail use, work with its specified monomer, have a consistent texture, and provide enough working time for your skill level.
Use these criteria when comparing powders and acrylic powder brands:
- Consistent texture: Fine, evenly blended powder can help produce more predictable beads. Lumps or uneven pigment distribution may make application less consistent.
- Suitable setting time: Beginners usually benefit from a slower-setting system, while fast-setting formulas require quicker, more confident placement.
- Reliable color: Clear powder should suit the finish you want, and pigmented or cover powders should have an even appearance. Check how the shade looks after the product hardens, not only in the container.
- Transparent labeling: Look for clear ingredient information, directions, warnings, and manufacturer details. Avoid unlabeled monomer or powders with no clear intended use.
- Compatible products: Check the manufacturer’s instructions for the liquid, powder, primer, and dehydrator. Do not assume that mixing different systems will give predictable results.
- Suitable quantity: Smaller containers may make more sense while learning, because acrylic products must be stored and handled properly and should not be kept indefinitely.
When researching the best acrylic powder or a best acrylic powder brand, compare these practical factors instead of relying on a ranking. Professional brands can be useful examples to research, but no brand should be treated as universally best without evidence that its specific product fits your needs.
Colored acrylic powder can be used for a finished color or design, while clear and cover powders are more commonly chosen for structure and opacity. Buy based on the result you want and the instructions for the system, not on the number of shades included.
How to use an acrylic nail kit at home
Learning how to do acrylic nails at home with a kit takes practice. Start with the kit’s instructions and practice bead pickup on a practice sheet before attempting a wearable set. Keep the first attempt simple; consistent placement is more important than speed.
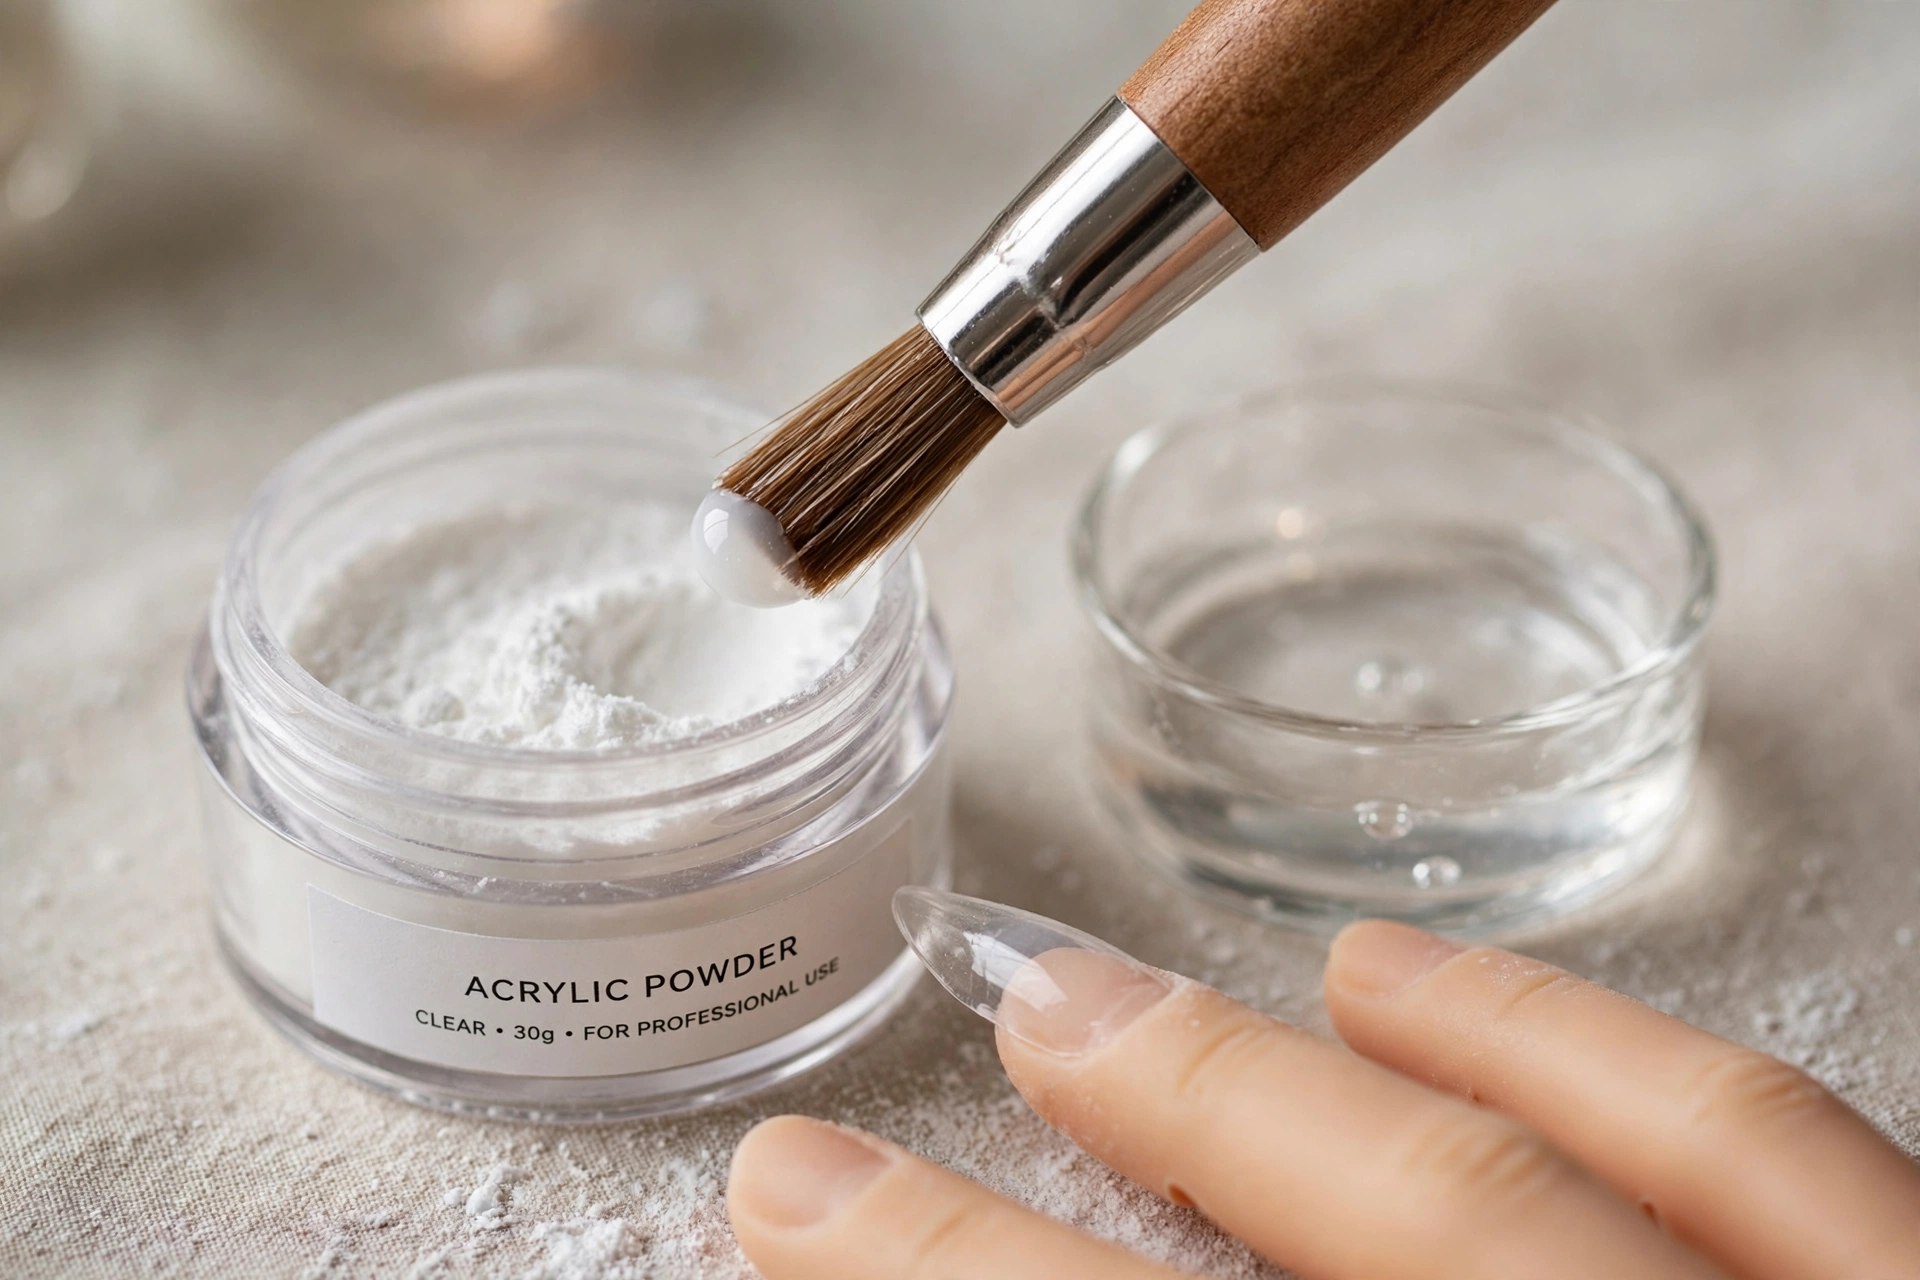
The basic workflow is:
- Prepare the nails. Remove existing polish, wash and dry your hands, and gently push back the non-living cuticle tissue. Avoid cutting living cuticle skin or aggressively filing the natural nail.
- Use the specified prep products. Apply dehydrator and primer as directed by the system. Keep all liquids and uncured product away from the skin.
- Set up the workspace. Work with good ventilation, arrange your brush and dappen dish, and use only the amount of monomer needed for the session. Follow the product’s storage and safety instructions.
- Practice picking up a bead. Dip the brush into the monomer, then pick up a small amount of powder. Adjust your technique according to the manufacturer’s instructions until the bead looks smooth and controllable.
- Build the enhancement. If using nail tips or forms, follow the kit’s directions for fitting them. Place and shape the acrylic carefully, keeping it off the surrounding skin. Do not try to correct flooding by simply spreading the product further.
- Let the acrylic harden. Traditional acrylic cures in the air. Do not put it under a UV or LED lamp to cure it; the lamp is not needed for this system.
- File and finish. Once the product has hardened as directed, refine the surface and shape with suitable files. Avoid filing the natural nail excessively, and finish with a compatible top coat if desired.
A wearable set may take several attempts to achieve. If the product repeatedly floods the skin, forms grainy beads, or lifts soon after application, stop and review your preparation, bead control, and product compatibility rather than adding more layers.
For nail art with acrylic powder, colored powders can create small raised details such as 3D flowers, while clear acrylic can be used for encapsulation when the system supports it. These techniques require control and are best practiced on a nail tip first; this guide does not cover a full nail-art tutorial.
Full sets, fills & refill kits
An acrylic full set is a new application over the natural nails, with extensions added when needed. A first full set usually uses more product because the nail structure has to be built from scratch. The amount required depends on nail length, the number of extensions, and the user’s technique.
As the natural nails grow, a gap appears near the cuticle area. A fill is commonly needed around every 2–3 weeks, depending on growth, wear, and the condition of the enhancement. A fill is not simply adding acrylic on top: the existing product must be checked, and any lifting must be handled correctly before the area is rebalanced.
An acrylic nail refill kit or acrylic nail fill kit may contain smaller quantities of powder and liquid, plus files or other maintenance supplies. It may not include tips, forms, or every preparation product. Check the contents against what you already own before buying a refill kit.
If acrylic has lifted, do not cover the gap with fresh product. Moisture and debris can become trapped beneath lifted material. Have a qualified nail professional assess the enhancement if you are unsure how to handle it. If you suspect a nail infection or fungus, consult a dermatologist rather than trying to cover or diagnose the problem yourself.
Acrylic kit mistakes to avoid
A kit can look complete and still be a poor choice. Watch for these common mistakes:
- Buying unlabelled or MMA monomer: Choose a clearly labeled EMA-based nail liquid and avoid MMA.
- Ignoring ventilation: Acrylic liquid has a strong odor. Work in a well-ventilated area and follow the label’s precautions.
- Letting product touch the skin: Repeated contact with uncured monomer or acrylic can trigger sensitization. Keep it off the skin rather than relying on cleanup after exposure.
- Choosing a poor-quality brush: A brush that cannot hold or release a bead predictably makes learning harder.
- Skipping necessary preparation products: Check whether primer and dehydrator are included or required separately.
- Mixing systems without checking compatibility: Different powders and liquids may not perform as expected together. Follow manufacturer guidance.
- Buying a kit without instructions: Clear directions and warnings are essential, especially for beginners.
- Forcing removal: To remove acrylic, file down the surface and soak the remaining product in acetone for around 15–20 minutes, following the product’s instructions. Gently remove only softened material. Never pry or force acrylic off, because this can lift layers of the natural nail.
Store products as directed, keep containers closed when not in use, and do not use expired or altered products. The number of sets a kit will provide varies widely with container size, nail length, how much product is used, and whether applications are full sets or fills. A first full set generally consumes more material than a routine fill, so a precise set count cannot be promised.
Frequently asked questions
Does an acrylic nail kit need a UV lamp?
No. A traditional acrylic system made from polymer powder and monomer liquid hardens in the air at room temperature. A UV or LED lamp is not needed to cure the acrylic itself.
How do you make acrylic powder at home?
You do not make genuine acrylic nail powder at home. It is a manufactured polymer product designed for use in a specific nail system. Homemade recipes are not a reliable substitute for formulated nail products, so buy labeled powder intended for nail use instead.
How long does one acrylic nail kit last?
It depends on the amount of powder and liquid in the kit, the length of the nails, and how much product is used per application. A kit with several full-size containers may last through multiple sets and fills, while a small starter kit may run out sooner. Follow storage instructions and replace products that are no longer suitable for use.
Can beginners do acrylic nails at home?
Yes, beginners can practice at home, but the system requires careful preparation, bead control, ventilation, and strict avoidance of skin contact. Start with practice tips and simple applications. If you cannot keep the product off your skin or identify a safe, clearly labeled system, it is better to learn from a qualified nail professional.
What is the difference between acrylic powder and dip powder?
Traditional acrylic powder is mixed with monomer liquid to create a workable bead. Dip systems typically use a specialized adhesive or resin with dipping powder and follow a different application process. Do not assume that the powders or liquids are interchangeable.
Is a kit cheaper than salon full sets?
A beginner kit may cost around $15–$40, while a salon acrylic full set commonly costs about $50–$80 or more in the US, before future fills. The kit’s upfront cost can be lower, but you may need additional supplies and practice materials, and mistakes can waste product. Compare the full cost and time involved rather than assuming home application will always be cheaper.
A suitable acrylic nail kit should have clearly labeled EMA-based monomer, compatible powder, a useful brush, essential preparation tools, and instructions you can follow. Choose a system for your experience level, practice before applying it to natural nails, and make safe handling a priority over extra colors or accessories.
Last reviewed: October 2026 — Editorial Team, Polish Haven