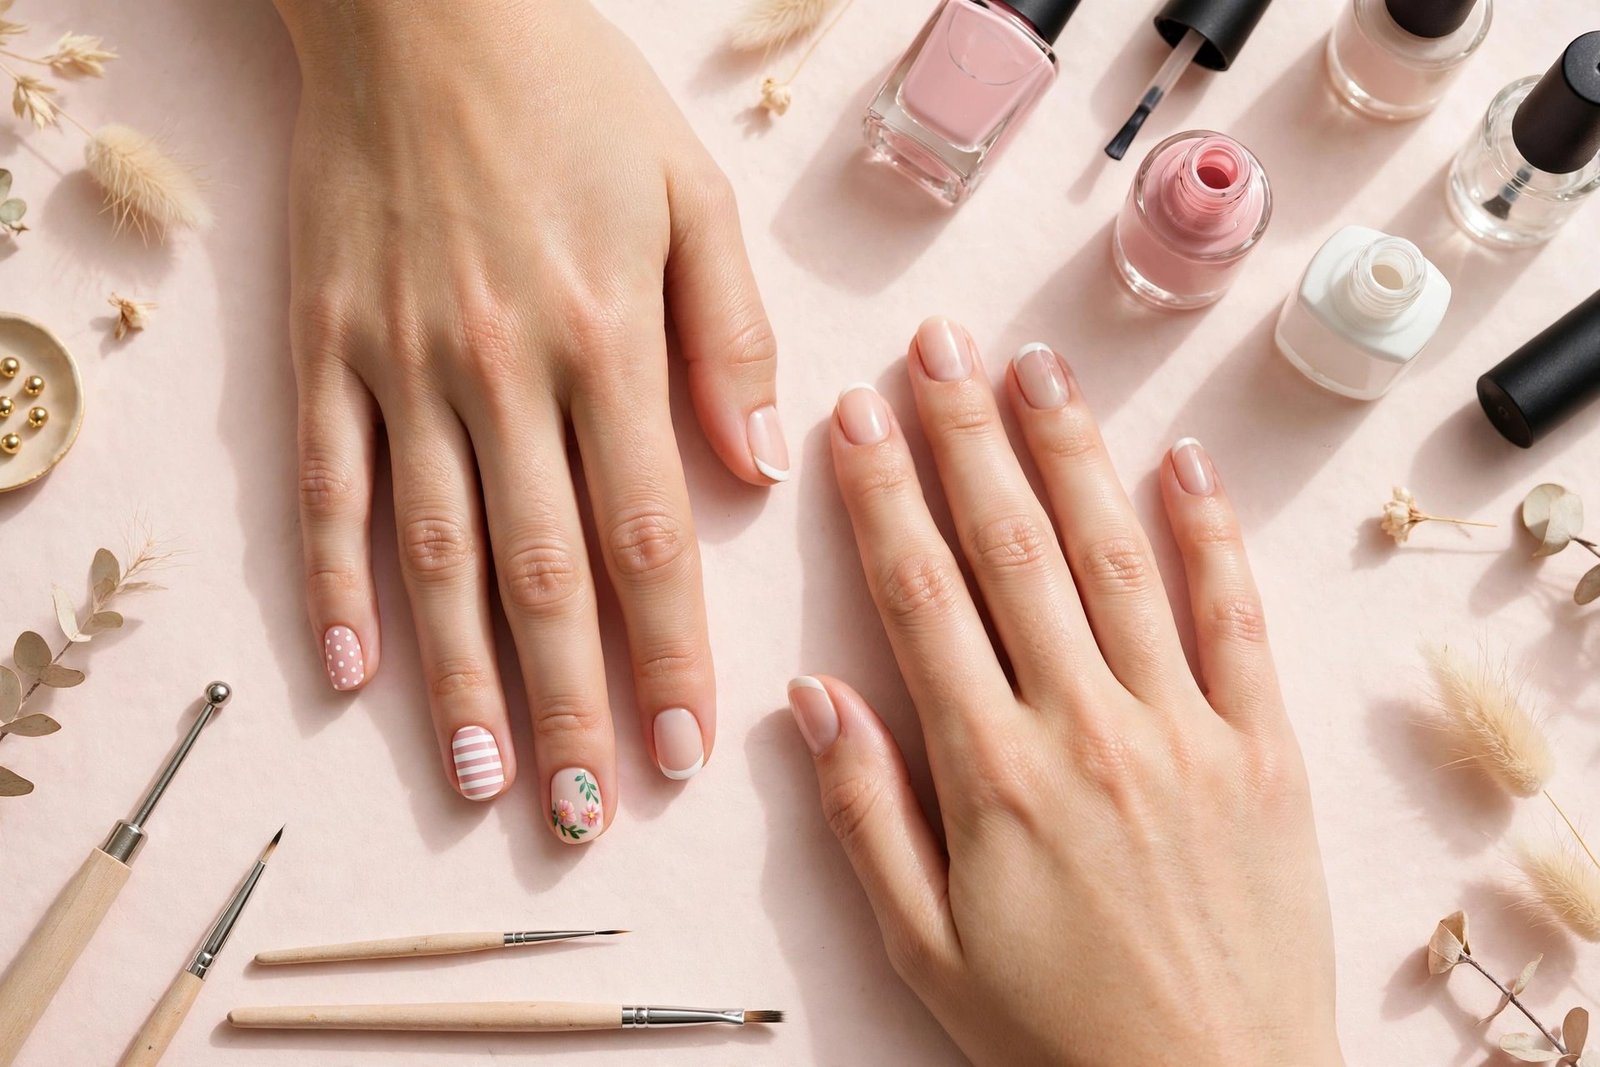

Nail art designs are decorative patterns, colors, and details applied to the natural nail or over nail polish, using techniques such as hand painting, stamping, stickers, foil, and rhinestones. The right design can be as simple as a few dots or as detailed as a custom illustration, depending on your skill, time, and preferred look. This guide covers the main nail art styles, five beginner-friendly techniques, colorful combinations, occasion-based ideas, wear time, and safe removal.
Updated for October 2026, this guide helps you choose nail designs that suit your routine, learn what you can create at home, and understand which techniques require more practice.
What is nail art?
Nail art is the practice of decorating nails with colors, patterns, textures, or small decorative elements. It can be painted directly onto the nail plate, layered over a base color, or applied using a decal, stamping plate, foil, or other nail-safe decoration.
The main styles of nail art include:
- Hand-painted designs: Dots, lines, flowers, abstract shapes, lettering, and illustrations created with brushes or dotting tools.
- Pattern-based designs: Repeating stripes, checks, waves, animal-inspired patterns, and geometric shapes.
- Color-focused designs: Color blocking, rainbow combinations, gradients, and coordinated single-color manicures.
- Decorative designs: Foil, chrome powder, rhinestones, and other nail-safe embellishments.
- Applied designs: Stickers, decals, and wraps that add a pattern without requiring advanced drawing skills.
The difference between nail art styles often comes down to the tools and technique rather than the complexity of the final result. A neat line design can look polished with only two colors, while a detailed hand-painted illustration may take considerably more time and practice.
Nail art is also flexible. You can decorate every nail with the same pattern, place a design on one nail as an accent, or use a different design on each finger. There is no single correct way to create a finished manicure.
The main types of nail art designs
The easiest way to choose among different types of nail designs is to consider three things: how difficult the technique is, how much time it takes, and how much detail you want. The following style map covers common nail design styles without requiring you to master every technique.
| Style | Difficulty | Best for | Typical cost |
|---|---|---|---|
| Single-color manicure | Beginner | Simple, coordinated everyday nails | Low at home; basic salon service |
| Dot and line patterns | Easy to medium | Small details, stripes, and repeat patterns | Low at home; salon add-on varies |
| Sticker or decal art | Beginner | Quick designs with consistent details | Low to moderate at home |
| Stamping | Easy after practice | Repeating images and crisp patterns | Low to moderate at home |
| Color blocking | Beginner to medium | Clean shapes and contrasting colors | Low at home |
| Sponge gradient or ombre | Medium | Soft transitions between shades | Low to moderate at home |
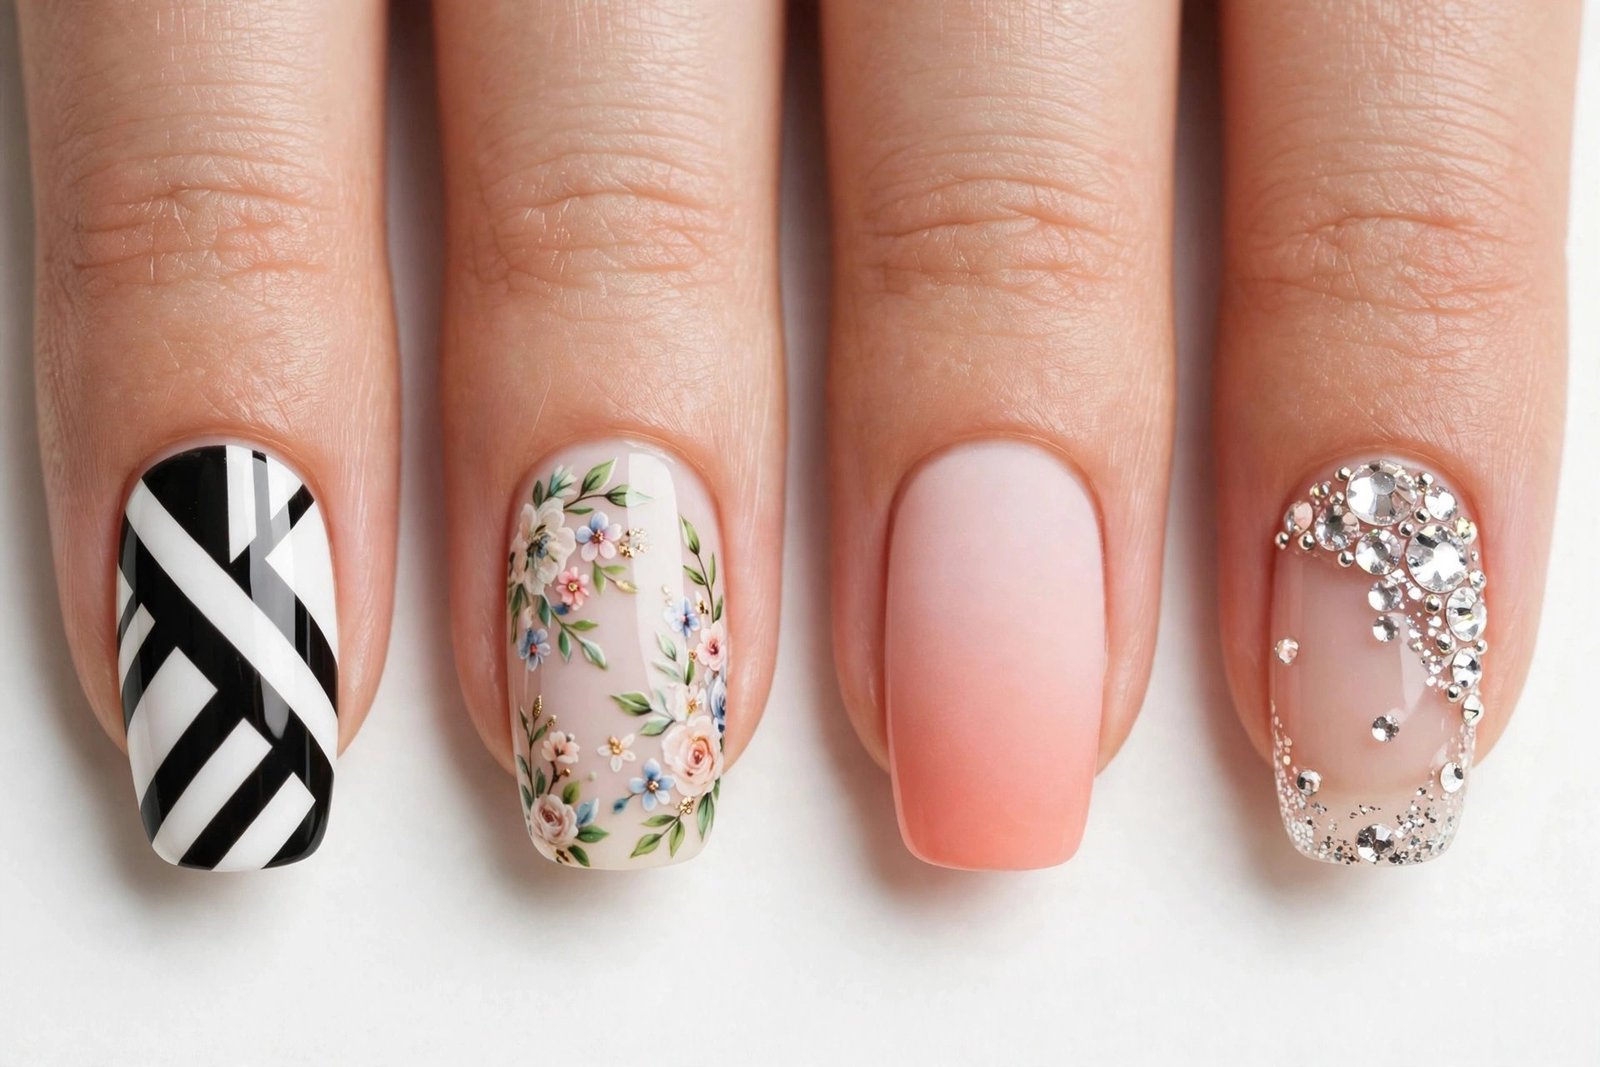
| Graphic and geometric art | Medium | Sharp lines, checks, grids, and abstract shapes | Low to moderate at home |
| Hand-painted florals or illustrations | Advanced | Detailed, individual artwork | Moderate to high at a salon |
| Foil, chrome, or glazed effects | Easy to medium, depending on the product | Reflective finishes and metallic accents | Low to moderate at home |
| Rhinestones and 3D decorations | Medium | Raised details and statement manicures | Moderate to high at a salon |
Cost guide: At-home costs depend on which supplies you already own. Salon pricing varies by location, artist, design complexity, and whether art is charged per nail or as a set add-on.
How the main styles differ
Graphic nail art uses deliberate lines, blocks, curves, grids, or shapes. It can look bold or understated depending on the colors and amount of detail. A striping brush and steady hand help with precise lines.
Hand-painted nail art covers designs drawn directly onto the nail, from tiny hearts and dots to complex illustrations. Start with basic shapes before attempting detailed artwork.
French manicure designs add a contrasting tip to the nail; the classic version uses a pale base and a light tip. More elaborate versions can use different colors or decorative lines, but the full French-tip guide belongs in its own tutorial.
Ombre and gradient designs blend one shade into another rather than creating a sharp dividing line. A sponge gradient is a common way to achieve this effect at home.
Glitter, chrome, and glazed designs add shine or reflective texture. The finish depends on the product and application method, so follow the manufacturer’s directions and avoid applying cosmetic powders or adhesives in ways they were not designed for.
Minimalist designs use restrained details, such as one fine line, a tiny dot, or a small accent. When less is more, a clean base color may be all you need.
Other nail design themes include cute motifs, abstract art, pastel colors, floral patterns, gems, charms, and alternative graphic looks. Each family can be adapted to a subtle or bold manicure without changing the basic technique.
DIY nail art for beginners: 5 techniques that actually work
You do not need professional drawing skills to create nail art at home. The most useful beginner techniques rely on simple tools, manageable patterns, and enough drying time between layers. Start with one or two colors and repeat the same design on a few nails before trying a more detailed look.
1. Dotting: make dots, petals, and tiny hearts
Difficulty: Easy
A dotting tool has a rounded tip that transfers small amounts of polish onto the nail. If you do not have one, a clean tool with a small rounded end can work for practice, provided it is suitable for nail use and does not scratch the surface.
- Apply a base coat and let it dry.
- Add one or two thin coats of your chosen base color.
- Place a small amount of contrasting polish on a palette.
- Dip the dotting tool lightly into the polish and press it onto the nail.
- Make evenly spaced dots, or arrange five dots in a circle to create a simple flower.
- Allow the design to dry before sealing it with top coat.
Use less polish than you think you need. Large blobs are harder to control and take longer to dry. Dot patterns are a practical starting point for DIY nail art ideas because they can look intentional even when the spacing is not perfectly uniform.
2. Striping: draw lines and simple geometric shapes
Difficulty: Medium
A striping brush has long, thin bristles that help create straight lines, curved lines, grids, and narrow color blocks. A fine detail brush is better for small shapes and lettering.
- Apply your base color and let it dry thoroughly.
- Load the striping brush with a small amount of polish.
- Rest your hand on a stable surface.
- Draw one line in a single controlled movement.
- Let the line dry before adding crossing lines or another color.
- Seal the design with top coat, moving gently so you do not drag the artwork.
Start with one vertical line or two parallel stripes. Once your hand feels steady, try checks, waves, or a simple abstract pattern. If the brush leaves thick lines, wipe off some polish before continuing.
3. Stamping: transfer a repeating pattern
Difficulty: Easy after the plate is prepared
Nail stamping transfers an engraved design from a stamping plate onto a stamper, then onto the nail. It is useful for crisp patterns that would be difficult to draw by hand.
- Apply your base color and let it dry.
- Apply stamping polish to the chosen pattern on the stamping plate.
- Scrape away excess polish using the plate’s recommended technique.
- Roll the stamper gently over the image to pick it up.
- Press or roll the image onto the nail, following the stamper’s instructions.
- Allow the pattern to settle before applying a compatible top coat.
Work efficiently because stamping polish may dry quickly. Clean the plate and stamper as directed between attempts. Practicing on a piece of paper or a practice nail first can help you understand how much polish to use.
4. Sponge gradients: blend two or more colors
Difficulty: Medium
A sponge gradient blends shades into one another for a soft transition. It can create a subtle two-color effect or a more colorful design with several shades.
- Apply a base coat and let it dry.
- Paint two or three thin stripes of polish next to each other on a small makeup sponge.
- Dab the sponge lightly onto the nail.
- Repeat with thin layers until the colors look blended and even.
- Allow the design to dry before applying top coat.
- Clean polish from the skin around the nail with an angled cleanup brush dipped in acetone.
Use light dabbing motions instead of pressing hard. A gradient may need several thin applications; thick layers can smudge or create a bumpy surface. This method works well for colorful nail inspo when you want blended colors rather than sharp borders.
5. Stickers and decals: add detail without drawing
Difficulty: Beginner
Nail stickers and decals are among the easiest ways to add small images, fine patterns, or decorative details. They are useful when you want a consistent result without freehand painting.
- Apply your base color and wait until it is completely dry.
- Select a decal that fits the nail without folding over the sidewalls or cuticle.
- Apply it according to its instructions. Some designs are self-adhesive; others need water or a separate application step.
- Smooth it gently so there are no raised edges or trapped air pockets.
- Seal with a compatible top coat if the product instructions allow it.
Do not pull at a sticker that is firmly attached to the nail or use a sharp tool to scrape it off. Follow the product’s removal instructions. Press-on nails, wraps, and sticker systems have their own application and removal considerations, so do not assume every product works the same way.
Basic tools for nail art at home
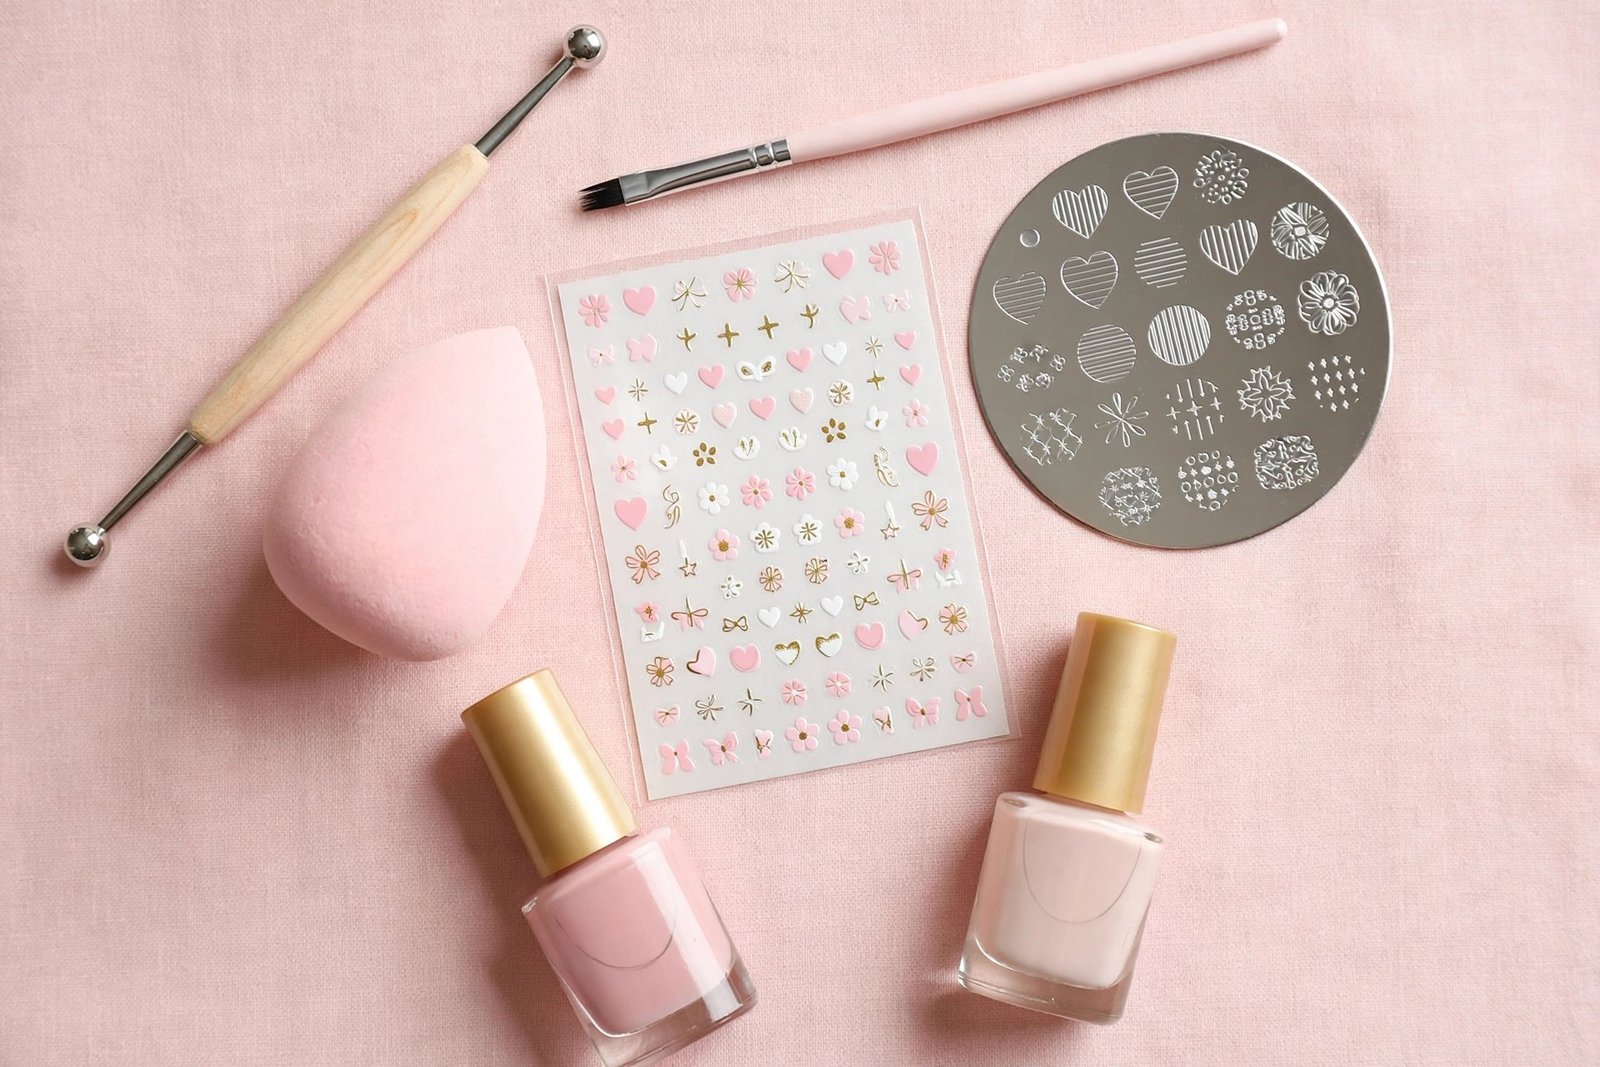
You can build a small set of tools over time rather than buying everything at once. Useful at-home manicure products for nail art include a dotting tool, striping brush, detail brush, stamping plate and stamper, makeup sponge, nail art tape, foil made for nail use, an angled cleanup brush, and top coat. You will also need nail polish, a base coat, a nail file, and an appropriate remover.
Beginner tip: Let each layer dry for about 2–3 minutes before the next step as a starting point, but follow the product label and allow more time when needed. Thick coats take longer to dry and are more likely to smudge your artwork. For products that require curing, use the specified lamp and curing time rather than relying on air-drying.
Patch-test new nail products or adhesives according to their instructions before regular use. Stop using a product if you develop irritation.
Colorful nail designs: from one color to rainbow
Color can change the entire mood of a manicure, even when the pattern stays simple. You can use one shade on every nail, alternate two colors, divide each nail into blocks, or blend several shades into a gradient. The best approach is to choose a color plan before you start painting.
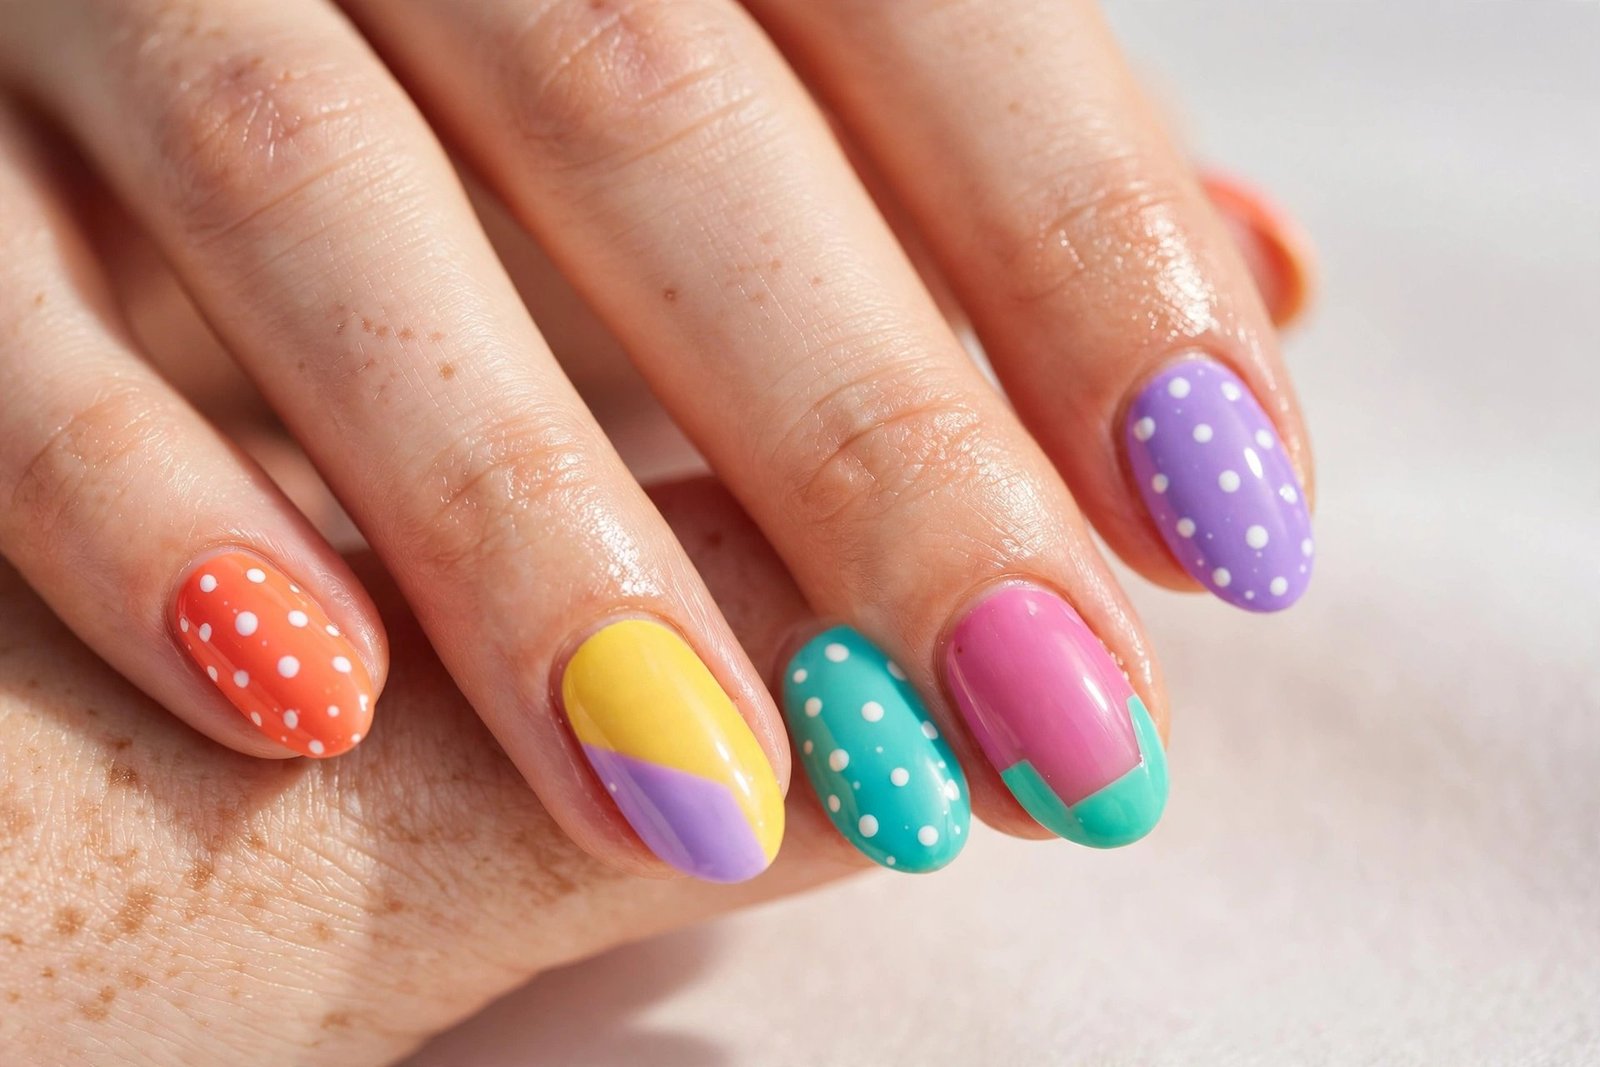
One-color nail designs
A single-color manicure is an easy way to create a coordinated look without drawing patterns. Choose a shade that suits the occasion and your personal taste, then use thin, even coats for a smoother finish.
For a little variation without adding another color, consider a matte finish on some nails and a glossy finish on others, provided the products are compatible. A single-color base can also make one small accent nail stand out.
Color blocking and two-color designs
Color blocking uses clearly separated sections of different colors. You can divide a nail diagonally, create a half-moon near the cuticle, or place two contrasting blocks side by side.
- For a coordinated look: Combine two shades with a similar undertone, such as warm pink and peach.
- For contrast: Pair a light shade with a dark one.
- For a softer effect: Use two neighboring shades, such as pale blue and blue-green.
- For a graphic look: Add a thin line between color blocks or leave a narrow strip of the base color visible.
Nail tape can help create crisp borders, but apply it only when the underlying polish is dry enough to avoid lifting.
Rainbow and multiple-color nail ideas
Rainbow designs do not have to use every color on every nail. Try assigning a different shade to each finger, repeating three colors across the hand, or using several colors in a row of small dots. These colorful nail ideas work particularly well when the pattern stays consistent across the manicure.
For a balanced result, decide which color should be most prominent and use the other shades as accents. If every color is equally bright, simple shapes can keep the design from looking visually crowded.
Choosing colors that work together
A few basic color principles make planning easier:
- Monochromatic: Use lighter and darker versions of the same color.
- Analogous: Choose shades next to one another on the color wheel, such as blue, blue-green, and green.
- Complementary: Pair colors opposite each other on the color wheel for stronger contrast.
- Neutral plus accent: Use a neutral base with one bright or metallic detail.
Light nails ideas might combine milky white, pale pink, or beige with a small pastel accent. Dark color nail art can use black, deep blue, burgundy, or forest green with a contrasting line or metallic detail. Neither approach requires elaborate artwork to look finished.
How to plan a colorful manicure
Before painting, lay out the colors you plan to use and decide which shade goes on each nail. If you want a different color on every finger, repeat a color or pattern somewhere to tie the look together. If you prefer a quieter result, use one main shade and reserve the brighter colors for small details.
There is no need to force a design onto every nail. A well-chosen base color with one contrasting detail can be just as effective as a full set of colorful patterns.
Simple & everyday nail art ideas
Everyday nail art can be subtle, colorful, playful, or graphic. The easiest way to make a design wearable is to control the amount of detail: use a few small elements, keep the colors coordinated, or decorate just one nail.
Accent nails and one-nail designs
An accent nail features a different color, pattern, or finish from the rest of the manicure. It is a practical option when you want to experiment with nail art without painting a detailed design on every finger.
Try these one nail design ideas:
- Paint one nail with small dots while keeping the others a solid color.
- Add a single metallic line to one finger.
- Draw a tiny heart or star on one nail.
- Use a different color on the ring finger.
- Create a small checkerboard or abstract shape on one nail and leave the others plain.
- Add a simple initial to one fingernail for a personalized detail.
A design on one nail can be easier to maintain than a full set of intricate artwork. It also lets you test a new technique before repeating it across the manicure.
Different designs on each nail
A different design on each nail can still look cohesive if you keep one element consistent. For example, use the same base color on every finger, repeat two colors throughout the set, or keep all the designs within one theme.
You could pair dots, stripes, small stars, abstract curves, and color blocks across five nails. For a more spontaneous look, choose a small set of motifs and place them differently on each finger. This creates a random nail art effect without making the overall manicure feel unrelated.
Casual nail art for daily wear
Casual nail art often relies on easy-to-maintain patterns and colors that work with different outfits. Consider:
- A small dot near the cuticle area, leaving the surrounding nail plain.
- Thin stripes over a neutral base.
- Two-tone color blocking.
- A tiny graphic on one or two nails.
- A dark base with a narrow contrasting line.
- A soft pink or beige base with one simple painted detail.
Feminine nail designs and girly nail inspo can include bows, hearts, tiny flowers, pastel accents, or delicate dots. These are style choices, not rules: any color or motif can be adapted to your preferences.
If you want an everyday manicure with almost no decoration, that is also a valid choice. No design nails can be a useful reminder that sometimes less is more; the dedicated minimalist guide will cover that style in greater detail.
Patterns and drawn nail designs
A nail pattern can be as simple as repeating dots or as structured as checks, waves, or intersecting lines. Begin with a base color that contrasts clearly with the pattern color, and use a detail brush for small marks.
Hand-drawn nail designs do not have to look identical on both hands. Small differences can be part of the handmade look. If precision matters to you, practice the pattern on paper before drawing on the nail.
Nail art for special occasions
The best design for an occasion depends on the dress code, your personal style, and how much detail you want. You do not need an elaborate manicure for every event; a coordinated color and a small accent can look appropriate in many settings.
Work, interviews, and formal events
Formal nail art designs often use a restrained color palette, fine lines, small dots, or a single accent. Neutral shades, soft pinks, muted colors, and deeper solid colors can work well when you want a polished appearance without a busy pattern.
For work or an interview, consider a small accent on one nail, a thin metallic line, or a clean geometric detail. If your workplace has specific dress or safety requirements, follow those first.
Weddings and romantic occasions
Romantic nail art ideas can include delicate hearts, fine lines, soft color combinations, or a small decorative detail over a neutral base. For weddings, coordinate with your outfit if you wish, but avoid assuming that every wedding manicure must be pale or understated.
For a more detailed, refined look, the future classy-and-elegant guide will cover its own range of designs. Cute and trendy styles also have a separate guide, so this pillar keeps occasion advice broad rather than providing full tutorials for every look.
Valentine’s Day designs and other holiday-specific looks belong in the site’s seasonal and holiday guides rather than this general overview.
Evening events and glamorous designs
Glamorous nail art designs can use reflective finishes, contrast, metallic details, or rhinestones. If you choose raised decorations, keep their placement practical: large gems and charms can catch on clothing or hair, and they need suitable anchoring.
For a more understated evening manicure, use one reflective accent against a solid base rather than adding embellishments to every nail. The aim is to choose a design that suits the event and remains comfortable to wear.
Nail art themes & styles trending in 2026
Nail art trends change throughout the year, but many modern nail art designs are variations on familiar ideas: strong color combinations, small illustrations, abstract lines, texture, and patterns that can be adapted to different preferences. Rather than treating every trend as a rule, use the following themes as starting points.
Graphic and abstract themes
Graphic nail art uses lines, blocks, checks, curves, or shapes to create a deliberate pattern. Abstract designs allow more freedom: marks can be asymmetrical, and the pattern does not need to represent a recognizable object.
Try a few curved lines over a plain base, contrasting shapes on alternate nails, or a grid pattern on one accent nail. These approaches can look bold without requiring a complicated illustration.
Cute and playful themes
Cute nail themes often use small stars, hearts, bows, smiley faces, or other simple motifs. Girly nail designs can also combine pastel shades with tiny decorative details. The same ideas can be made more subtle by reducing the number of motifs or choosing a neutral background.
Bold and alternative themes
Bold nail art designs may use high contrast, saturated colors, strong graphic shapes, or larger decorative details. Alternative nail art can combine dark colors with unusual patterns, asymmetric placements, or unexpected color combinations.
If you want unusual nail art designs, start by changing one element of a familiar pattern: use contrasting colors for a classic stripe, move the design to one side of the nail, or repeat a motif at different sizes. You can make a manicure expressive without relying on a complicated design on every finger.
Nature-inspired designs
Nature nail art can feature leaves, flowers, clouds, or other natural motifs. A single small leaf or flower can serve as an accent; detailed floral tutorials belong in the dedicated floral and nature guide.
Seasonal and month-based themes
Month-based searches, including June nail ideas, often reflect weather, events, and seasonal colors. For a general summer-inspired manicure, you could choose bright shades, simple fruit-like shapes, or a multi-color pattern without tying the design to a specific holiday.
The site’s seasonal guides cover holiday nail art, Halloween looks, and fall designs in more depth. This page stays focused on the broader design methods that can be used throughout the year.
How to choose a theme
Use three questions to narrow your options:
- What look do you want? Minimal, playful, graphic, colorful, or decorative?
- How much time do you have? A few dots are quicker than detailed freehand artwork.
- What can you comfortably create? Choose a technique you can repeat neatly rather than a complex image you may struggle to finish.
A theme can be as broad as color or as specific as stars and stripes. You can also combine two compatible themes, such as pastel colors and geometric shapes, while keeping the design simple enough to complete well.
Name & initial nail art: personalizing your manicure
Name and initial nail art adds a personal detail to a manicure without requiring a large illustration. You can use your own initials, a short name, a meaningful letter, or a tiny word. The most important part is choosing lettering that fits the available space.
How to write names on nails at home
- Apply your base coat and color, then let the polish dry completely.
- Choose a fine striping brush or a nail-art pen specifically intended for nail use.
- Practice the lettering on paper first, especially if you plan to use small cursive letters.
- Use a small amount of polish or nail-art paint and draw slowly.
- Let the lettering dry according to the product directions.
- Seal it with a compatible top coat, using a gentle stroke so you do not drag the letters.
Short initials are often easier to read than a full name on a small nail. If the lettering looks crowded, use one initial per nail or place the design on a single accent nail.
Name-art ideas
- A single initial on a plain base.
- Two initials separated by a tiny dot or heart.
- A short name written across one nail.
- A small letter in a contrasting color.
- Matching initials on two accent nails.
For a clean result, choose a background that gives the letters enough contrast. Fine lettering usually works best with a simple base rather than a busy pattern behind it.
If you want custom press-ons with names, initials, or more complex personalized artwork, that is a separate design category and may require a specialist. This guide focuses on simple personalization you can try at home.
How long does nail art last (and how to make it last)
Nail art generally lasts about as long as the polish or decorative system underneath it. Regular-polish designs may last around 2–7 days, while some nail wraps and sticker sets can last approximately 7–14 days when applied correctly and used according to their instructions. These are typical ranges, not guarantees; natural nail growth, hand use, application, and product formulation all affect wear.
| Technique | Typical wear time | What can affect it |
|---|---|---|
| Regular-polish art | About 2–7 days | Drying time, nail preparation, daily activities, and polish quality |
| Stickers and decals | Varies by product; often several days | Adhesion, placement, and whether the edges are sealed |
| Nail wraps | Around 7–14 days for some products | Application, fit, product directions, and exposure to water |
| Stamping over regular polish | Similar to the underlying manicure, often 2–7 days | Whether the image is dry and properly sealed |
| Rhinestones and charms | Depends on the base manicure and attachment | Snagging, placement, adhesive compatibility, and top-coat coverage |
Ways to help nail art last
- Use thin layers. Thick polish layers take longer to dry and are more likely to smudge.
- Let each layer dry. As a starting point, allow about 2–3 minutes between steps, or longer when the product requires it. Follow the label rather than assuming every polish dries at the same speed.
- Seal the artwork. Apply one or two thin layers of a compatible top coat, following the product instructions. Avoid dragging the brush across wet artwork.
- Protect your hands. Wear suitable gloves for cleaning or prolonged wet work.
- Avoid catching raised decorations. Rhinestones and charms can snag on hair, clothing, and fabrics. Place them where they are less likely to interfere with daily activities.
- Use cuticle oil carefully. Applying oil around the nail can help keep the surrounding skin comfortable, but it does not repair chipped art or replace proper application.
Do not promise yourself a fixed number of wear days. A simple manicure on someone who works with their hands may wear differently from the same design on someone with fewer wet or repetitive tasks.
For more involved nail-care routines, use the site’s dedicated nail-care guide rather than treating nail art maintenance as a substitute for overall nail care.
How to remove nail art without damaging your nails
The safest removal method depends on the product. Regular nail polish, glitter polish, stickers, wraps, and products that require curing may need different removal steps. Read the product instructions first and avoid forcing any decoration off the nail.
Never peel, bite, pry, or scrape nail art off. Pulling at polish or attached decorations can lift layers of the natural nail plate, leaving the surface rough or weakened.
Removing regular nail polish and simple art
- Work in a well-ventilated area and keep remover away from flames.
- Soak a cotton pad with an appropriate nail-polish remover.
- Press it gently against the nail for about 30–60 seconds.
- Wipe toward the nail tip without aggressively rubbing back and forth.
- Repeat with fresh cotton if polish remains.
- Wash your hands if appropriate for the remover, then apply moisturizer or cuticle oil.
Acetone usually removes many regular polishes efficiently, while non-acetone removers may work more slowly or be better suited to certain products. Neither option is universally right for every nail coating. Choose a remover intended for the product you are removing.
Removing stubborn glitter polish
Glitter can take longer to remove because particles may resist a quick wipe. One common method is to place remover-soaked cotton on the nail and wrap it with foil for about 5–10 minutes, provided that approach is suitable for the polish and remover. Check the nail periodically, then wipe gently. Do not scrape remaining glitter from the surface.
Removing stickers, wraps, and raised decorations
Follow the manufacturer’s instructions for stickers, decals, wraps, and rhinestones. Do not pull a firmly attached decoration away from the nail. If a product will not release with its recommended method, seek advice from a qualified nail professional rather than forcing it.
New products and adhesives should be patch-tested according to their instructions. If you notice persistent redness, swelling, pain, discoloration, or other signs that could indicate a nail infection, consult a dermatologist rather than attempting to diagnose or treat the problem yourself.
Nail art for teens: easy school-friendly ideas
Nail art for teens can be creative, affordable, and easy to remove when school rules or personal preferences change. Simple dots, small stars, two-color stripes, tiny hearts, and one accent nail are good options for beginners. For school-friendly nail designs, keep nails at a practical length, choose subtle or coordinated colors if needed, and check any school or activity rules before adding decorations.
For younger teens, start with regular polish and basic tools rather than complicated systems. An adult can help with product directions, ventilation, and removal when needed. Do not use hardware super glue or household adhesives on nails; only use products specifically intended for nail applications, and patch-test new products as directed.
You do not need to buy every tool at once. A dotting tool, one fine brush, two polish colors, and a top coat are enough to try several beginner-friendly patterns. For nails ideas for 12 year olds, small dots, color blocking, and simple accent designs are practical starting points because they require little equipment and do not depend on advanced drawing skills.
Frequently asked questions
What is nail art?
Nail art is decoration applied to the nail using polish, hand-painted patterns, stamping, decals, foil, or nail-safe embellishments. Designs can be simple, such as dots or stripes, or detailed, such as hand-painted illustrations.
How do I start nail art as a beginner?
Begin with a clean nail surface, base coat, two polish colors, and a top coat. Try dots first, then simple lines or stickers. Work in thin layers and allow each one to dry before adding another. Practice on paper or a practice nail if you are learning a new tool.
Which nail art designs last the longest?
There is no single design that lasts longest in every situation. Regular-polish art often wears for around 2–7 days, while some wraps or sticker sets can last about 7–14 days when applied correctly. Product instructions, hand use, and application have a major effect on longevity. Raised gems and charms may snag and need extra care.
What nail art goes with everything?
A coordinated single-color manicure, a neutral base with a small accent, fine lines, or a subtle two-color design can work with many outfits and occasions. If you need a workplace-friendly option, choose a color and level of detail that fit your dress code. The best all-purpose design is one you enjoy wearing and can maintain comfortably.
Can I do nail art with regular nail polish?
Yes. Regular nail polish works for dots, stripes, simple hand-painted designs, stamping products designed for regular polish, and many decals. Use a compatible base coat and top coat, and let each layer dry before adding more detail. For a wider explanation of polish formulas and finishes, refer to the site’s nail-polish guide.
How much does nail art cost at a salon?
In the US, a simple nail-art add-on may cost roughly $5–$15 per nail or $15–$40 extra for a full set, depending on the salon and design. Detailed custom artwork, extensive hand painting, and designs with gems or 3D decorations can cost more. Ask whether the quoted price is per nail or for the full set before booking.
The best nail art designs balance the look you want with the time, tools, and skill you have. Start with dots, stripes, stamping, gradients, or decals, then experiment with color combinations and accent nails as your confidence grows. Keep layers thin, follow product directions, and remove decorations gently instead of peeling them off. With a few reliable techniques, you can create nail art that feels personal without making every manicure complicated.
Last reviewed: October 2026 — Editorial Team, Polish Haven