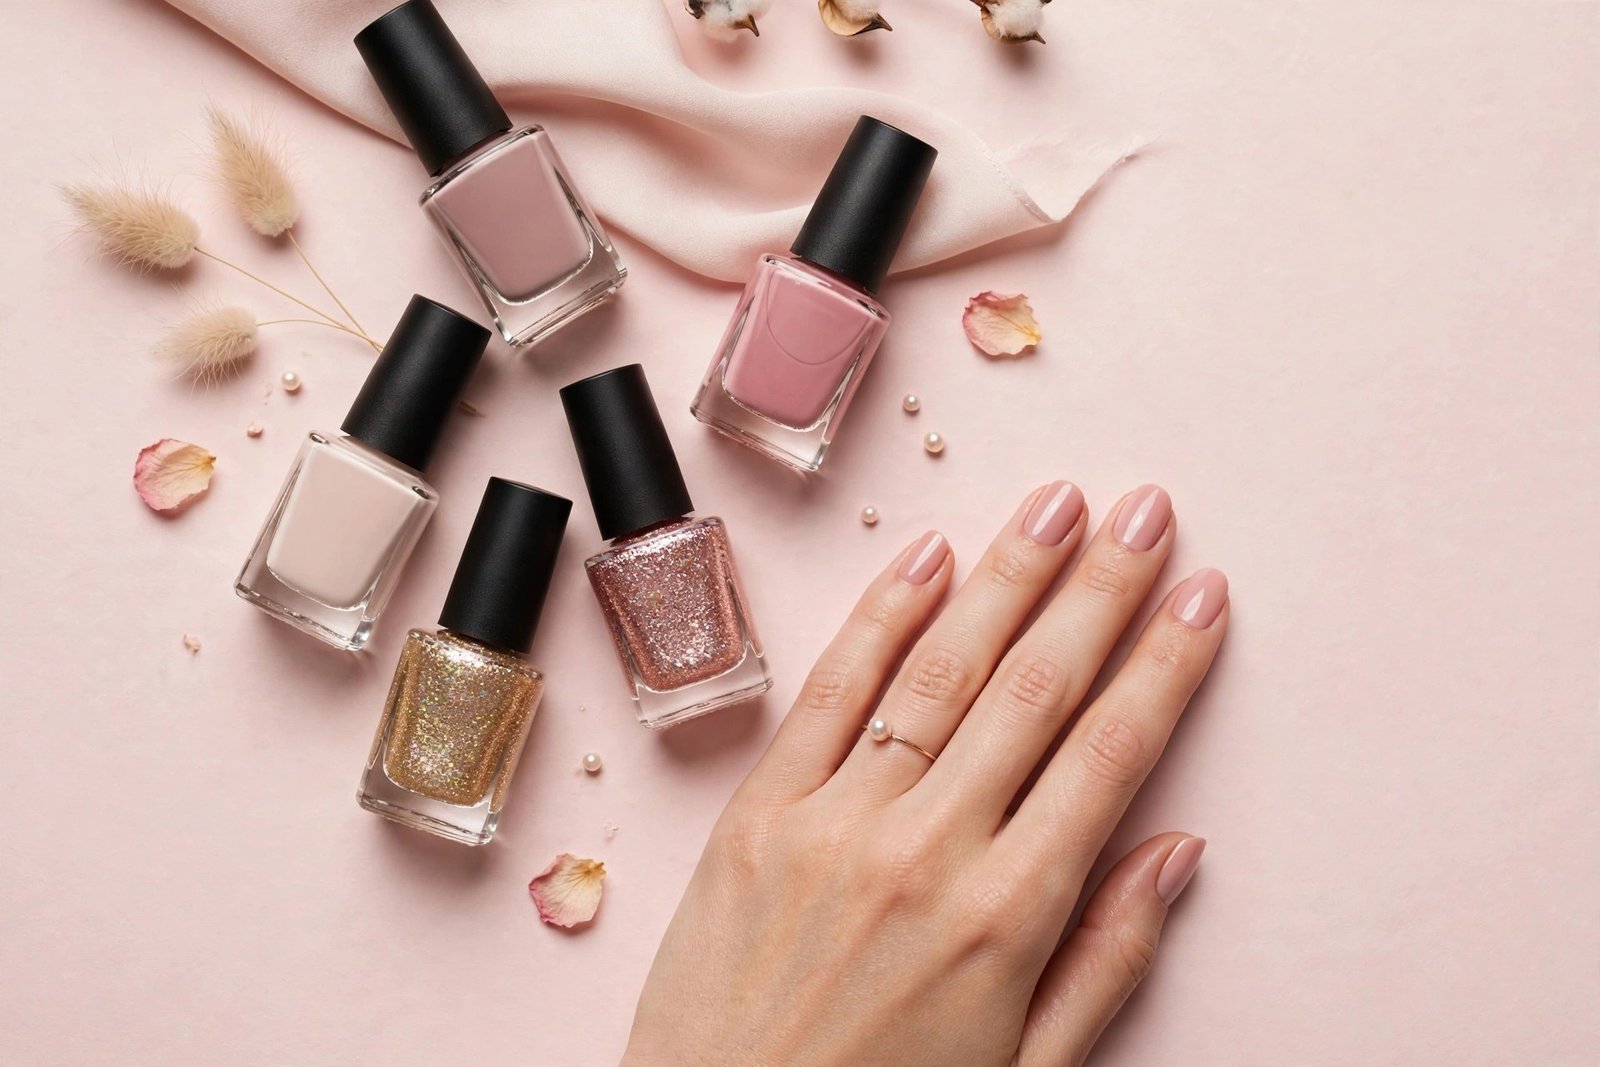

Nail polish is a colored or clear lacquer applied to the nail plate to add color, shine, or a protective-looking finish. The right formula, careful application, and safe removal can help your manicure look smoother and last longer. This guide covers nail polish types, finishes, color choices, application techniques, wear time, ingredient labels, and prices so you can choose a formula that fits your routine.
Updated for October 2026, this Polish Haven guide focuses on practical differences rather than brand rankings. Whether you want regular nail polish for everyday wear, soft pastel shades, or a longer-lasting salon finish, start by understanding how each formula behaves.
What is nail polish?
Nail polish, also called nail lacquer, is a cosmetic coating designed to dry on the surface of the nail. The traditional term nail enamel is also used for this product. Most conventional formulas contain film-forming ingredients such as nitrocellulose, along with resins, solvents, and, depending on the formula, pigments or other ingredients that affect shine, flexibility, and color.
As the solvents evaporate, the coating forms a film on the nail. This is why regular nail polish dries in the air rather than needing a UV/LED lamp. A base coat can help create a more even surface and reduce staining from some pigments, while a top coat adds shine or a different finish and can help protect the color from everyday wear.
Nail polish is a surface coating, not a treatment for nail problems. It can improve the appearance of nails, but it does not diagnose or treat nail disease. If you notice persistent discoloration, pain, swelling, separation, or changes that make you suspect a fungal infection, remove the polish if needed for inspection and consult a dermatologist rather than trying to diagnose the cause yourself.
The main types of nail polish
Different nail polish types suit different schedules, preferences, and removal habits. Before buying, consider how long you want the color to last, whether you have a UV/LED lamp, and how much time you want to spend removing it.
- Regular nail polish: A traditional air-drying lacquer that is easy to apply at home and remove with nail polish remover. It commonly lasts around 2–7 days, depending on nail condition, preparation, application, and top coat.
- Gel polish: A coating that needs UV/LED curing, commonly done at salons. It generally lasts around 2–3 weeks when correctly applied and maintained, but it requires appropriate removal.
- Semi-permanent nail polish: This label is often used for gel-style polish designed to stay on for an extended period. Check the product directions because the term is not used consistently across all markets.
- Water based nail paint: A water-based formula that may have a lower solvent odor than conventional lacquer. Wear time varies, and some formulas are designed for easy removal.
- Peel-off fingernail polish: A formula made to lift off as a film. It is convenient for short-term color, but it often lasts only around 1–3 days.
- Breathable nail polish: Marketed as a more permeable coating. Formulas and claims vary, so do not assume that “breathable” makes a polish a nail treatment or eliminates the need for ordinary nail care.
- Dip powder: A separate manicure system involving powder and bonding products, often applied in salons. A typical set may last around 3–4 weeks, depending on application and nail growth. It is not the same as regular nail polish.
For most everyday manicures, regular lacquer is a practical starting point: it does not require a lamp, offers plenty of color and finish choices, and can be removed at home. Choose a different formula when its specific trade-offs suit your needs, not simply because the packaging promises longer wear.
Regular polish vs gel polish: which should you choose?
Regular lacquer and gel polish both add color, but they dry in different ways. Regular polish forms a film as its solvents evaporate. Gel polish uses a curing process that requires the correct UV/LED lamp and product instructions.
The term nail polish with UV light usually refers to gel-style products, not conventional air-drying lacquer. You should not put regular polish under a UV/LED lamp expecting it to cure like gel. Follow the instructions for the exact product you use.
| Feature | Regular nail polish | Gel polish |
|---|---|---|
| Typical wear time | Around 2–7 days | Around 2–3 weeks |
| Removal | Nail polish remover; often straightforward | Product-specific removal, often involving soaking and careful removal |
| Cost | Generally lower for a home manicure | Usually higher when salon application and removal are included |
| Damage risk | Peeling or rough removal can lift nail layers | Picking, scraping, or improper removal can damage nails; curing products can also cause problems if used incorrectly |
| At-home ease | Beginner-friendly; no lamp required | Requires compatible curing equipment, careful application, and correct removal |
These are typical ranges, not guarantees. Nail condition, daily activities, formula, and technique all affect wear time. Gel polish may be convenient if you want a longer-lasting finish, but it is not automatically the best choice for everyone.
A simple decision rule: choose regular polish if you like changing colors frequently or want easier removal. Consider gel polish if you prefer a longer-lasting manicure and are prepared to follow curing and removal instructions carefully. Never peel, bite, or pry off either type.
Nail polish finishes explained (cream, sheer, shimmer, glitter, chrome, matte)
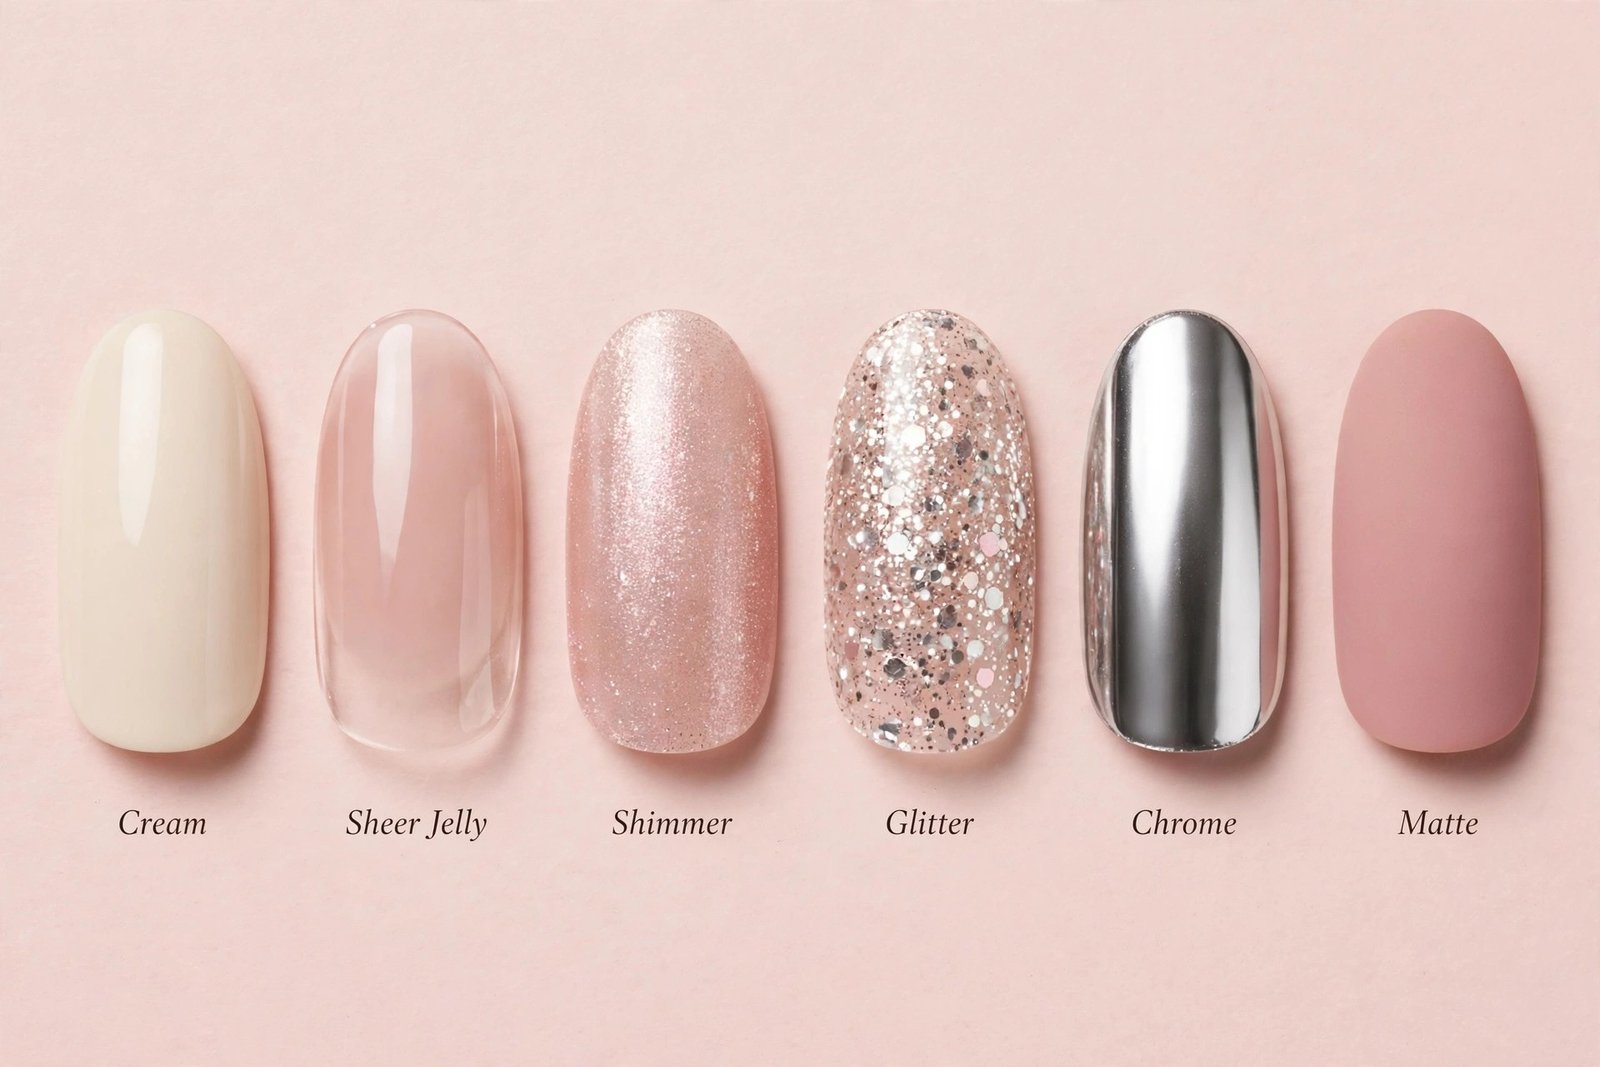
A nail polish color describes the shade; the finish describes how that shade looks when it dries. Knowing the finish helps you choose a bottle that matches the result you want.
Cream finish
A smooth, opaque color without visible shimmer or glitter. Cream nail varnish is a versatile everyday option, from pale pink to deep red, and usually gives an even, classic appearance.
Sheer or jelly finish
A translucent, glossy look that lets some of the natural nail show through. One coat gives a subtle tint; additional coats build color without necessarily becoming fully opaque.
Shimmer finish
Fine reflective particles create a soft glow as the nails move in the light. Shimmer can make a neutral shade look more dimensional without the texture of chunky glitter.
Glitter finish
Visible reflective particles create sparkle, from fine scattered flecks to dense coverage. Glitter can take more effort to remove, so use a suitable remover and avoid scraping it off.
Chrome finish
A highly reflective, metallic effect often created with chrome powder over a compatible base. The technique and products matter; a standard metallic polish may look shiny without producing a true mirror finish.
Matte finish
A low-shine surface that looks soft and velvety rather than glossy. A matte top coat can change the appearance of many compatible regular polishes without requiring a separate color.
If you are unsure which finish to buy, cream is a dependable starting point because it is easy to compare across shades and usually works well for a simple, polished look. Choose sheer or jelly finishes for a lighter effect, and glitter or chrome when you want more visible reflection.
How to apply nail polish like a pro: step by step
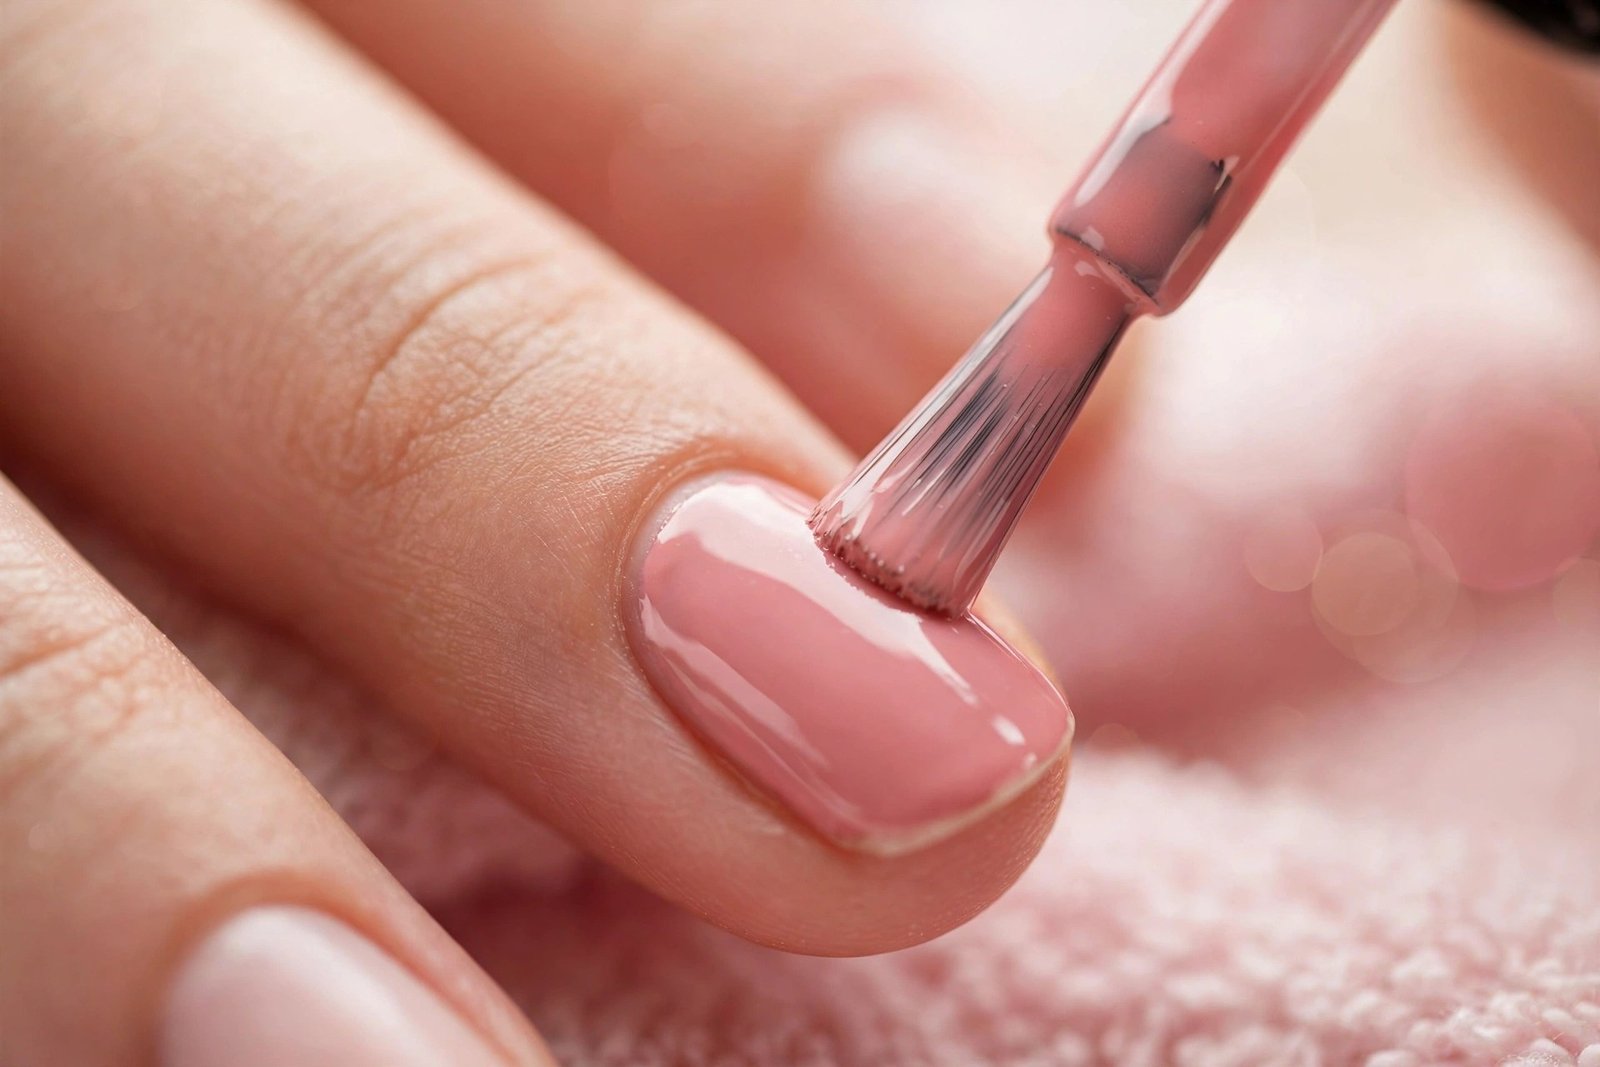
A smooth manicure depends more on preparation and thin coats than on buying the most expensive bottle. These steps work for most regular nail lacquer formulas. Always follow the label if a product has different instructions.
- Start with clean, dry nails. Remove old polish and wash your hands. Make sure the nail plate is dry and free from oily residue before applying color.
- Shape and lightly buff. Use a nail file to refine the free edge. If needed, lightly smooth uneven areas with a buffer. Avoid aggressive filing or frequent heavy buffing, which can thin the nail plate.
- Gently push back the cuticles. Use a suitable orange stick or cuticle pusher with light pressure. Do not cut living cuticle tissue or force the tool under the skin. Stop if the area hurts.
- Remove surface residue. If the product instructions recommend it, wipe the nail plate with a small amount of appropriate nail cleanser or rubbing alcohol and allow it to evaporate. Avoid getting drying products on irritated or broken skin.
- Apply a thin base coat. A base coat can help the color apply evenly and may reduce staining from strongly pigmented shades. Let it dry according to its directions.
- Apply the first thin coat of color. Load only enough polish to cover the nail. Start near the center, then paint each side with controlled strokes. Leave a tiny gap around the skin instead of flooding the cuticle area.
- Add a second thin coat. Once the first coat is dry enough for another layer, apply a second coat to build an even color. Thick coats tend to remain soft underneath and can smudge or dent more easily.
- Cap the free edge. Lightly sweep the brush across the tip of the nail where practical. This can help protect the edge from everyday wear, particularly on longer nails.
- Finish with top coat. Apply a compatible top coat over the color and, where possible, cap the free edge again. Choose glossy, matte, or quick-dry top coat according to the finish you want.
- Allow time to dry. Follow the product directions. As a general guide, allow around 10–15 minutes between layers when needed, but remember that a polish can feel dry on the surface before it is fully hardened. Quick-dry drops may help some formulas set faster; they do not replace the manufacturer’s drying instructions.
What nail polish do salons use?
Salons generally use professional nail lacquer products alongside careful preparation and application techniques. The exact formula varies by salon and service, but thin, even coats, suitable base and top coats, clean brush control, and proper drying make a major difference. The brand alone does not guarantee a better manicure.
How to choose an easy formula
If you are looking for the easiest nail polish to apply, start with a formula that spreads evenly without being too runny or too thick. A medium-width brush can make coverage easier, while a cream finish often shows streaks less than some very sheer shades. Beginners may find pale pink, beige, or medium-coverage colors easier to work with than very dark or highly translucent shades.
For a professional-looking result, do not overload the brush or try to finish a nail with one thick coat. Clean up small mistakes with a fine brush dipped in remover, keeping the remover away from the freshly painted nail.
How to make your nail polish last longer
A durable nail polish is not only about the formula. Nail preparation, coat thickness, daily activities, and removal habits all affect how long the finish stays neat. Even a product advertised as chip free nail polish can chip under friction or impact.
Use these habits to help your nail polish stay on:
- Prepare the nail plate properly. Remove old polish, dust, and surface residue. Apply polish to clean, dry nails, following the product’s directions.
- Use a base coat. Choose one that works with your color formula. A base coat can improve the appearance of the color and may help it adhere more evenly.
- Keep coats thin. Thick layers can stay soft underneath, making dents and chips more likely. Two thin color coats usually work better than one heavy coat.
- Cap the free edge. Brush a small amount of color and top coat across the tip where practical. Avoid building up a thick ridge.
- Re-seal with top coat. Reapply a compatible top coat every 2–3 days if the product instructions allow it. This may refresh the shine and help protect the edges, though it will not prevent every chip.
- Use cuticle oil daily. Apply a small amount around the nail folds and cuticle area. Keeping the surrounding skin conditioned can help reduce dryness; avoid rubbing aggressively over fresh polish.
- Protect your nails during chores. Gloves can help limit prolonged water exposure and contact with household cleaners. Use your fingertips carefully rather than your nails as tools.
How long should regular polish last?
Regular polish commonly lasts around 2–7 days before noticeable chipping, although some manicures wear better or worse than that. Frequent handwashing, swimming, typing, cleaning, nail flexibility, and the condition of the free edge can affect the result.
If your polish repeatedly chips within a day, check whether your nails are still damp or oily when you apply it, whether the layers are too thick, and whether the polish is touching your skin. Also check that the bottle has not become unusually thick or difficult to spread. Adding more layers to a poorly prepared manicure usually will not solve the underlying problem.
Nail polish colors: the classics and what’s trending in 2026
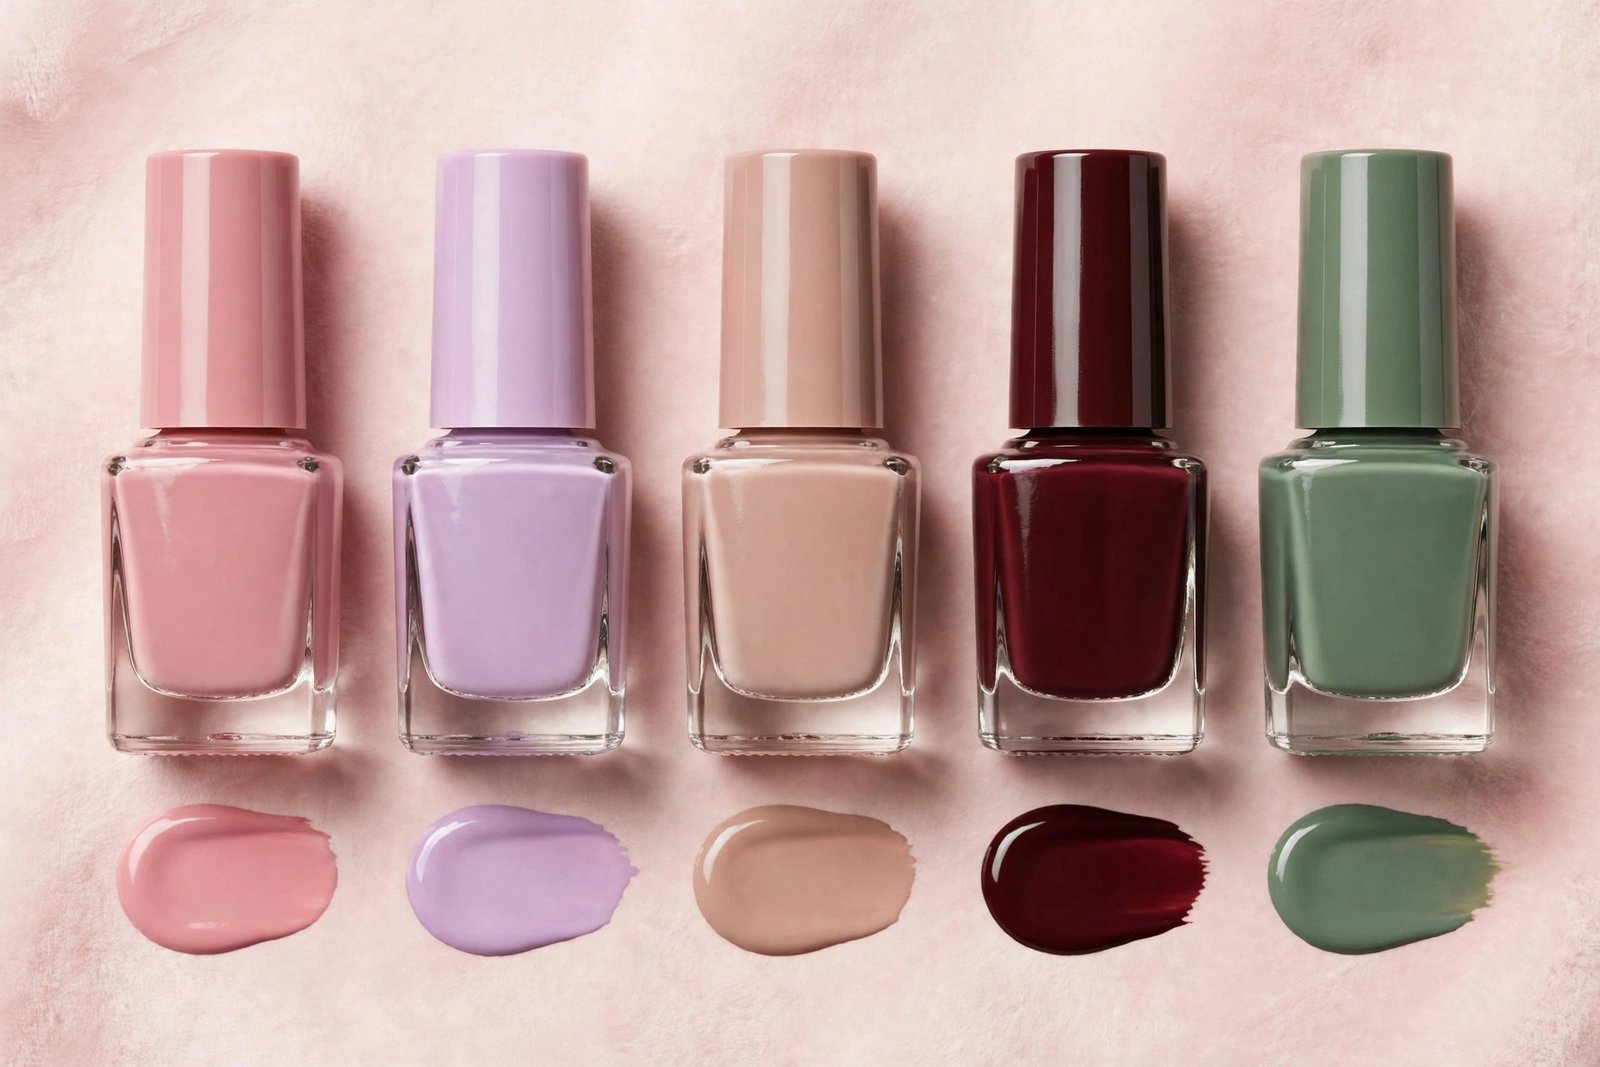
Choosing a nail polish color is easier when you start with the effect you want: natural-looking, understated, bold, or high-contrast. Lighting, skin tone, opacity, and finish can all change how a shade appears, so a swatch is more useful than relying on the bottle alone.
Classic shades that work year-round
- Blush pink: A soft pink that can look natural and understated, especially in a sheer or milky formula. Nail polish blush pink is a useful search phrase when you want this delicate shade family.
- Classic red: A clear, saturated red that suits both simple manicures and more formal looks.
- Nude and beige: Neutral shades that range from pink-beige to warm caramel. Choose the undertone and opacity you like rather than assuming one nude shade suits everyone.
- Deep burgundy: A rich wine-red option that gives more contrast than a pale neutral.
- White and off-white: Useful for French manicure tips, clean graphic details, or an opaque minimalist look.
- Clear polish: Adds a simple glossy finish and can be worn alone or as a compatible top coat when the label allows.
Soft pastels and lighter shades
Soft pastel nail polish includes pale pink, lilac, mint, powder blue, butter yellow, and peach. A pastel color nail polish may need two or more thin coats to look even, especially if the formula is very sheer. Apply each coat carefully rather than trying to achieve full opacity in one thick layer.
For a subtle manicure, try blush pink, milky beige, or a sheer jelly tint. For a more noticeable pastel look, choose a cream finish in lilac, pale blue, or soft green. If you want a natural fingernail polish effect, look for sheer pink, translucent beige, or clear formulas that let some of the natural nail show through.
Color trends to consider in 2026
For 2026, shades that fit current minimalist and expressive manicure styles include milky neutrals, soft pastels, chocolate brown, deep red, muted greens, and reflective finishes. These are broad style directions, not a fixed ranking, and personal preference matters more than following every trend.
A shade’s name can be descriptive rather than standardized. Nail polish names such as Ballet Pink, Rosewater, Dusty Lilac, Sage, or Espresso may help communicate the color family, but two products with similar names can look quite different. Compare swatches and check whether the finish is sheer, cream, shimmer, or glitter before buying.
Keep color selection simple: pick one main shade, decide whether you want a glossy or matte finish, and consider how opaque you want the result. Detailed seasonal color guides and nail-art designs are best treated as separate inspiration topics rather than a reason to buy colors you will rarely use.
Clean and organic nail polish: what the labels really mean
Terms such as clean nail polish, organic nail polish, organic nail lacquer, and environmentally friendly nail polish are not interchangeable, and they do not automatically guarantee that a product is safer for every person or better for the environment.
What does 5-free or 9-free mean?
A 5-free or 9-free label generally means that the manufacturer has formulated the polish without a specified list of ingredients. Lists vary by brand and product, but commonly discussed substances include formaldehyde, toluene, and dibutyl phthalate (DBP). Some formulas exclude additional ingredients.
The important point is that “free-from” is a formulation claim, not a universal safety certification. It tells you something about the ingredients the company says it leaves out, but it does not prove that the entire formula is risk-free, allergy-proof, or environmentally harmless. Read the ingredient list and product directions, especially if you have known sensitivities.
Is organic nail polish actually organic?
The term organic nail polish is often used as a marketing description, but conventional nail lacquer relies on film-forming ingredients, solvents, and other components that may not fit the everyday meaning of “organic.” The word alone does not establish a product’s composition or safety. Look for clear ingredient information and any relevant certification details rather than relying on the front label.
Likewise, non-toxic is frequently used as a marketing term. It does not mean that a product can be swallowed, used on irritated skin, or handled without following directions. Keep polish away from children, avoid inhaling concentrated fumes, and use it in a well-ventilated space.
Water-based polish may be appealing if you prefer a lower-odor formula, while conventional lacquer may offer more options for coverage and wear time. Neither category is automatically the right choice for everyone. Patch-test new products according to their directions, and stop using a product if you develop irritation or an unexpected reaction.
Simple nail art you can do with regular polish
You do not need specialist equipment to try simple nail art. Regular nail polish works for basic dots, French tips, and accent nails, provided each layer has enough time to dry. Keep the design small at first, and use a compatible top coat to help protect the finished look.
Dot details
Apply your base color and let it dry. Use a dotting tool or the rounded end of a suitable clean tool to place a small amount of contrasting polish on the nail. Start with two or three dots rather than covering the entire nail. Let the dots dry before applying top coat to avoid dragging the design.
A simple French manicure
A French manicure pairs a sheer pink, nude, or clear-looking base with a pale tip. Let the base dry, then create a thin tip using a fine nail-art brush or a French-tip guide. Remove any guide gently and at the time recommended by its instructions. A narrow line is often easier to keep even than a thick stripe.
One accent nail
Paint most nails in one color and use a contrasting shade on a single nail. For example, pair a neutral cream finish with one burgundy accent. This approach gives you a coordinated look without requiring detailed designs on every finger.
A two-color detail
Use a toothpick or nail-art tool intended for cosmetic use to draw a simple line or small heart with a second polish color. Work over a dry base layer and use only a small amount of polish at a time. If the design starts to drag, let it dry longer before continuing.
Nail art polish may be sold in bottles with narrow brushes or fine tips for more controlled details. You can also use ordinary lacquer with a separate nail-art brush, provided the brush is suitable for the product and cleaned properly. Nail painting sets can be useful for people who regularly do designs, but you do not need a full set to make a few dots or accent nails.
For a cute nail polish art look, keep the palette limited to two or three coordinating shades. Simple designs tend to be easier to repeat evenly and quicker to correct if a line or dot goes wrong.
How to remove nail polish without damaging your nails
Safe removal matters just as much as application. Never peel, bite, scrape, or pry off nail polish. Pulling at a coating can lift layers of the natural nail plate, leaving the surface rough, thin, or uneven.
How to remove regular nail polish
- Choose a remover that suits your polish. Acetone usually works faster, particularly on darker or more resistant colors. Non-acetone remover may feel less drying for some users but can take longer and may need more wiping.
- Moisten a cotton pad with remover. It should be damp enough to contact the polish without dripping.
- Press the pad against the nail for about 30–60 seconds, adjusting as needed for the formula.
- Wipe gently toward the tip of the nail. Avoid scrubbing the skin or rubbing the same area forcefully.
- Repeat with a clean section of cotton if color remains. Do not scrape off stubborn patches.
- Wash your hands when finished if the remover directions recommend it, then apply a suitable moisturizer or cuticle oil to help relieve dryness.
Use remover in a well-ventilated area and keep it away from flames or heat sources, particularly when using acetone-based products. Avoid prolonged skin contact, and do not apply remover to broken or irritated skin.
What about peel-off polish and glitter?
Peel-off polish is formulated to lift away more easily than standard lacquer, but removing it before it releases naturally can still disturb the nail surface. Follow the label and do not force a stubborn edge. For glitter polish, allow the remover-soaked pad more contact time rather than scraping particles off the nail.
Removing gel polish
Gel polish may need a specific removal method based on its formula. Do not treat it like ordinary lacquer or try to chip it off with a tool. Follow the product’s directions or ask a qualified nail professional to remove it safely. Avoid filing down to the natural nail or peeling off any remaining coating.
If you notice persistent discoloration, nail separation, tenderness, swelling, or other signs that concern you, do not cover the problem with a new manicure. A dermatologist can assess suspected nail fungus or infection; appearance alone is not enough to diagnose it.
How much does nail polish cost (and where to buy it)
Nail polish cost depends on the formula, bottle size, finish, and whether you are buying a single color or paying for a salon service. The following are approximate US price ranges, not guaranteed prices.
| Product or service | Typical US price |
|---|---|
| Drugstore regular polish bottle | $5–$12 |
| Salon-grade regular polish bottle | $10–$18 |
| Starter sets | $15–$40 |
| Salon regular-polish manicure | Often around $15–$35, depending on location and service |
| Salon gel manicure | Often around $25–$60 or more, depending on location and service |
A nail polish set can be a useful gift or a way to get several coordinated shades at once, but compare the total price with the individual bottle sizes. If you only wear one or two colors regularly, buying a single bottle may be better value than purchasing a large collection. Nail polish sets can also contain shades you rarely use, so check the color range before buying.
A professional nail lacquer may cost more than a drugstore bottle, but the price alone does not guarantee easier application or longer wear. Brush shape, consistency, shade opacity, and your application technique all influence the result. Choose a product you can apply comfortably and remove safely.
If you are searching for a polish nail shop, first decide whether you want a salon service or a bottle to use at home. A nail salon is the better fit when you want a professional manicure or help with a specific removal process; a beauty retailer or reputable online seller is more suitable for comparing bottles, finishes, and ingredient labels. Check product details, seller policies, and local service prices before buying.
What should you check before buying?
- Formula: Regular lacquer is suitable for air-drying at home; gel polish requires compatible curing equipment and a different removal process.
- Finish and opacity: Look for a clear description such as cream, sheer, shimmer, or glitter.
- Brush and consistency: A brush that fits your nail width and a formula that spreads evenly can make application easier.
- Ingredients and directions: Read the label, especially if you have known sensitivities or prefer a water-based formula.
- Bottle size and value: Compare the amount of product, not just the price.
- Return policy: Nail cosmetics may have restrictions on returns once opened, so check before purchasing.
Some people search by brand names such as NYC nail polish or New York Color nail polish. Treat those as product-name searches rather than quality guarantees: check the specific formula, availability, and current packaging instead of assuming a brand name tells you how the polish will perform.
Frequently asked questions
What is good nail polish?
Good nail polish applies evenly, matches the finish you want, and removes without requiring forceful scraping or peeling. Look for a formula with a workable consistency, a brush you can control, clear instructions, and an ingredient list you can review. The most expensive option is not necessarily the best fit.
How long does regular nail polish last?
Regular nail polish commonly lasts around 2–7 days before noticeable chipping. Preparation, thin coats, top coat, nail condition, and daily activities can all affect wear time. Reapplying a compatible top coat every 2–3 days may help protect the finish.
Can you use regular nail polish on acrylic or gel nails?
Regular polish can often be applied over a finished acrylic or gel surface, but compatibility and removal depend on the product and manicure system. For acrylic-specific guidance, see the dedicated acrylic nail guide; for gel manicures, follow the separate gel nail guidance. Do not peel off the color or file into the underlying enhancement.
Is water-based polish worth it?
Water-based polish can be worth trying if you prefer a lower-odor formula or want color that is easy to remove. The trade-off is that some formulas have shorter wear time, often around 1–3 days, and may be less resistant to water or friction. Check the individual product directions rather than assuming every water-based polish performs the same way.
What is the difference between nail lacquer and nail polish?
In everyday beauty use, nail lacquer and nail polish often refer to the same type of cosmetic coating. “Nail lacquer” may appear on product packaging or in descriptions, while “nail polish” is the more familiar general term.
Why does my polish chip so fast?
Common reasons include applying polish to damp or oily nails, using thick coats, getting color on the surrounding skin, skipping a base or top coat when the formula calls for one, or putting stress on the nail tips. Try applying thinner layers to clean, dry nails and capping the free edge. If the polish remains soft or streaky, allow more drying time before adding another layer.
Nail polish is easiest to enjoy when you choose a formula that suits your routine, apply it in thin layers, and remove it without damaging the natural nail. Start with a finish and color you like, use a compatible base and top coat, and give each layer time to dry. A little attention to technique can make a regular manicure look neat without needing a complicated process.
Last reviewed: October 2026 — Editorial Team, Polish Haven